Installing and Using Podman on Windows
Podman is a tool used for running and managing containers on your Linux system. Containers can be run using either the Podman command or the docker command. In this tutorial, you will learn how to install and use Podman on the Windows system.
A few months ago I decided to start using Podman for managing containers instead of Docker Desktop as it requires minimum 1GB memory run on Windows. Where as Podman can start with minimum 512MB memory.
Podman is a container manager that is used to run, create, and manage containers on any Linux distribution. Podman does not require a daemon to be running and hence it can be used in rootless mode. Podman is available for Windows, Mac OS X and other Linux distributions.
Prerequisites
- Windows 10 or Windows 11. On x64, WSL requires build 18362 or later, and 19041 or later is required for arm64 systems.
- CPU that supports virtualization
Installing Podman
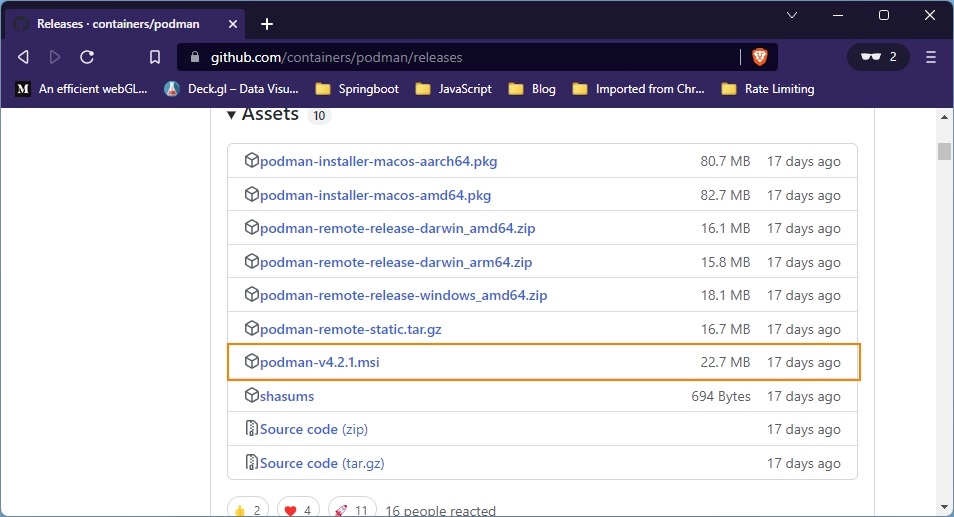
Step 1) First head over to the Podman release page and download the latest release for your architecture. Download the Windows installer Podman-vx.x.x.msi file.
At the time of writing this blog post 4.2.1 is the latest version, so I am downloading podman-v4.2.1.msi file.
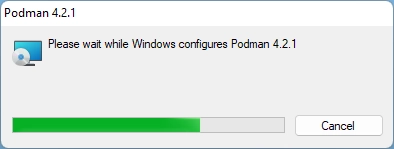
Step 2) Install the Podman by double clicking the msi file
Step 3) Open PowerShell or Command prompt in your system and enter following command
podman machine initCode language: Java (java)The above command will start downloading the VM image of Linux distribution (Fedora) and configures the virtual system.
You will logs similar to below.
Downloading VM image: fedora-podman-v36.0.47.tar.xz: done
Extracting compressed file
Importing operating system into WSL (this may take a few minutes on a new WSL install)...
Configuring system...
...
...
Machine init complete
To start your machine run:

        podman machine startCode language: Java (java)
Starting Machine
After the machine init process completes, Podman can then be started with below command
podman machine startCode language: Java (java)Starting machine "podman-machine-default"
This machine is currently configured in rootless mode. If your containers
require root permissions (e.g. ports < 1024), or if you run into compatibility
issues with non-podman clients, you can switch using the following command:
podman machine set --rootful
API forwarding listening on: npipe:////./pipe/podman-machine-default
Another process was listening on the default Docker API pipe address.
You can still connect Docker API clients by setting DOCKER HOST using the
following powershell command in your terminal session:
$Env:DOCKER_HOST = 'npipe:////./pipe/podman-machine-default'
Or in a classic CMD prompt:
set DOCKER_HOST = 'npipe:////./pipe/podman-machine-default'
Alternatively terminate the other process and restart podman machine.
Machine "podman-machine-default" started successfullyCode language: Java (java)In above console log ,pay attention to following message
Another process was listening on the default Docker API pipe addressCode language: Java (java)As I was running Docker Desktop also while starting Podman machine, Podman was alerting that another process is listening to Docker API pipe address. This is important for libraries like Testcontainers which uses Docker API to manage the containers.
Testing Podman run command
Just like hello-world program for testing docker, Running of Podman can be tested with following command.
podman run ubi8-micro dateCode language: Java (java)If Podman machine successfully started, you should see following info on your console.
Resolved "ubi8-micro" as an alias (/etc/containers/registries.conf.d/000-shortnames.conf)
Trying to pull registry.access.redhat.com/ubi8-micro:latest...
Getting image source signatures
Checking if image destination supports signatures
Copying blob sha256:25e17fce3fcf3fdef13311059a07dd9dddc3c4e6bbcce988acdfd0d6ce09d57f
Copying blob sha256:4f4fb700ef54461cfa02571ae0db9a0dc1e0cdb5577484a6d75e68dc38e8acc1
Copying config sha256:4545db1fb6690c622181faa99fdba8374d2ffbef9253996cedd9da315635dd95
Writing manifest to image destination
Storing signatures
Sat Sep 24 06:44:18 UTC 2022Code language: Java (java)
Stopping Podman
You can stop Podman machine with following command
podman machine stopCode language: Java (java)Running Commands
Let’s try the docker commands with Podman
Building Image
First let’s build the image. I am trying to build image of spring boot project from GitHub
The project contains below Docker file
FROM adoptopenjdk/openjdk11:x86_64-alpine-jdk-11.0.14.1_1-slim
ARG JAR_FILE=target/*.jar
COPY ${JAR_FILE} app.jar
RUN addgroup -S springboot && adduser -S sbuser -G springboot
USER sbuser
EXPOSE 8080
ENTRYPOINT ["java","-jar","/app.jar"] Code language: Java (java)
podman build . -t springboot-crud-exampleCode language: Java (java)You will see below error
Error: error creating build container: short-name resolution enforced but cannot prompt without a TTYCode language: Java (java)To resolve the issue, you need to change one line from Docker file.
You need to add the docker.io in front of image.
FROM docker.io/adoptopenjdk/openjdk11:x86_64-alpine-jdk-11.0.14.1_1-slimCode language: Java (java)Note
There are other ways to resolve the “short-name resolution” issue. Please refer the Troubleshoot section.
After the change, If you run the command again you should be able to build the image of the spring boot project.
STEP 1/7: FROM docker.io/adoptopenjdk/openjdk11:x86_64-alpine-jdk-11.0.14.1_1-slim
Trying to pull docker.io/adoptopenjdk/openjdk11:x86_64-alpine-jdk-11.0.14.1_1-slim...
Getting image source signatures
Copying blob sha256:8663204ce13b2961da55026a2034abb9e5afaaccf6a9cfb44ad71406dcd07c7b
Copying blob sha256:fd4cc2a0a4bd43f46e6321e07cea8ba180b772d15579a4aa2f3bf895b82d71a5
Copying blob sha256:e5609250e3d3aa370fb7305c13e71c8d76b8eca5a16dc44f52a86032864ec452
Copying blob sha256:112e3bc8839ebe273d9ead5bdbfadc45f7d10aeede018faaa0a5a31748ea33ff
Copying config sha256:420bab03857d45ebad119ae067e542fe1da410580053c30c22ba0913b71440bb
Writing manifest to image destination
Storing signatures
STEP 2/7: ARG JAR_FILE=target/*.jar
--> 9208a1638bd
STEP 3/7: COPY ${JAR_FILE} app.jar
--> 460dbeeb392
STEP 4/7: RUN addgroup -S springboot && adduser -S sbuser -G springboot
--> 486c946a19f
STEP 5/7: USER sbuser
--> 035e340b1bf
STEP 6/7: EXPOSE 8080
--> 46f06de546f
STEP 7/7: ENTRYPOINT ["java","-jar","/app.jar"]
COMMIT springboot-crud-example
--> 9ead733b938
Successfully tagged localhost/springboot-crud-example:latest
9ead733b938c852155092fd50e545d935f8d61933496fce5b546c425e04fd998Code language: Java (java)
Listing Images
podman image listCode language: Java (java)
Running Container
podman run -p 8080:8080 springboot-crud-exampleCode language: Java (java)run in detached mode with predefined container name
podman run -d --name springboot-app -p 8080:8080 springboot-crud-exampleCode language: Java (java)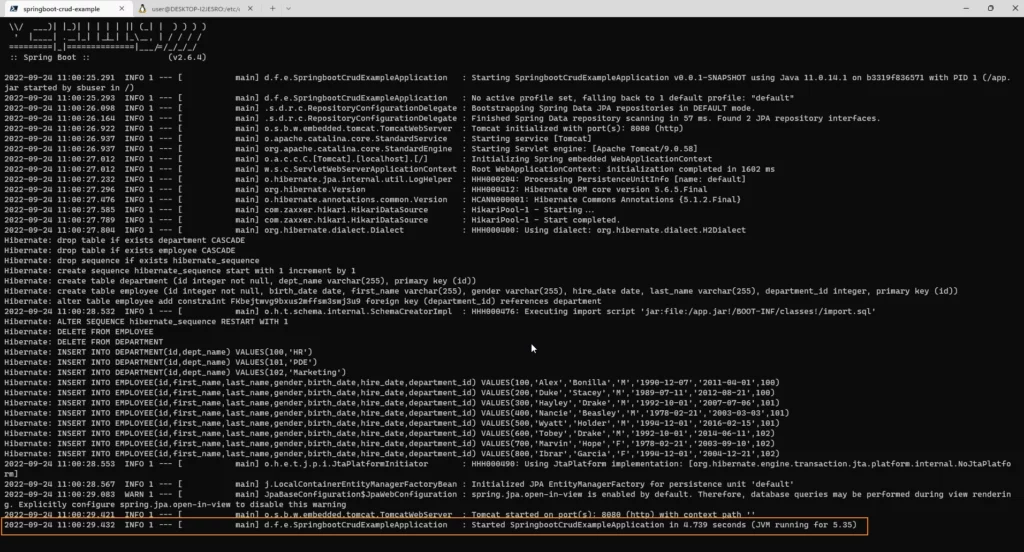
Listing Running Containers
podman container lsCode language: Java (java)Stopping Running Container
podman container stop <container id>Code language: Java (java)or
podman container stop <container name>Code language: Java (java)Pushing Image to Docker
First we need to login into docker account.
After you enter below command, it will prompt for username and password
podman login docker.ioCode language: Java (java) podman push <image-tag> docker.io/<repository-name>/springboot-crud-example2Code language: Java (java)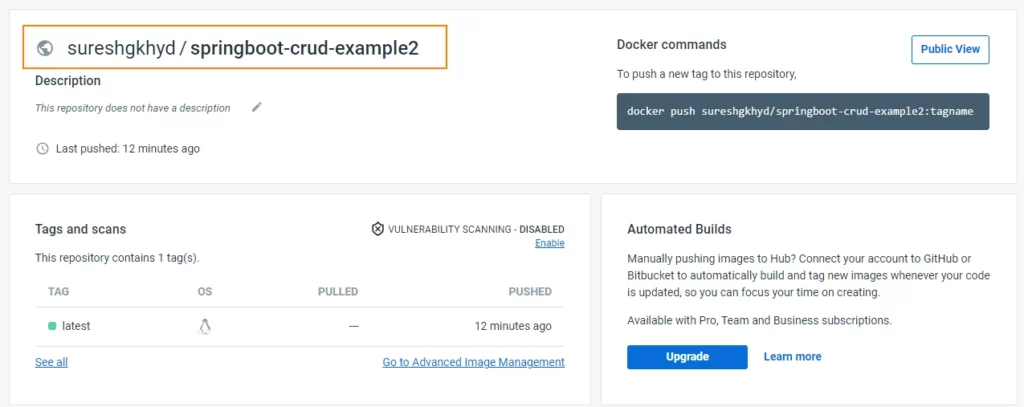
Pulling Images from docker registry
podman pull docker.io/<repository-name>/<image-name>:<image-tag>Code language: Java (java)Removing Image
podman rmi <image-name>Code language: Java (java)or
podman rmi <image-id>Code language: Java (java)View Logs of Container
podman logs <container-name>Code language: Java (java)or
podman logs <container-id>Code language: Java (java)Login into Container
podman exec -it <container-name> shCode language: Java (java)Listing Podman Machine(s)
To list the available podman machine instances and their current resource usage, use the following command:
podman machine ls

NAME                     VM TYPE     CREATED      LAST UP            CPUS        MEMORY      DISK SIZE
podman-machine-default*  wsl         3 hours ago  Currently running  2           672.9MB     1.357GBCode language: Java (java)
Rootfull & Rootless
Podman can either be run under the root user (rootful) or a non-privileged user (rootless). For behavioral consistency with Podman on Linux, rootless is the default on Windows as well.
While most containers run fine in a rootless setting, you may find a case where the container which requires port < 1024 only functions with root privileges. If this is the case, you can switch the machine to rootful by stopping it and using the set command:
podman machine stop
podman machine set --rootfulCode language: Java (java)
To restore rootless execution, set rootful to false:
Podman machine stop
Podman machine set --rootful=falseCode language: Java (java)
Accessing the Podman Linux Environment
While using the Podman on the Windows environment provides a seamless native experience supporting the usage of local desktop tools and APIs, there are a few scenarios in which you may wish to access the Linux environment to change configuration
- Updating to the latest stable packages on the embedded Fedora instance
- Using Linux development tools directly
- Using a workflow that relies on EXT4 filesystem performance or behavior semantics
There are three mechanisms to access the embedded WSL distribution:
SSH using podman machine ssh command
WSL command on the Windows PowerShell prompt
Windows Terminal Integration
Using SSH
It immediately drops you into the appropriate user based on your machine’s rootful/rootless configuration (root in the former, ‘user’ in the latter). The –username option can be used to override with a specific user.
podman machine sshCode language: Java (java)The above command logs you into virtual machine console, where you can access the
Connecting to vm podman-machine-default. To close connection, use <code>~.<span style="font-family: "Courier 10 Pitch", Courier, monospace; font-size: 0.9375rem; color: var(--global-palette4);"> or </span><span style="background-color: rgba(45, 55, 72, 0.2); font-size: 0.8rem; color: var(--global-palette4);">exit</span></code>Warning: Permanently added '[localhost]:60863' (ECDSA) to the list of known hosts.
Last login: Mon Sep 26 19:49:01 2022 from ::1
[root@DESKTOP-I2JE5RO ~]#Code language: Java (java)
Using the WSL Command
The wsl command provides direct access to the Linux system.Unless you have no other distributions of WSL installed, it’s recommended to use the -d option with the name of your podman machine (podman-machine-default is the default)
wsl -d podman-machine-defaultCode language: Java (java)You will be automatically entered into a nested process namespace where
systemd is running. If you need to access the parent namespace, hit ctrl-d
or type exit. This also means to log out you need to exit twice.
[user@DESKTOP-I2JE5RO ~]$Code language: Java (java)Using Windows Terminal Integration
When Podman is installed it integrates option to access podman machine with Terminal.
You can click on the podman-machine-default option to access the Podman linux environment


Removing a Podman Machine
To remove a machine, use the following command:
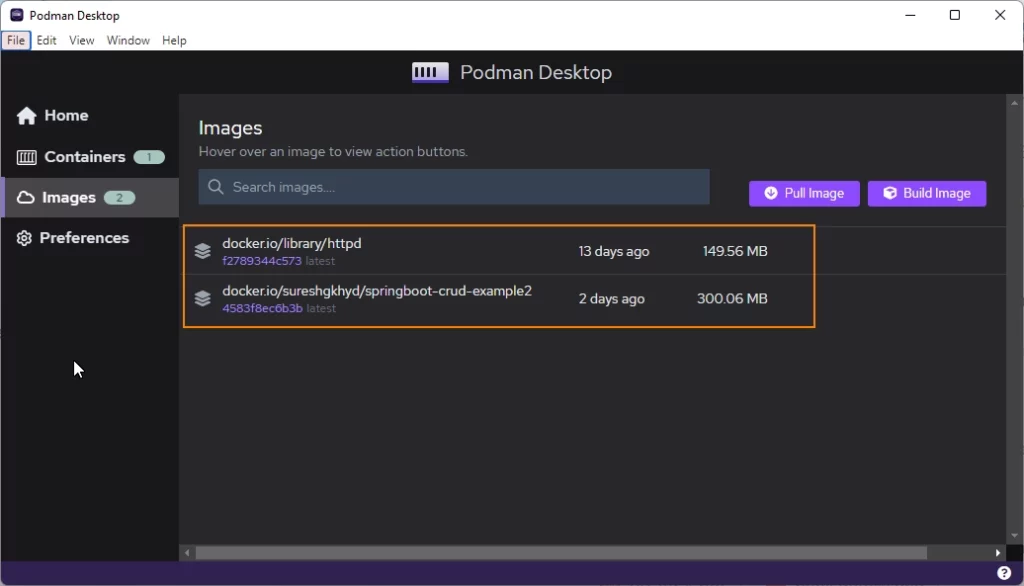
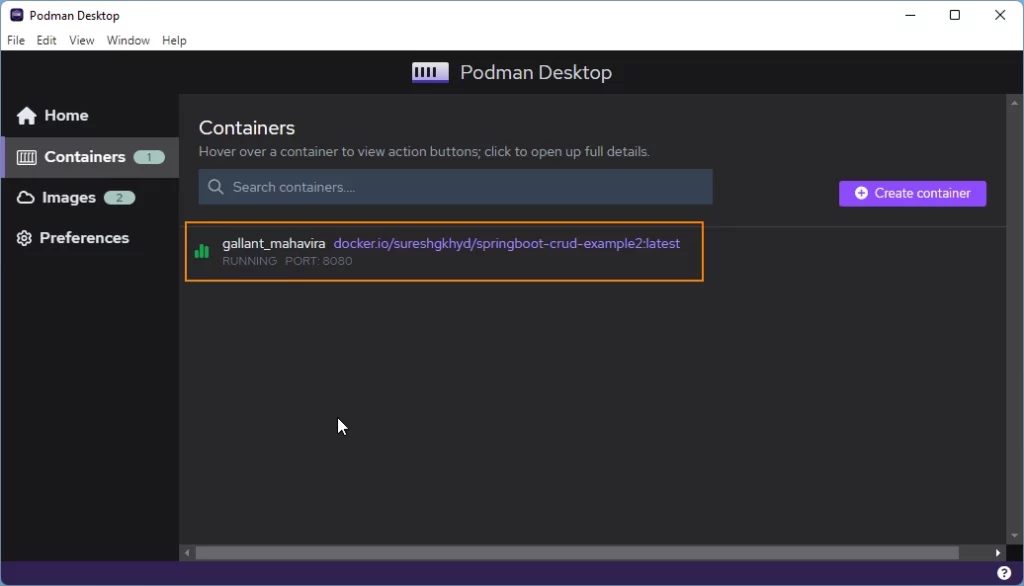
podman machine rmCode language: Java (java)Podman Desktop
Similar to Docker desktop, Podman provides GUI interface for managing the images and containers.
You can download the installation file for your OS from here
To install the Podman Desktop application for Windows, download the .exe file and double click on it.
Once Podman is installed, you will see a toggle button at “Home” window that will allow you to initialize a Podman Machine with default configurations. Simply activate the toggle to proceed.
Toggling button is equivalent to below commands
podman machine initCode language: Java (java)podman machine startCode language: Java (java)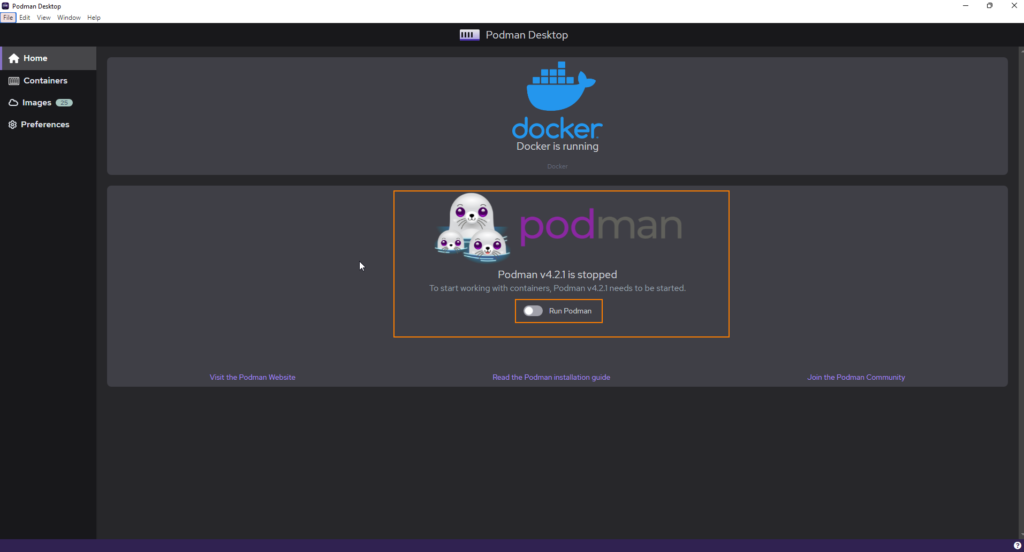
Note
Podman Engine on Windows is backed by a virtualized Windows Subsystem for Linux (WSLv2) instance. If you don’t have it installed already, Podman Desktop will prompt you to do so when you initialize a Podman Machine for the first time.
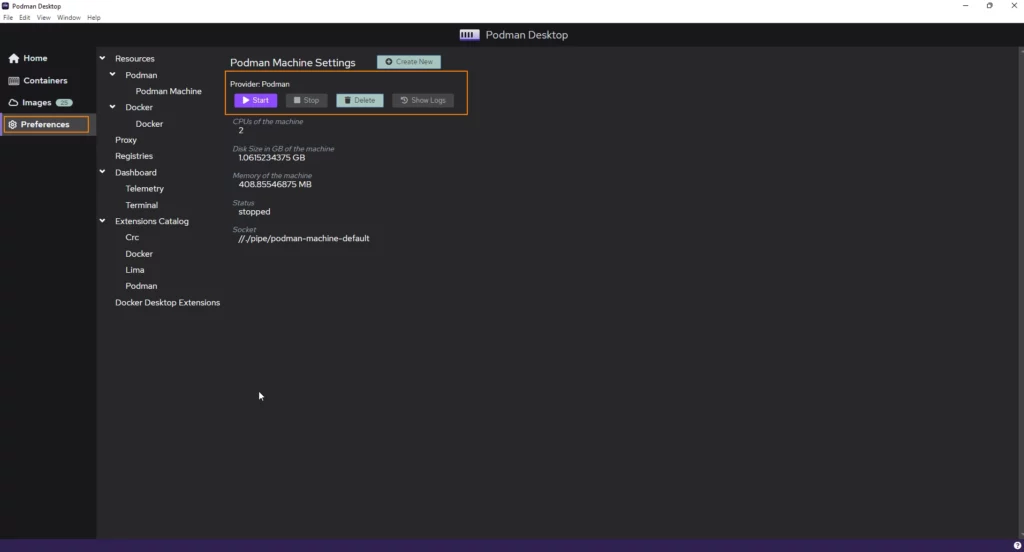
You can also start the Podman Machine from “Preference” section.
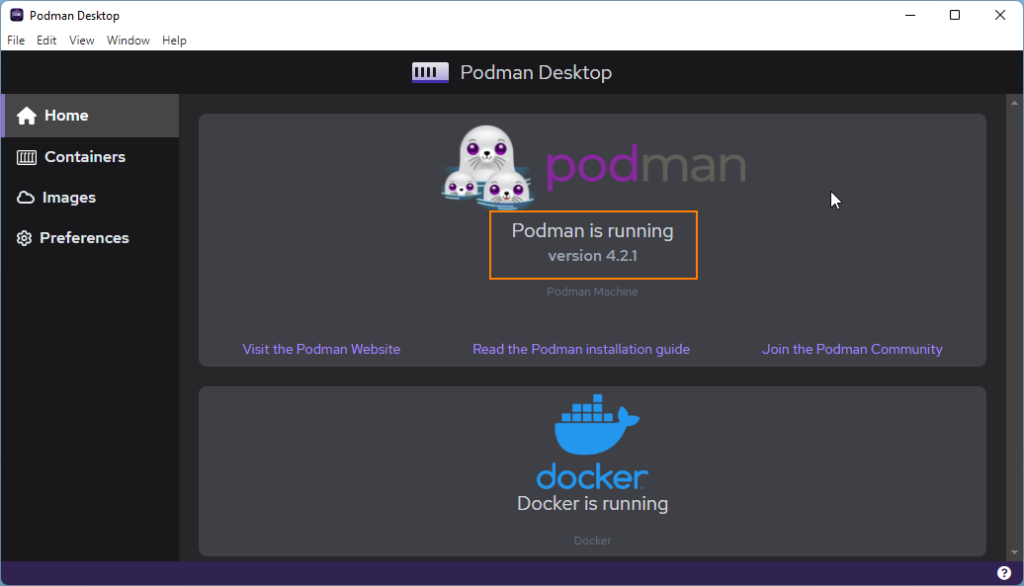
If the Podman is running,
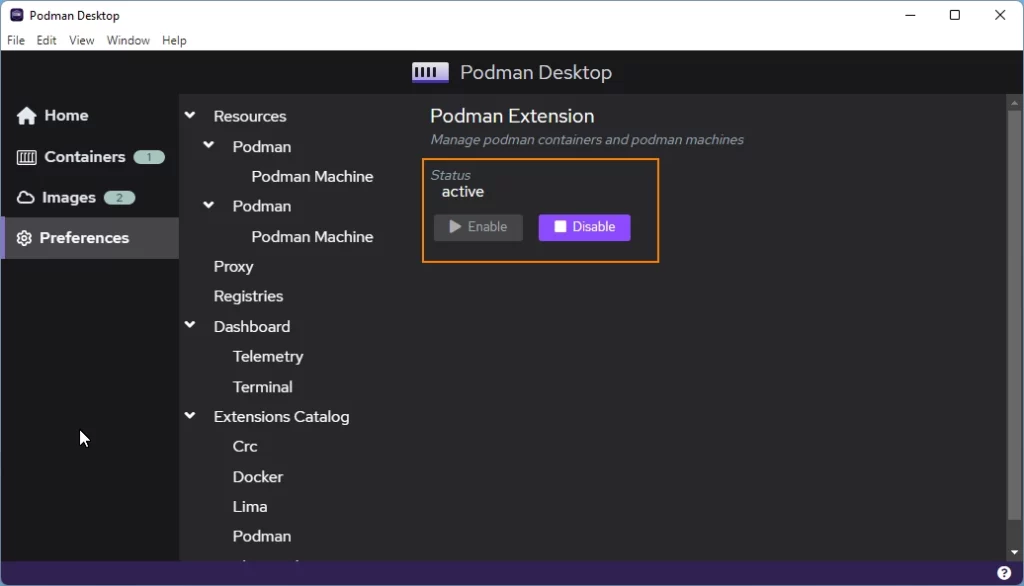
By Enabling Podman Extentio in Extention Catalog, we can manage Images and Containers from GUI, We can also view/manage images and containers created by Podman from commandline also
Podman Compose
Podman compose is a project used to run docker compose based containers using Podman.
You can install with following command in Windows
pip3 install podman-compose --userCode language: Java (java)After instllation, You can start docker compose based service/container with
podman-compose upCode language: Java (java)stop containers
podman-compose downCode language: Java (java)Troubleshooting
Cannot connect to Podman
Cannot connect to Podman. Please verify your connection to the Linux system using `podman system connection list`, or try `podman machine init` and `podman machine start` to manage a new Linux VM
Error: unable to connect to Podman. failed to create sshClient: connection to bastion host (ssh://user@localhost:51655/run/user/1000/podman/podman.sock) failed: dial tcp [::1]:51655: connectex: No connection could be made because the target machine actively refused it.Code language: Java (java)
While testing with Podman, I received above error. I could not find root cause of the problem so I resolved the issue by re-installing the podman again.
short-name resolution enforced
Error: error creating build container: short-name resolution enforced but cannot prompt without a TTYCode language: Java (java)This is the very common error we encounter when working with Podman. Dockerfile which worked without issue with docker will not run with Podman by default.
The Shot Answer
With default configuration, Podman does not allow short names when pulling image.
Docker defaults to docker.io registry when pulling images.
So there are 2 options
- Specify the fill path of image including the registry
2) Change the configuration of Podman to allow it search for image in list of registries.
SSH into Podman Linux VM
podman machine sshCode language: Java (java)Change to root
sudo su -Code language: Java (java)Edit the /etc/containers/registries.conf file
vi <strong>/etc/containers/registries.conf</strong>Code language: Java (java)Look for short-name-mode=”enforcing” text in the file and change it to one of following option.
short-name-mode=”permissive”
or
short-name-mode=”disabled”
Detailed Explanation
Docker defaults to pulling from a specific registry (i.e., Docker.io) when a reference to an image does not explicitly include a registry. So if we attempt to docker pull xxx, the specified image name is completed for us, and we will actually pull docker.io/xxx:latest.
To allow for an easy transition from Docker, Podman supports auto-completing image names as well but it does not limit users to one registry.
Podman allows sysadmins to specify a list of container registries to auto-complete short-image names. Podman then reaches out to each registry in the given order and attempts to pull the specified image until it has been pulled successfully.
We can specify these search registries in the /etc/containers/registries.con configuration file.
Podman would attempt pull images in the order specified in registries.conf file
For security reasons, default configuration does not allow short names for images.
“short-name modes” that can be configured in the registries.conf:
- enforcing: If no alias is found and more than one unqualified-search registry is set, prompt the user to select one registry to pull from. If the user cannot be prompted (i.e., stdin or stdout are not a TTY), Podman will throw an error.
- permissive: Behaves as enforcing but will not throw an error if the user cannot be prompted. Instead, Podman will try all unqualified-search registries in the given order. Note that no alias will be recorded.
- disabled: Podman will try all unqualified-search registries in the given order, and no alias will be recorded. This is pretty much the same behavior of Podman before short names were introduced.
Linux VM used by Podman by default sets short-name-mode=”enforcing”.
To change default value
SSH into Podman Linux VM and change the short-name-mode value in “/etc/containers/registries.conf” file like below
short-name-mode=”permissive”
or
short-name-mode=”disabled”