Create Free & Powerful Ubuntu VPS (4 cores, 24 GB RAM) in Oracle Cloud
In this blog post, I will show the step by step process to create Ubuntu server in Oracle cloud and how you can connect to it.
As explained in one of my previous blog post, Oracle cloud provides generous resources under its free tier. Especially good amount of compute resources.
- Two AMD Compute VMs
- Up to 4 instances of ARM Ampere A1 Compute with 3,000 OCPU hours and 18,000 GB hours per month
Especially for ARM Ampere A1 Compute instance you can allocate 4 cores and up to 24 GB RAM. So you can make powerful Virtual Private Server in the cloud for free.
Note
Ampere A1 is ARM architecture based processor. So software based on x86 architecture can not be installed on it.
In coming weeks, We will use the Ampere compute instance from oracle cloud to create powerful Java development machine in the cloud.
This blog post is the first post in the process where we create a server and install Ubuntu on it.
Prerequisites
- Free tier account in Oracle Cloud
Note
You can register with Oracle and Create account for free. For step by step instructions to create a free account you can visit my one of previous blog post
Let’s see the step by step process to create VPS based on the Ampere A1 ARM processors and how you can connect to it from your local system.
Login into Your Oracle Cloud Account
Step 1) Got to cloud.oracle.com. Click on on Sign-in button and enter your cloud tenancy name
Step 2) Enter your user name and password to login into your account.
Creating Compute Instance and Installing Ubuntu
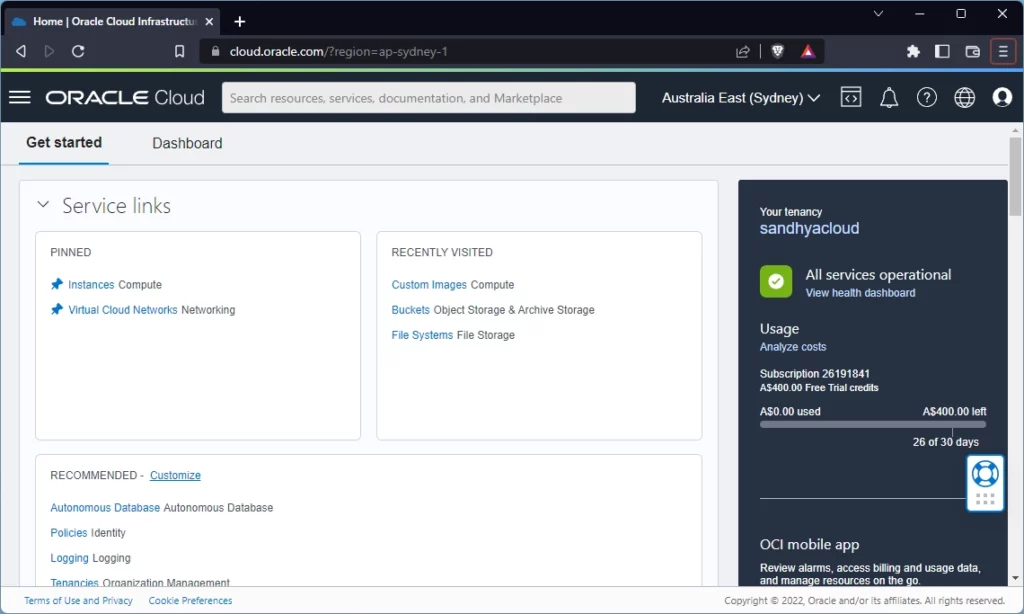
Step 3) Once you login into account, You will see following home page
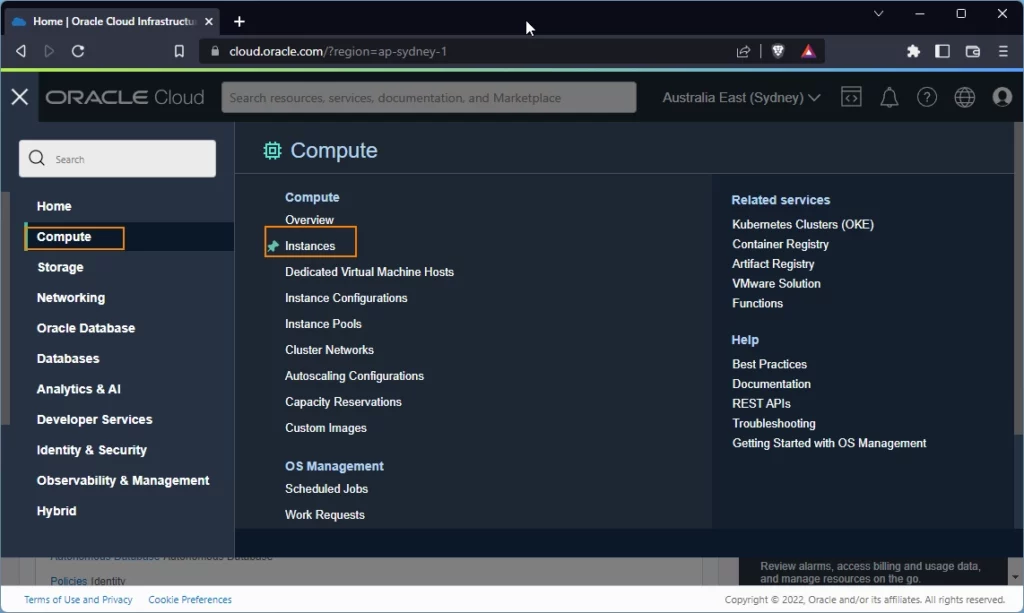
Step 4) First we need to allocate compute resources to create server. To create compute instance, click on hamburger icon on left side corner . From the menu click on “Compute” -> “Instances” option
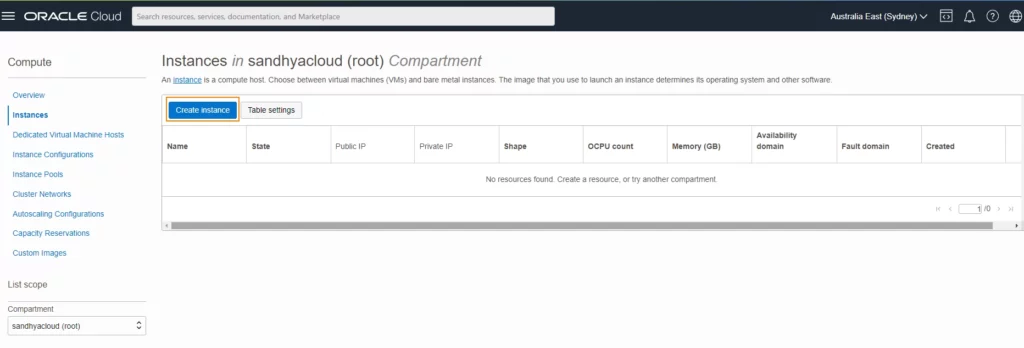
Step 5) Click on the “Create Instance” button
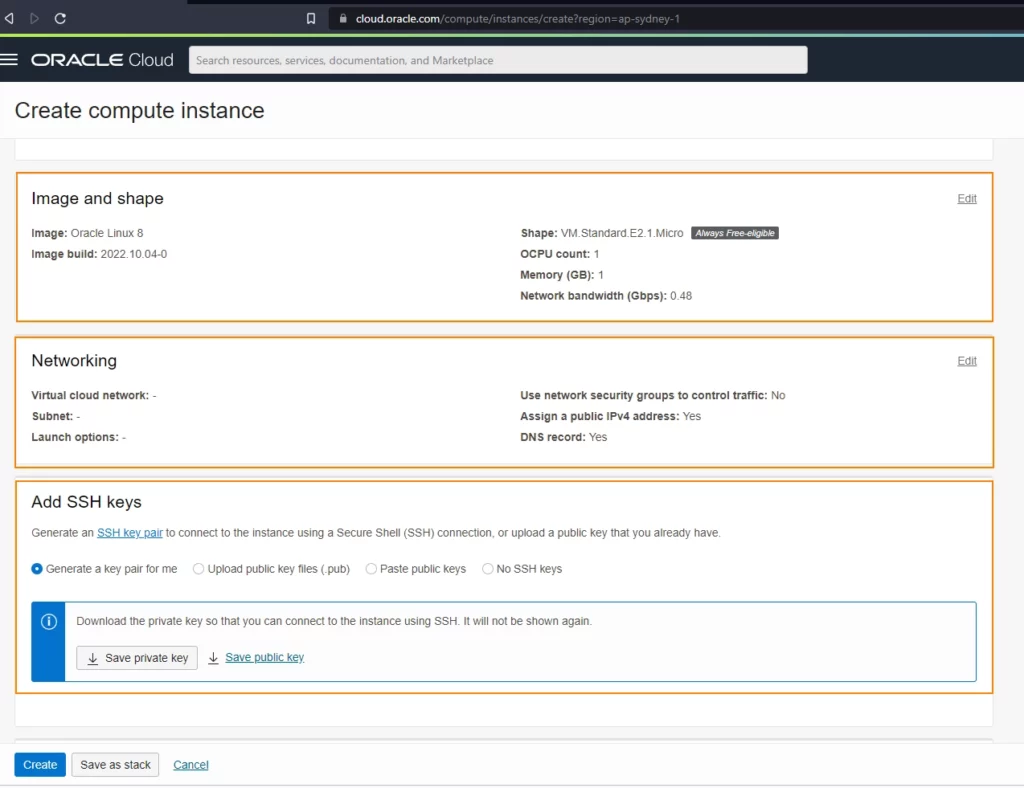
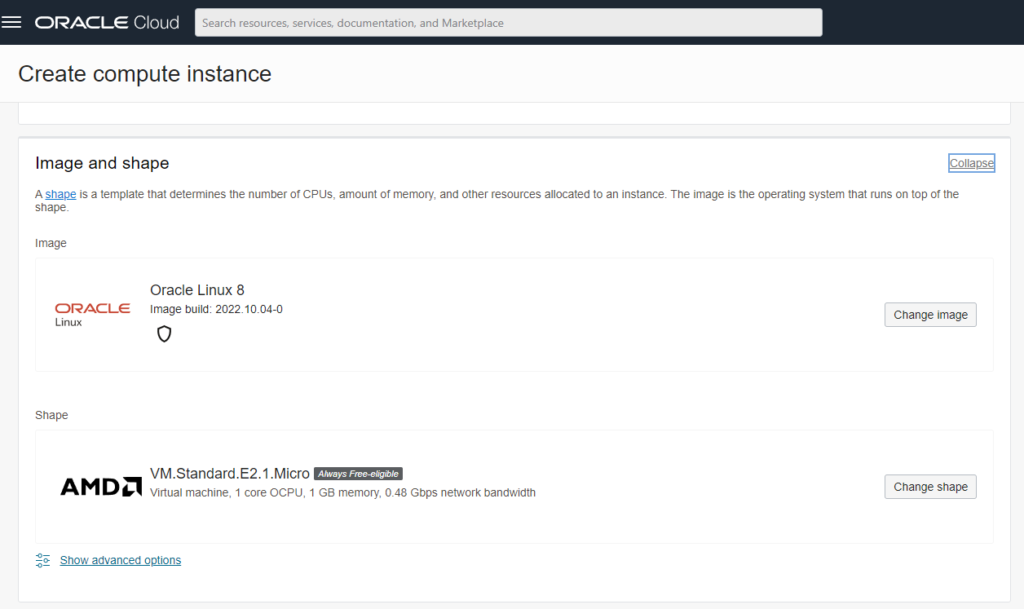
Step 6) Next screen gives option for following
Image and Shape – options to select OS, processor, memory
Networking – Setup VCN (Virtual Cloud Network Interface) for compute instance
SSH Keys – SSH keys to access the remote compute instance from local systems
Selecting Image and Shape
Step 7) Click on the “Edit” link of the Image and Shape section

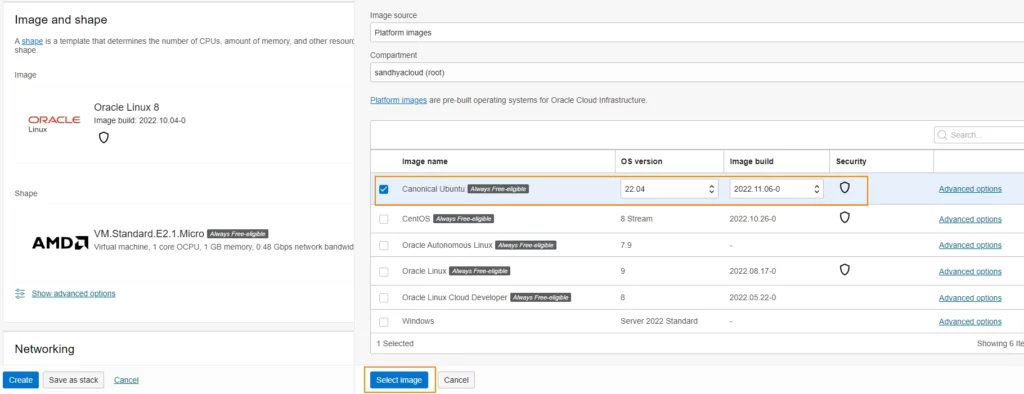
Step 8) For our server, we are going to use Ubuntu OS, so click on the “Change Image” button and select “Canonical Ubuntu” option and click on “Select Image” button.
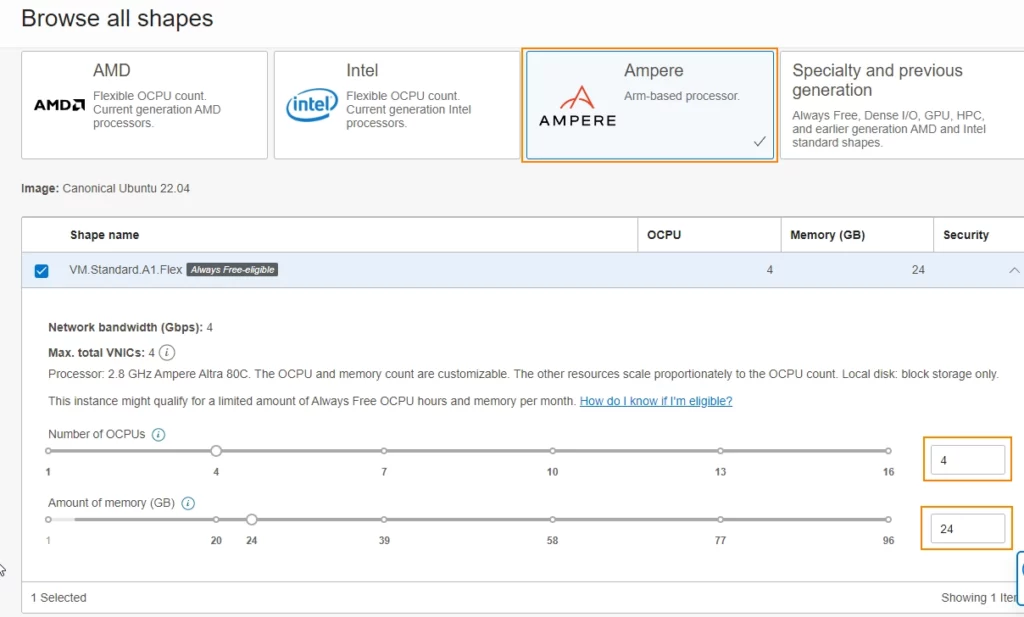
Step 9) We are going to use “Ampere CPU” cores, so click on the “Edit Shape” button and select “Ampere” button and select no. of CPUs to 4 and memory to 24 GB and click on “Select Shape” button . These are the maximum resources which you can use under free tier.
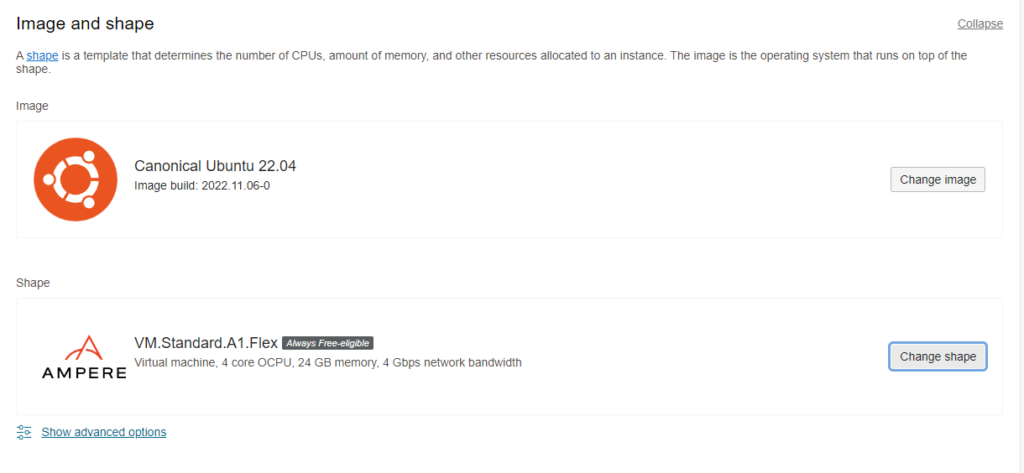
Once you select the image and shape, the section should look like below
Setting Network
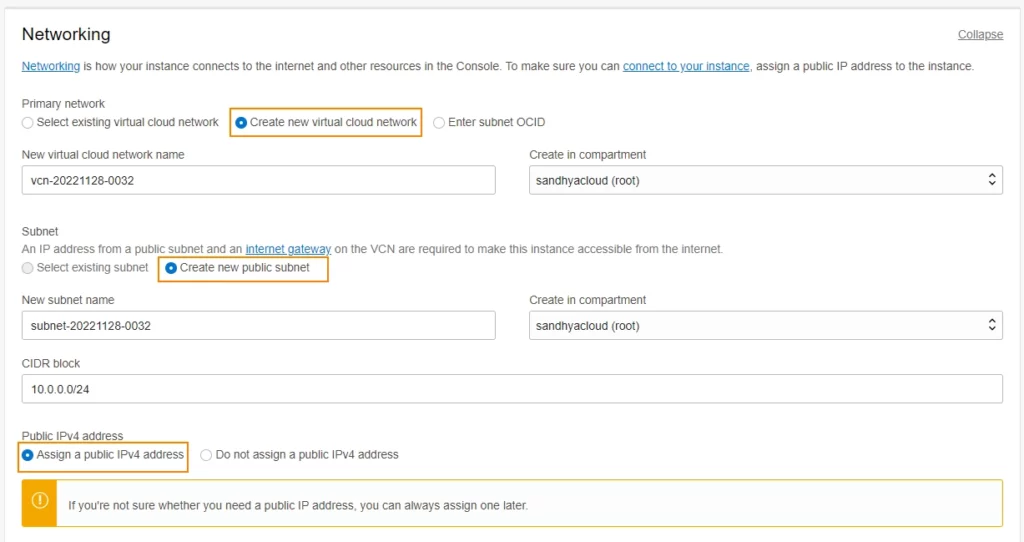
Step 10) Click on the “Edit” button of the Networking section

Step 11) Select “Create new Virtual cloud network” option as we do not have any VCN. and leave other options default. If you want you can change the names of VCN and subnet.
You could also go with existing VCN if you have already created one.
Generating SSH Keys
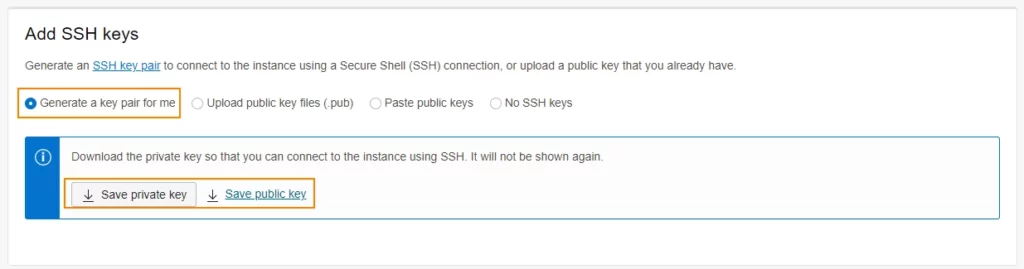
Step 12) By default VCN created above opens the SSH port 22.We need to setup SSH keys for the server being created.
Step 13) I am going to use the SSH keys generated by the Oracle cloud. So I am going with default “Generate a key pair for me” option and click on the “Save private key” and “Save public key” buttons to download the SSH keys. Save them in a separate folder so that it will be easy to use them when we try to connect to the server.
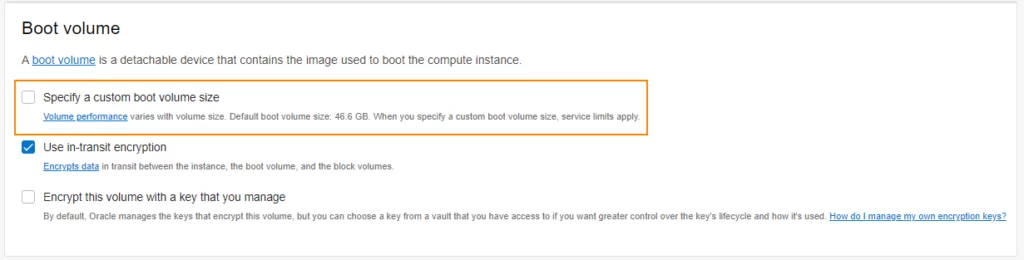
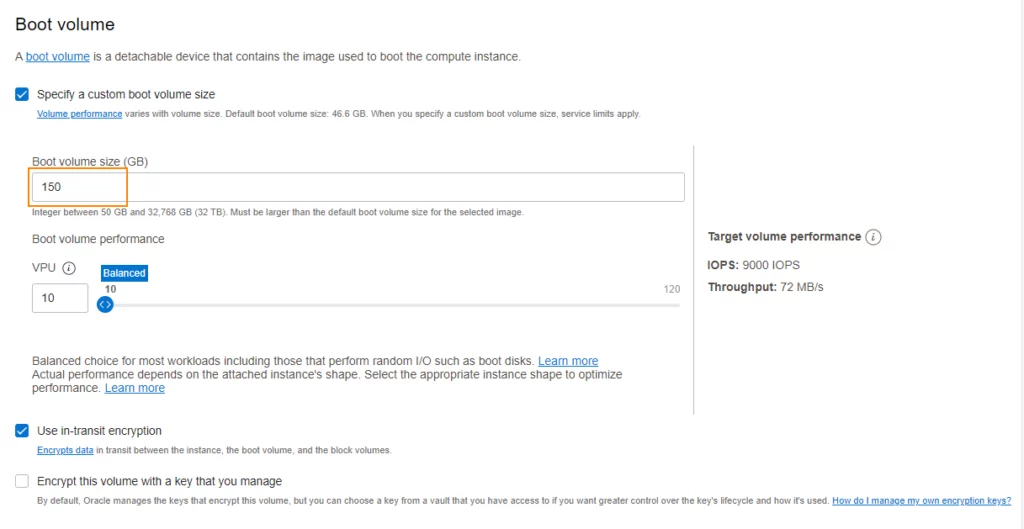
Setting Boot Volume
By default, 50 GB of disk space( Boot volume) is allocated to server. I am going to increase it to 150 GB. Oracle cloud provides up to 200 GB diskspace under free tier. But if you allocate all available diskspace to single server, you won’t be able to create other servers.
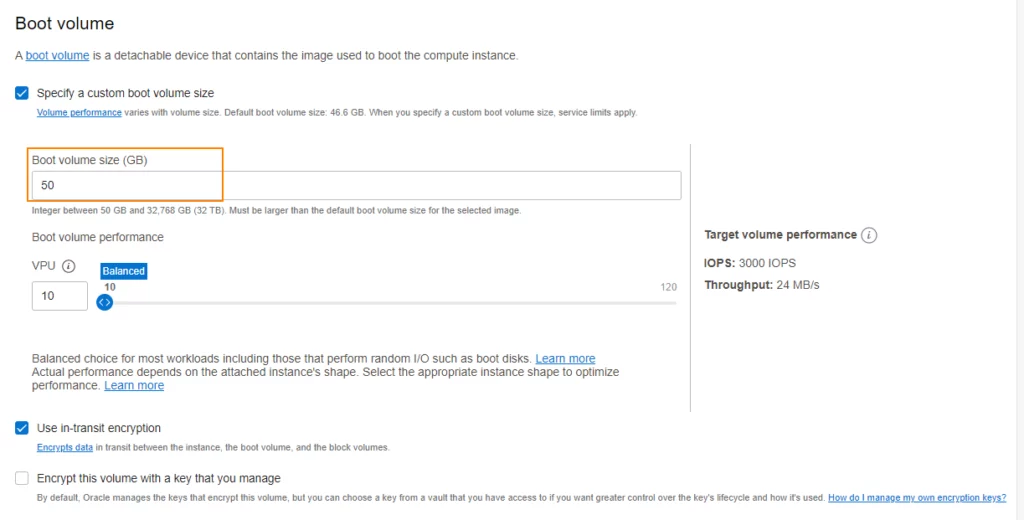
Step 14) Check the “Specify a custom boot volume size” option. It will show the default allocated boot volume disk space. Change the number in textbox to 150.
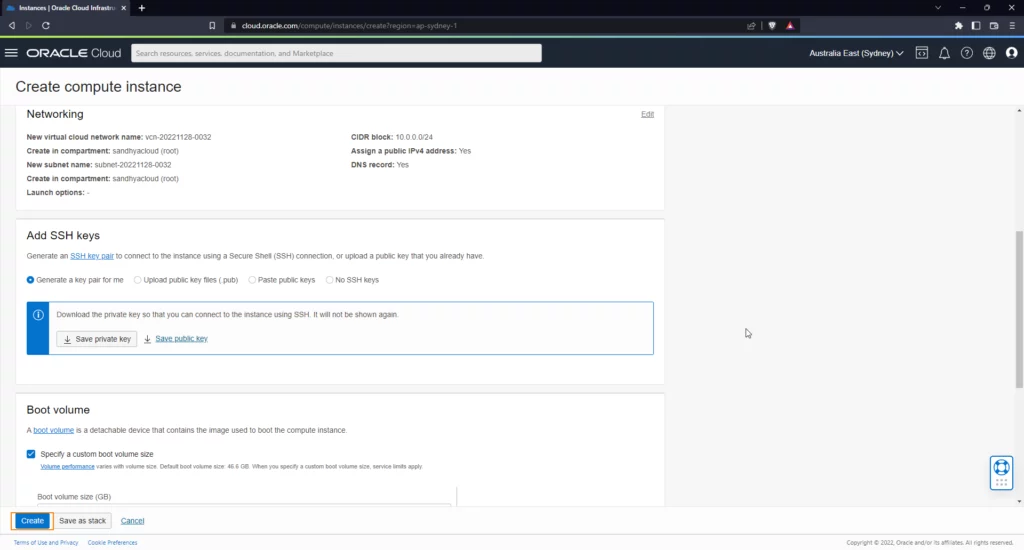
Step 17) Click on the “Create” button on the bottom to create server
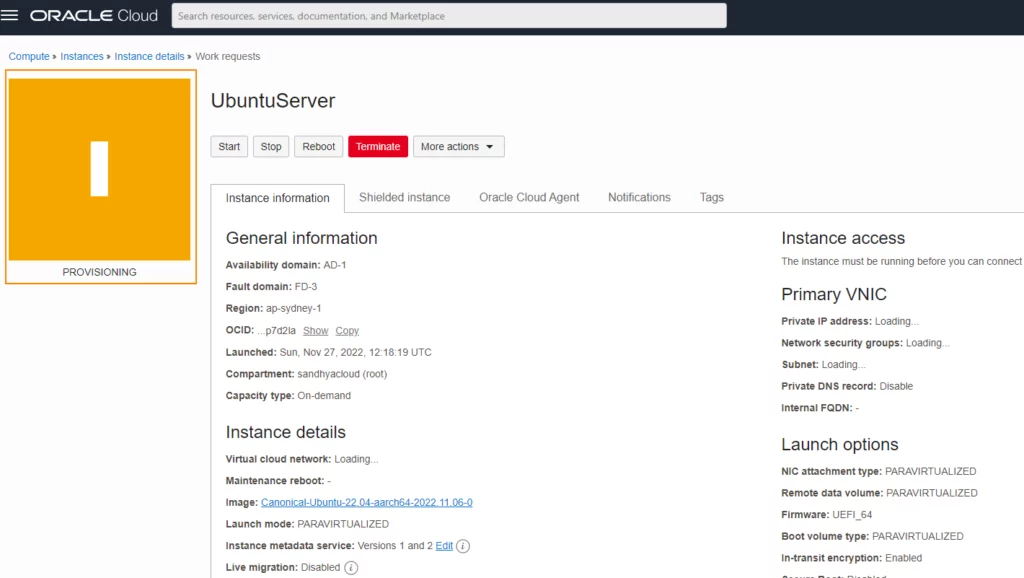
Step 18) Once you click on “Create” button oracle cloud starts to provision the server
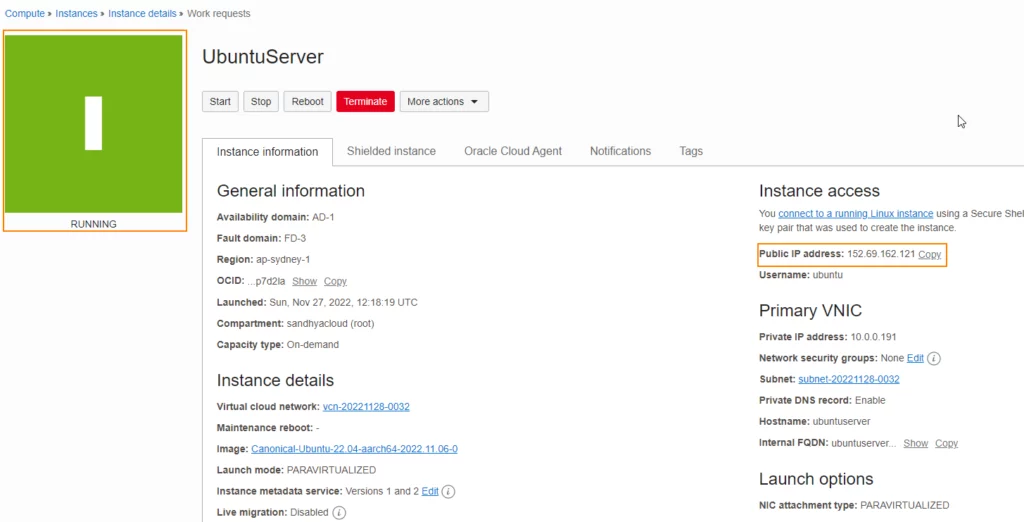
Step 19) You need to wait for couple of minutes to fully provision and start the server. Once server starts you should be able to see the public IP of the server which will be used to connect the server.
Connecting to Remote Server
Step 20) We can connect to the remote server using SSH. In Oracle Cloud, ubuntu installation comes with default user “ubuntu” and we are going to use the private key downloaded in step 13.
We can connect to the ubuntu remote server using below SSH command from terminal
ssh -i <private-key-file-path> ubuntu@<public-ip>Code language: Java (java)First time you might see following error message when you try to connect to server using SSH
It is required that your private key files are NOT accessible by others. This private key will be ignored.
ssh -i .\ssh-key-2022-11-27.key ubuntu@<public-ip>
The authenticity of host '<public-ip> (<public-ip>)' can't be established.
ECDSA key fingerprint is SHA256:dIx9yobPpz+l4gmJCBBtfAjEUd2L0jjCQCCBEn0gJDQ.
Are you sure you want to continue connecting (yes/no/[fingerprint])? yes
Warning: Permanently added '<public-ip>' (ECDSA) to the list of known hosts.
@@@@@@@@@@@@@@@@@@@@@@@@@@@@@@@@@@@@@@@@@@@@@@@@@@@@@@@@@@@
@         WARNING: UNPROTECTED PRIVATE KEY FILE!          @
@@@@@@@@@@@@@@@@@@@@@@@@@@@@@@@@@@@@@@@@@@@@@@@@@@@@@@@@@@@
Permissions for '.\\ssh-key-2022-11-27.key' are too open.
It is required that your private key files are NOT accessible by others.
This private key will be ignored.
Load key ".\\ssh-key-2022-11-27.key": bad permissions
ubuntu@<public-ip>: Permission denied (publickey).Code language: Java (java)
This error occurs when private key can be accessed by other users and groups other than loggedin user.
We need to remove the permission of other users and groups for ssh key and give read and execute permission to only the logged in user.
In Linux , you can run following command to set the proper permissions.
sudo chmod 600 <ssh-private-key-file>Code language: Java (java)If you are using Windows OS , you need to follow below step by step process to set proper permission for SSH key.
i) Go to the properties windows of the SSH key file by right clicking on the file and clicking on “properties” menu
ii) Go to “security” tab and click on the “Advanced” tab
iii) The “Advanced Security Settings” popup dialog shows all the groups and users who have access to the file.
iv) First click on the “Disable Inheritance” button and the click on the “Remove all inherited permissions from this object” option from the popup dialog. It will clear all the users and groups from the permission entries in “Advanced Security Settings” window.
v) Click on “Add” button in the resulting window, click on the “Select a principal” link
vi) In popup window enter logged in user name then click on the “check names” button to confirm the user actually exists. and click on the ok button.
vii) In “Permission Entry” window make sure that Read and Read & Execute ” permission are assigned to the user and click on “OK” button.
viii) The “Advanced Security Settings” popup dialog should contain only the logged in user in the permission entries section.
iX) Click on the ok button.
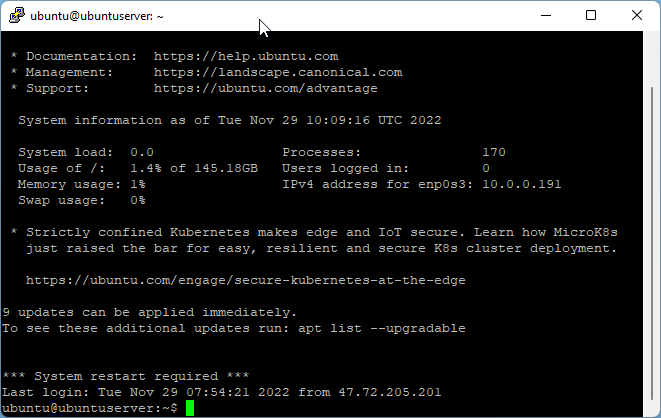
Now you should be able to access the server using the SSH command.
ssh -i <private-key-file-path> ubuntu@<public-ip>Code language: Java (java)Once logged in, update the packages
sudo apt updateCode language: Java (java)Connecting With Putty
Putty is the another software which can be used to connect to remote server using SSH connection.
First download the “Putty” and “Putty Key Generator” from here.
Putty does not support the SSH key format downloaded in Step13.So we need to convert it to supported format of Putty. For that we going to use “Putty Key Generator” software
First we need to convert the SSH key downloaded in Step 13 to ppk format.
Converting SSH key
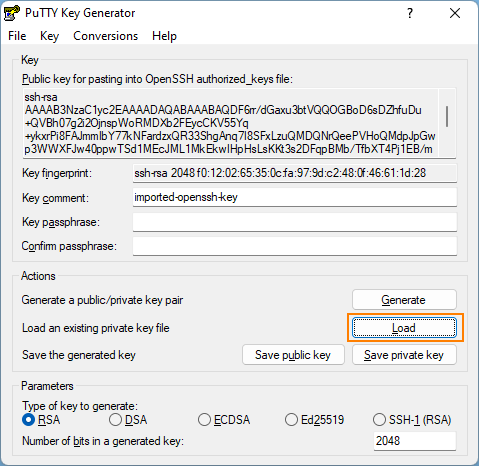
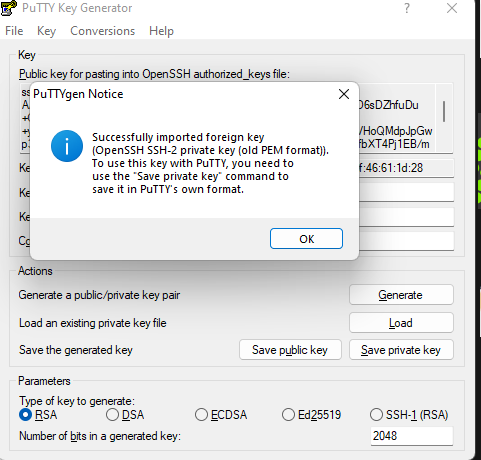
- Open “Putty Key Generator” and click on “Load” button and load the downloaded private key.
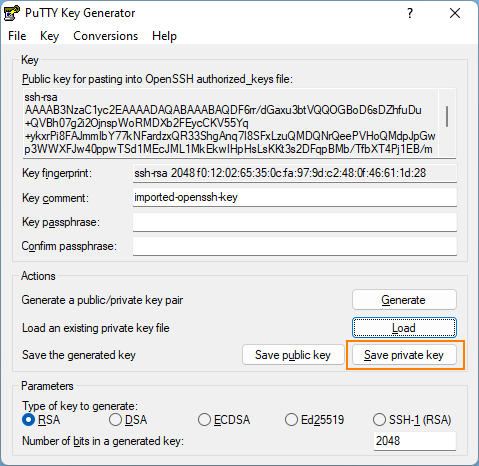
2. Next click on the “Save private key” button to save the private key in new format. The saved new SSH key is used with putty to connect to the server.
Using Putty
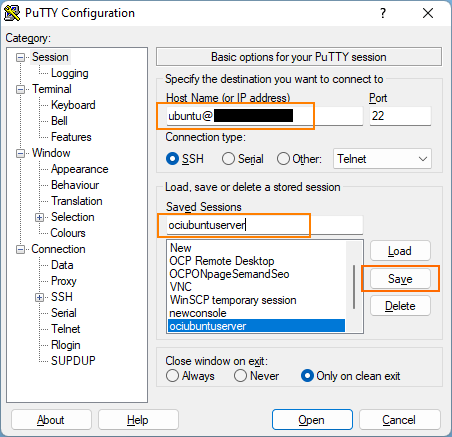
- Open the putty software, Enter “ubuntu@<public-ip>” under Host Name , Enter server instance name under “Saved Session” and click on Save button.
2) Next click on the “SSH -> Auth” option on the left side tree menu, on the right side window click on browse button and load the newly exported SSH private key using “Putty Key Generator” and click on the “Open” button to connect to server.

Using User Generated SSH Key
In first part of blog post, we have used SSH key generated by the Oracle Cloud. If you wish, you can also generate SSH key with “Putty Private Keygen” tool and use that key to connect to the server.
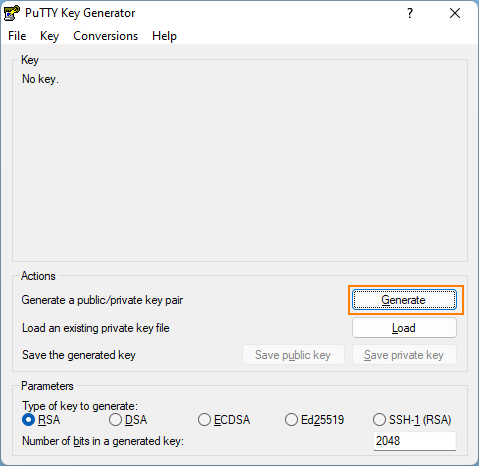
- Open “Putty Key Generator” key tool and click on the “Generate” button. Then wait for the key generation to complete
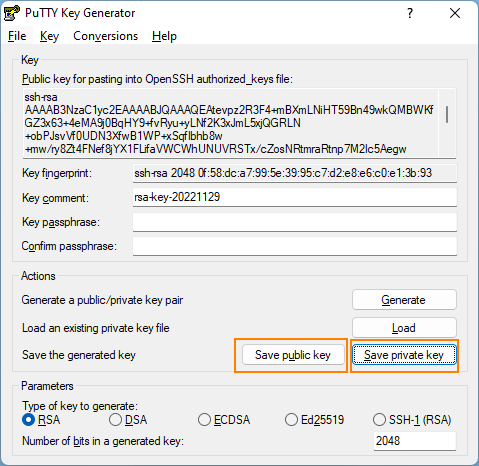
2. Save generated public key and private keys by clicking the corresponding buttons.
3. While creating the server in Oracle Cloud, in Step 13 , choose “Paste public key” option and paste the generated public key in given text area. Once server is started , use the generated private key to connect to the server.
Next week I will write a blog post on how to install the desktop GUI on the Ubuntu server created in oracle cloud so that you can use it as remote desktop.
You might be also interested in