Deploying Spring Boot Applications on Oracle Cloud
In this tutorial, I will show how to deploy Spring Boot application on Oracle Cloud in Ubuntu Server and access the API from Internet.
Oracle Cloud provides 2 AMD based instances (1 ocpu, 1GB RAM) with their free tier account. We will deploy the spring boot application on the one of AMD instance and make API available over the internet. We will use the spring boot application repo for deployment.
Prerequisites
- Oracle Cloud Free Tier account
1.Create a Compartment for Development
You can create a separate compartment for resources.
Note : This is completely optional step.
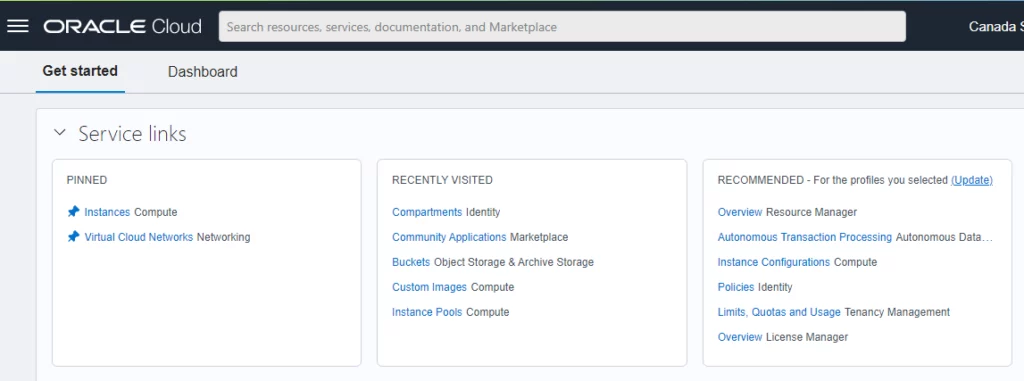
- Log in to the Oracle Cloud Infrastructure Console.
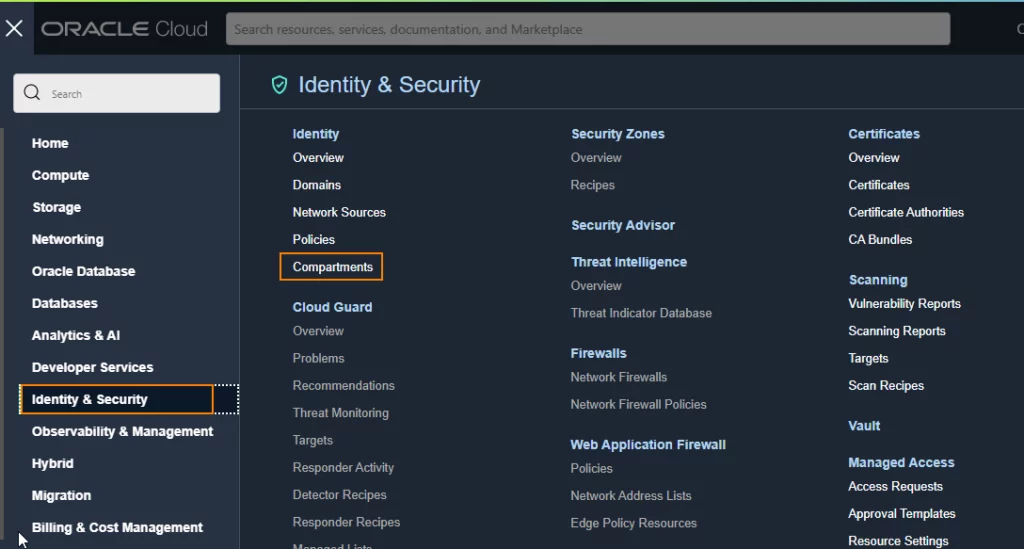
- Open the navigation menu from left corner and click Identity & Security. Under Identity, click Compartments.
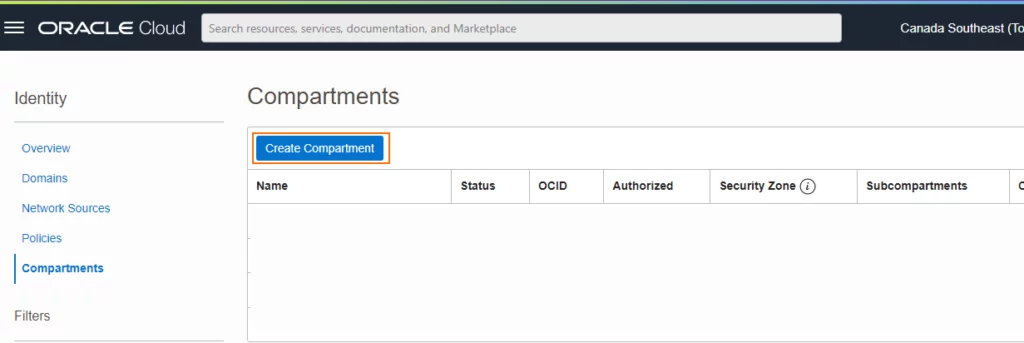
- Click Create Compartment.
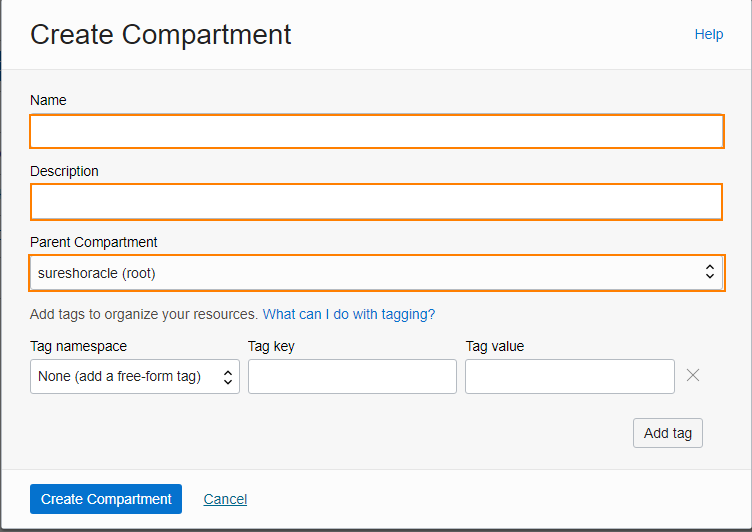
- Fill in the following information:
- Name
- Description
- Parent Compartment
- Click Create Compartment.
- New compartment should appear under compartments
2. Create Ubuntu Instance
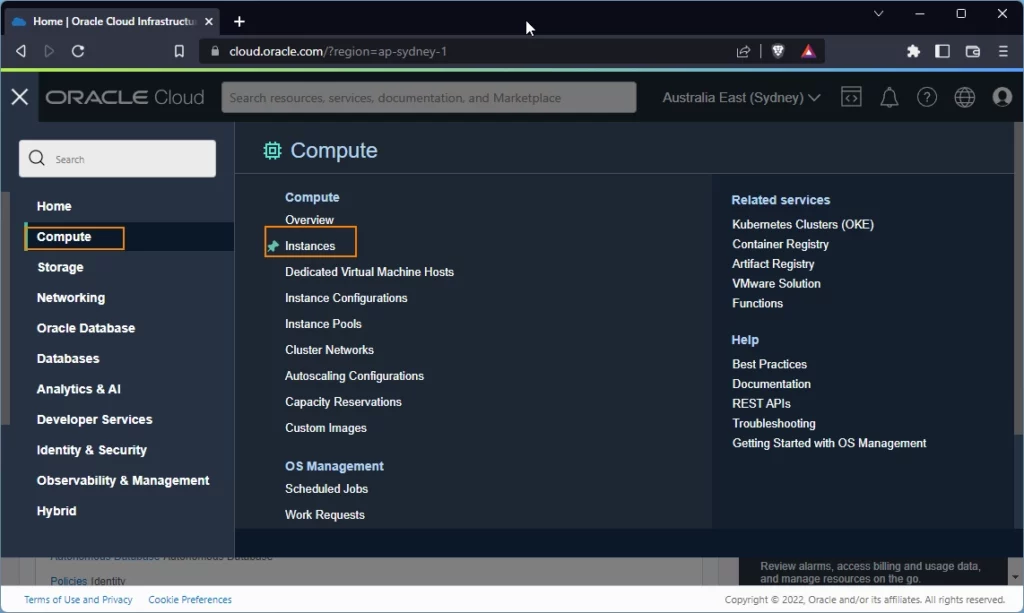
1. From the console page, Open the navigation menu from left corner and click on Compute -> Instances option
2. The Create compute instance page is displayed. It has following sections
- Placement
- Image and Shape
- Networking
- SSH Keys
- Boot Volume
3. First Enter Name and Compartment
If you have created separate compartment you can choose it.

4.Select Placement
You can go with default options.
5.Select Image and shape settings
Operating System
We are going to create Ubuntu based instance.
Click on Edit button to choose Ubuntu OS
Click on “Change Image” button and select Ubuntu OS.
OS : Canonical Ubuntu 22.04
Image build: 2022.11.06-0
Shape
We are going with default option
Shape:VM.Standard.E2.1.MicroAlways Free-eligible
OCPU count:1
Memory (GB):1
Network bandwidth (Gbps):0.48
6. Select Networking settings
Click on “Edit” button, and select one of the options from below
i) Select existing virtual cloud network – If you have already created a VCN
ii) Create new virtual cloud network – If you want to create
select “Assign a public IPv4 address” option.
Note : Oracle Free Tier account allows you to create 2 Virtual Cloud Network (VCN) interfaces.
Add SSH Keys
Select the Generate a key pair for me or option
Click Save Private Key and Save Public Key to save the private and public SSH keys for this compute instance.
If you want to use your own SSH keys, select “Paste public keys” options to provide your public key.
You can use software like PuTTygen to create new SSH key pair.
Boot volume
By default, compute instances in Oracle Cloud comes with 50GB boot disk ( minimum requirement in Oracle Cloud) which is more than enough for our case.
Click on “Create” button to create the compute instance. Wait for couple of minutes to complete the provisioning.
Opening the PORT in VNC
Spring boot applications generally runs on port 8080, So need to open the port to allow traffic from public internet.
We need to create ingress rule on VCN to allow the internet traffic.
- Click on the compute instance you have created in above step
- Scroll down the page, click on “Attached VNICs” link on left side. On the right side screen click on the “Subnet” link.
- Click the Default Security List link
- The default Ingress Rules for your VCN are displayed.
- Click Add Ingress Rules. An Add Ingress Rules dialog is displayed.
- Fill in the ingress rule with the following information
Fill in the ingress rule as follows:
- Stateless: Checked
- Source Type: CIDR
- Source CIDR: 0.0.0.0/0
- IP Protocol: TCP
- Source port range: (leave-blank)
- Destination Port Range: 8080
Click Add Ingress Rules.
Now HTTP traffic on port 8080 allowed which is required for Spring Boot application.
Install and Configure Spring Boot
Next, we need to install all the required software needed for building and running of Spring Boot application
Connect to Instance with SSH
Open your terminal and log into the server using SSH command.
To get the IP and user name of the server created in Oracle Cloud,
- Open the navigation menu and click Compute. Under Compute, click Instances
- Click the link to the instance created in the previous step. From the Instance information tab look under the Instance Access section. Write down the public IP address and username of the system created . We use this IP address and username to connect to server instance.
To connect with SSH to compute instance, we need to get the public IP of the system.
Open your terminal and log into the server using SSH command.
ssh -i <path-to-private-key> ubuntu@<public-ip-of-server>Code language: Java (java)Once logged in, update all packages
sudo apt update && sudo apt upgradeCode language: Java (java)Update port in IP tables
Allow the traffic for port 8080 by adding rule to IP tables
sudo iptables -I INPUT 6 -m state --state NEW -p tcp --dport 8080 -j ACCEPT
sudo netfilter-persistent saveCode language: Java (java)
Install Docker
First we will install docker
Before you install Docker Engine for the first time on a new host machine, you need to set up the Docker repository. Afterwards, we can install and update Docker from the repository.
sudo apt install \
    ca-certificates \
    curl \
    gnupg \
    lsb-releaseCode language: Java (java)
sudo mkdir -p /etc/apt/keyrings
Code language: Java (java)curl -fsSL https://download.docker.com/linux/ubuntu/gpg | sudo gpg --dearmor -o /etc/apt/keyrings/docker.gpgCode language: Java (java)echo \
"deb [arch=$(dpkg --print-architecture) signed-by=/etc/apt/keyrings/docker.gpg] https://download.docker.com/linux/ubuntu \
$(lsb_release -cs) stable" | sudo tee /etc/apt/sources.list.d/docker.list > /dev/nullCode language: Java (java)Grant read permission for the Docker public key file before updating the package
sudo chmod a+r /etc/apt/keyrings/docker.gpg

sudo apt-get updateCode language: Java (java)
Install Docker Engine
To install the latest version, run following command
sudo apt install docker-ce docker-ce-cli containerd.io docker-compose-plugin
The Docker daemon always runs as the root user . other users can access only access it using “sudo”
If you don’t want to preface the docker command with sudo, create a Unix group called docker and add users to it. When the Docker daemon starts, it creates a Unix socket accessible by members of the docker group.
Create docker group
sudo groupadd docker
Code language: Java (java)
Add your user to the docker group.
sudo usermod -aG docker $USER
You can run the following command to activate the changes to groups
newgrp docker
You can also Log out and log back in so that your group membership is re-evaluated.
Verify that you can run docker commands without sudo.
docker run hello-worldCode language: Java (java)Installing Docker compose
sudo curl -L "https://github.com/docker/compose/releases/download/v2.14.0/docker-compose-$(uname -s)-$(uname -m)" -o /usr/local/bin/docker-compose
Code language: Java (java)
Apply executable permissions to docker-compose binary
sudo chmod +x /usr/local/bin/docker-compose
Test docker compose
docker-compose  --help
Code language: Java (java)
Starting the docker service on system startup
sudo systemctl enable docker.service
sudo systemctl enable containerd.service
Installing GIT
sudo apt install gitCode language: Java (java)For installing Java and Maven software we will use software called SDKMAN.
With SDKMAN, we can easily install JDK’s from different vendors and switch between versions and vendors. SDKMAN will take care of installing Java based on your processor architecture.
Installing SDKMAN
Open your terminal and enter following command to download.
curl -s "https://get.sdkman.io" | bashCode language: Java (java)I had to install zip and unzip to complete sdkman installation successfully
sudo apt install zipCode language: Java (java)sudo apt install unzipCode language: Java (java)Follow the on-screen instructions to complete the installation.
source "/home/suresh/.sdkman/bin/sdkman-init.sh"Code language: Java (java)You can verify the installation of sdkman with following command.
sdk versionCode language: Java (java)Installing Java
I am installing GraalVM java 17 and 11 version. You could choose any JVM
sdk install java 22.3.r11-grlCode language: Java (java)You can check installation of java with following command.
java --version

openjdk 11.0.17 2022-10-18
OpenJDK Runtime Environment GraalVM CE 22.3.0 (build 11.0.17+8-jvmci-22.3-b08)
OpenJDK 64-Bit Server VM GraalVM CE 22.3.0 (build 11.0.17+8-jvmci-22.3-b08, mixed mode, sharing)Code language: Java (java)
Installing Maven
You can install maven with following command.
sdk install maven 3.8.6Code language: Java (java)Restart your system
sudo rebootCode language: Java (java)You can check the installation of maven with following command
mvn --versionCode language: Java (java)Installing PostgreSQL DB
We will install PostgreSQL database using docker.
mkdir postgres
cd postgres
sudo nano docker-compose.ymlCode language: Java (java)
Paste following text into docker compose file
version: '3.3'


services:
  postgres:
    # Official Postgres image from DockerHub
    image: 'postgres:13.2'
    volumes:  # volume
      - ./postgres-data:/var/lib/postgresql/data
    ports:
      - 5432:5432

    environment:
      POSTGRES_USER: postgres
      POSTGRES_PASSWORD: admin
      POSTGRES_DB: Test # The PostgreSQL default database (automatically created at first launch)Code language: Java (java)
Now you can start the database
docker-compose up -dCode language: Java (java)Building Spring Boot Application
Option 1) In first method we will manually checkout the the code and build the jar in server itself.
From your home directory check out the springboot-flyway-dbmigration project from GIT
git clone https://github.com/sureshgadupu/springboot-flyway-dbmigration.gitCode language: Java (java)Move to project directory and build the application jar with following command
mvn clean packageCode language: Java (java)Run the application
java -jar ./target/springboot-flyway-dbmigration-0.0.1-SNAPSHOT.jarCode language: Java (java)From the the log you can verify that application is successfully started.
. ____ _ __ _ _
/\\ / ___'_ __ _ _(_)_ __ __ _ \ \ \ \
( ( )\___ | '_ | '_| | '_ \/ _` | \ \ \ \
\\/ ___)| |_)| | | | | || (_| | ) ) ) )
' |____| .__|_| |_|_| |_\__, | / / / /
=========|_|==============|___/=/_/_/_/
:: Spring Boot :: (v2.7.0)
2022-12-31 06:01:06.819 INFO 9910 --- [ main] e.SpringbootFlywayDbmigrationApplication : Starting SpringbootFlywayDbmigrationApplication v0.0.1-SNAPSHOT using Java 11.0.17 on springboot-server with PID 9910 (/home/ubuntu/springboot-flyway-dbmigration/target/springboot-flyway-dbmigration-0.0.1-SNAPSHOT.jar started by ubuntu in /home/ubuntu/springboot-flyway-dbmigration)
2022-12-31 06:01:06.902 INFO 9910 --- [ main] e.SpringbootFlywayDbmigrationApplication : No active profile set, falling back to 1 default profile: "default"
2022-12-31 06:01:13.923 INFO 9910 --- [ main] .s.d.r.c.RepositoryConfigurationDelegate : Bootstrapping Spring Data JPA repositories in DEFAULT mode.
2022-12-31 06:01:14.309 INFO 9910 --- [ main] .s.d.r.c.RepositoryConfigurationDelegate : Finished Spring Data repository scanning in 291 ms. Found 2 JPA repository interfaces.
2022-12-31 06:01:17.713 INFO 9910 --- [ main] o.s.b.w.embedded.tomcat.TomcatWebServer : Tomcat initialized with port(s): 8080 (http)
2022-12-31 06:01:17.805 INFO 9910 --- [ main] o.apache.catalina.core.StandardService : Starting service [Tomcat]
2022-12-31 06:01:17.806 INFO 9910 --- [ main] org.apache.catalina.core.StandardEngine : Starting Servlet engine: [Apache Tomcat/9.0.63]
2022-12-31 06:01:18.327 INFO 9910 --- [ main] o.a.c.c.C.[Tomcat].[localhost].[/] : Initializing Spring embedded WebApplicationContext
2022-12-31 06:01:18.327 INFO 9910 --- [ main] w.s.c.ServletWebServerApplicationContext : Root WebApplicationContext: initialization completed in 11006 ms
2022-12-31 06:01:19.119 INFO 9910 --- [ main] o.f.c.internal.license.VersionPrinter : Flyway Community Edition 8.5.11 by Redgate
2022-12-31 06:01:19.119 INFO 9910 --- [ main] o.f.c.internal.license.VersionPrinter : See what's new here: https://flywaydb.org/documentation/learnmore/releaseNotes#8.5.11
2022-12-31 06:01:19.120 INFO 9910 --- [ main] o.f.c.internal.license.VersionPrinter :
2022-12-31 06:01:19.203 INFO 9910 --- [ main] com.zaxxer.hikari.HikariDataSource : HikariPool-1 - Starting...
2022-12-31 06:01:19.623 INFO 9910 --- [ main] com.zaxxer.hikari.HikariDataSource : HikariPool-1 - Start completed.
2022-12-31 06:01:19.717 INFO 9910 --- [ main] o.f.c.i.database.base.BaseDatabaseType : Database: jdbc:postgresql://localhost:5432/Test (PostgreSQL 13.2)
2022-12-31 06:01:20.121 INFO 9910 --- [ main] o.f.core.internal.command.DbValidate : Successfully validated 2 migrations (execution time 00:00.209s)
2022-12-31 06:01:20.209 INFO 9910 --- [ main] o.f.core.internal.command.DbMigrate : Current version of schema "public": 2
2022-12-31 06:01:20.210 INFO 9910 --- [ main] o.f.core.internal.command.DbMigrate : Schema "public" is up to date. No migration necessary.
2022-12-31 06:01:20.611 INFO 9910 --- [ main] o.hibernate.jpa.internal.util.LogHelper : HHH000204: Processing PersistenceUnitInfo [name: default]
2022-12-31 06:01:20.823 INFO 9910 --- [ main] org.hibernate.Version : HHH000412: Hibernate ORM core version 5.6.9.Final
2022-12-31 06:01:21.622 INFO 9910 --- [ main] o.hibernate.annotations.common.Version : HCANN000001: Hibernate Commons Annotations {5.1.2.Final}
2022-12-31 06:01:22.220 INFO 9910 --- [ main] org.hibernate.dialect.Dialect : HHH000400: Using dialect: org.hibernate.dialect.PostgreSQLDialect
Hibernate: alter table employee drop constraint FKbejtwvg9bxus2mffsm3swj3u9
.............
e unit 'default'
2022-12-31 06:01:29.301 WARN 9910 --- [ main] JpaBaseConfiguration$JpaWebConfiguration : spring.jpa.open-in-view is enabled by default. Therefore, database queries may be performed during view rendering. Explicitly configure spring.jpa.open-in-view to disable this warning
2022-12-31 06:01:35.004 INFO 9910 --- [ main] o.s.b.w.embedded.tomcat.TomcatWebServer : Tomcat started on port(s): 8080 (http) with context path ''
2022-12-31 06:01:35.020 INFO 9910 --- [ main] e.SpringbootFlywayDbmigrationApplication : Started SpringbootFlywayDbmigrationApplication in 31.196 seconds (JVM running for 34.527)
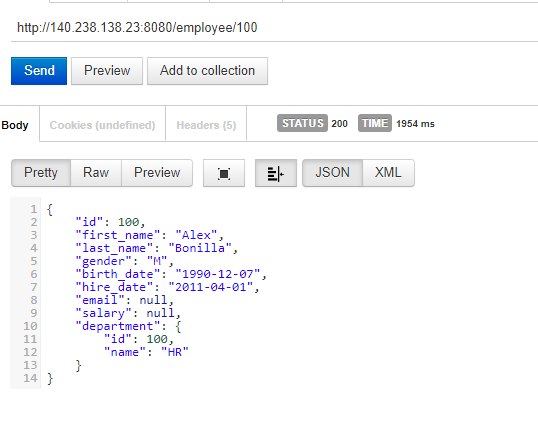
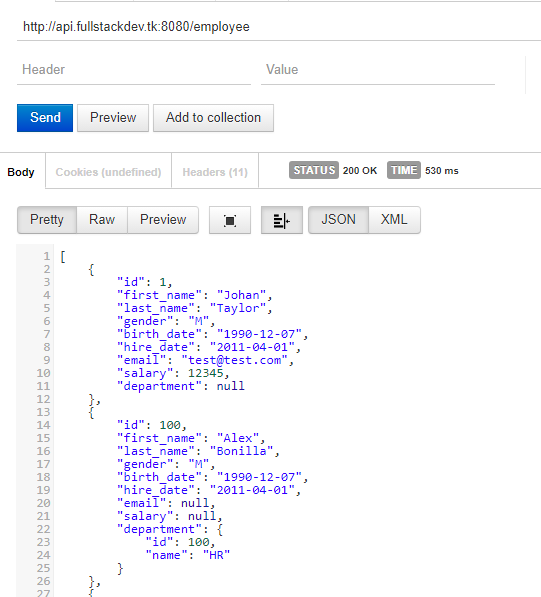
Code language: Java (java)Now we can test API by Rest client. We have to use the public IP of the server as host.
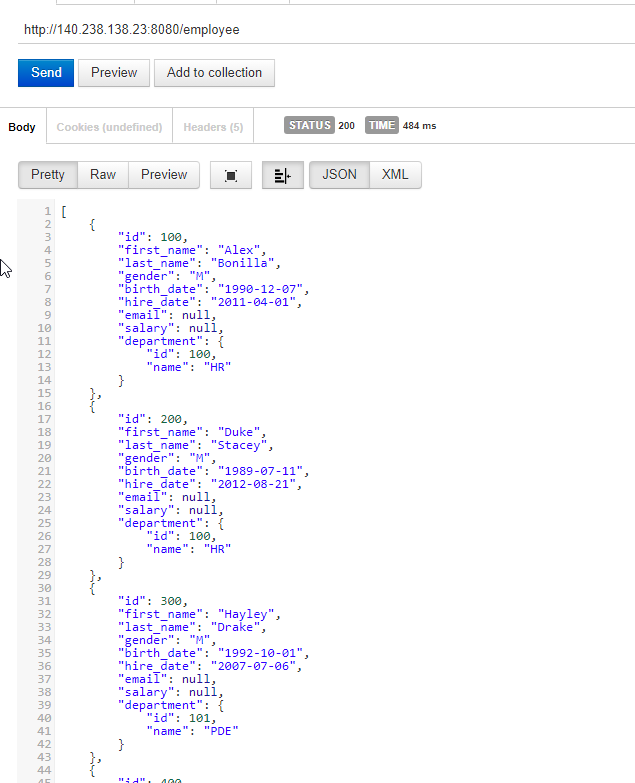
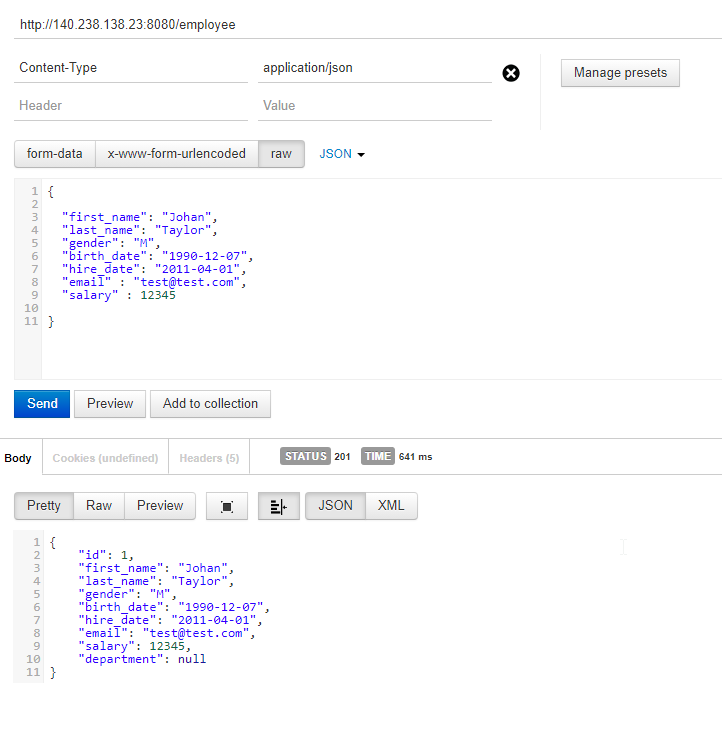
Below are the few examples of API testing from REST Client
Option 2) In second method, we pull the docker image of application from docker hub and deploy the application. Instead of building the application in the server. We will build and push the docker image to docker hub from development machine .
I built and pushed docker image to docker hub with following commands from my development machine.
First build the jar
mvn clean packageCode language: Java (java)Next build docker image and push it to docker hub.
docker build . -t sureshgkhyd/springboot-flyway-dbmigration
Code language: Java (java)
docker push sureshgkhyd/springboot-flyway-dbmigrationCode language: Java (java)
Next I have created a docker compose file which starts both application and database.
version: '3.3'


services:
  springboot-app:
    container_name: 'springboot-app'
    image: 'sureshgkhyd/springboot-flyway-dbmigration'
    restart: always
    ports:
      - 8080:8080
    environment:
      - SPRING_DATASOURCE_URL=jdbc:postgresql://postgresdb:5432/Test
    depends_on:
       - "postgres"


  postgres:
    container_name: 'postgresdb'
    image: 'postgres:13.2'
    volumes:  # volume
      - ../postgres/postgres-data:/var/lib/postgresql/data
    ports:
      - 5432:5432
    environment:
      POSTGRES_USER: postgres
      POSTGRES_PASSWORD: admin
      POSTGRES_DB: TestCode language: Java (java)
Now You can start application with following command.
docker-compose up -dCode language: Java (java)Now you can test the application with Rest client

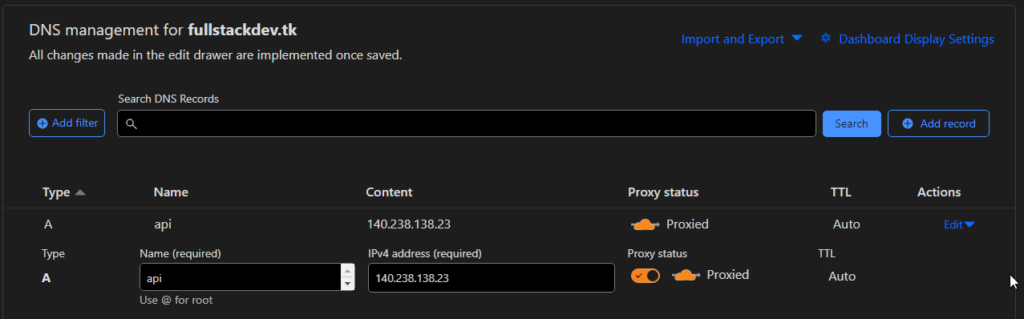
Till now were testing API using IP address of the server. If you own a domain ( you can get free domain from freenom) , you can create a DNS entry pointing to IP of the server and invoke API with domain entry.
I have created “A” record pointing IP of server to “api.fullstackdev.tk” domain address. Then you can invoke API with domain name.
You might be also interested in