Quarkus REST API CRUD Example
In this blog I show how to create a CRUD REST API with Quarkus framework.
Quarkus is a full-stack, Kubernetes-native Java framework made for Java virtual machines (JVMs) and native compilation, optimizing Java specifically for containers and enabling it to become an effective platform for serverless, cloud, and Kubernetes environments.
I have been playing with Quarkus for a few months now and I really like it. It is very easy to get started with Quarkus and you can get a lot of work done in a short amount of time. In this post, we are going to create a simple CRUD web application with Quarkus REST API.
We’ll be creating a simple Employee Management System where Employees can be created, read, updated and deleted.
I have already covered about Hibernate ORM with Panache in one of my previous blog post ( link ) so I will not discuss much about database layer in this post. I am going discuss more about developing REST API.
Setting Up Project
Head over to code.quarkus.io and create project by selecting following extensions
- RESTEasy jackson
- JDBC Driver – PostgreSQL
- Hibernate ORM with Panache
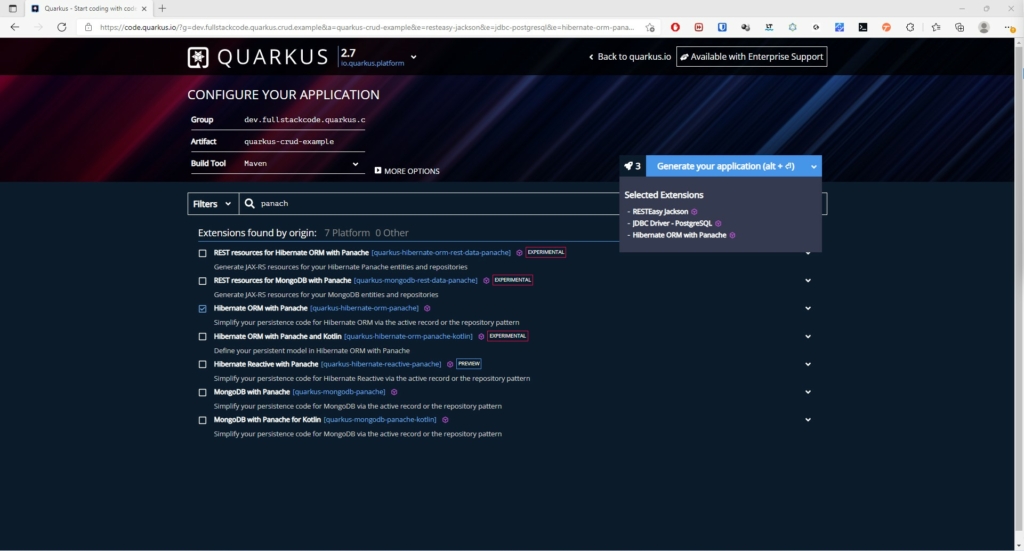
Download the project, unzip and import the project into your favourite IDE.
We are going to use MapStruct to map between entities and dto’s so added the following dependencies in pom.xml
<dependency>
<groupId>org.mapstruct</groupId>
<artifactId>mapstruct</artifactId>
<version>1.3.1.Final</version>
</dependency>
<dependency>
<groupId>org.mapstruct</groupId>
<artifactId>mapstruct-processor</artifactId>
<version>1.3.1.Final</version>
</dependency>Code language: HTML, XML (xml)Building REST Services for CRUD Operations
Creating DTO
First we create Employee and Department beans as follows
public class DepartmentDto {

    private Long id;
    private String name;
    public List<Employee> employees = new ArrayList<>();

    public List<Employee> getEmployees() {
        return employees;
    }

    public void setEmployees(List<Employee> employees) {
        this.employees = employees;
    }

    public String getName() {
        return name;
    }

    public void setName(String name) {
        this.name = name;
    }

    public Long getId() {
        return id;
    }

    public void setId(Long id) {
        this.id = id;
    }
}Code language: Java (java)
public class EmployeeDto {
private Long id;
private String first_name;
private String last_name;
private String gender;
private LocalDate birth_date;
private LocalDate hire_date;
public Department department;
public Department getDepartment() {
return department;
}
public void setDepartment(Department department) {
this.department = department;
}
public Long getId() {
return id;
}
public void setId(Long id) {
this.id = id;
}
public String getFirst_name() {
return first_name;
}
public void setFirst_name(String first_name) {
this.first_name = first_name;
}
public String getLast_name() {
return last_name;
}
public void setLast_name(String last_name) {
this.last_name = last_name;
}
public String getGender() {
return gender;
}
public void setGender(String gender) {
this.gender = gender;
}
public LocalDate getBirth_date() {
return birth_date;
}
public void setBirth_date(LocalDate birth_date) {
this.birth_date = birth_date;
}
public LocalDate getHire_date() {
return hire_date;
}
public void setHire_date(LocalDate hire_date) {
this.hire_date = hire_date;
}
}
Code language: Java (java)Next, We need to create Resource class which acts as a controller
@Path("/employee")
@Consumes(MediaType.APPLICATION_JSON)
@Produces(MediaType.APPLICATION_JSON)
public class EmployeeResource {


    @Inject
    EmployeeService empService;
}Code language: Java (java)@Path("/department")
@Consumes(MediaType.APPLICATION_JSON)
@Produces(MediaType.APPLICATION_JSON)
public class DepartmentResource {
@Inject
DepartmentService departmentService;
}Code language: Java (java)@Path annotation tells path to invoke this controller. This annotation can be used at class level and method level.
@Consumes(MediaType.APPLICATION_JSON) – sets media type consumed by Resource class
@Produces(MediaType.APPLICATION_JSON) – sets media type produced by Resource class.
@Inject is used to auto wire the dependency classes into Resources classes. This annotation is equivalent of @Autowired of Spring Framework.
Note
When a JSON extension is installed such as quarkus-resteasy-jackson or quarkus-resteasy-jsonb, Quarkus will use the application/json media type by default for most return values, unless the media type is explicitly set via @Produces or @Consumes annotations (there are some exceptions for well known types, such as String and File, which default to text/plain and application/octet-stream respectively).
Create Operation
HTTP POST method is used to create a new resource on the server
For creating Employee, we will send the employee data in json format to server in request body.
@POST
    public EmployeeDto createEmployee(EmployeeDto employee) {
        return empService.createEmployee(employee);
    }Code language: Java (java)
@POST annotation ensures that HTTP POST requests to /employee are mapped to createEmployee method.
Retrieve Operation
Next let’s look at the retrieve functionality.
HTTP GET method is used to retrieve resource(s) from server.
    @GET
    @Path("/{id}")
    public EmployeeDto getEmployee(@PathParam(value = "id") Long id) {
        return empService.getEmployee(id);
    }

    @GET
    public List<EmployeeDto> getAllEmployees() {
        return empService.getAllEmployees();
    }Code language: Java (java)
The @GET annotation ensures that HTTP GET requests to /employee are mapped to the getEmployee()/getEmployees method.
In above code, first method (getEmployee()) is trying retrieve the single employee information based on the id provided in the path.
@Path annotation -tells that path param is expected in the url invoke the method.
URL http://localhost:8080/employee/1 – will fetch the employee information of Emp Id : 1.
In above URL 1 is path param, which can be passed dynamically.
Second method (getEmployees) is used to retrieve all the employees information
URL http://localhost:8080/employee will retrieve all the employees information.
if you are passing parameter as a query parameter you can write get function as below
    @GET
    @Path("/queryParam")
    public EmployeeDto getEmployeeById(@QueryParam(value = "id") Long id) {
        return empService.getEmployee(id);
    }Code language: Java (java)
Update Operation
Next let’s look at the update functionality.
HTTP PUT/POST method is used to update resource on server.
In below example I am using HTTP PUT method for updating employee information.
    @PUT
    @Path("/{id}")
    public EmployeeDto updateEmployee(@PathParam(value = "id") Long id, EmployeeDto employee) {

        if (employee.getFirst_name() == null || employee.getLast_name() == null) {
            throw new WebApplicationException("first_name or last_name was not set on request.", 422);
        }
        return empService.updateEmployee(id, employee);
    }Code language: Java (java)
In some cases HTTP PATCH method is used to update the resource.
The HTTP PATCH request method applies partial modifications to a resource.
A PATCH request is considered a set of instructions on how to modify a resource.
Generally if you have to change single field in entity we should prefer patch method.
    @PATCH
    @Path("/{id}/updateDept")
    public EmployeeDto updateEmpDepartmentById(@PathParam(value = "id") Long emp_id ,Department department) {

        return  empService.updateEmpDepartment(emp_id,department);
    }Code language: Java (java)
Delete Operation
Next let’s look at the delete functionality.
HTTP DELETE method is used to delete resource on server.
    @DELETE
    @Path("/{id}")
    public Response deleteEmployee(@PathParam(value = "id") Long id) {
        return empService.deleteEmployee(id);
    }Code language: Java (java)
Now lets look at the other components implementation.
Writing Mapper
Since we are using MapStruct mapper , we need to write mapper classes map between DTO’s and Entity classes
@Mapper(componentModel = "cdi")
public interface DepartmentMapper {
    DepartmentDto toDepartmentDto(Department department);
    List<DepartmentDto> toDepartmentDtoList(List<Department> departments);
    Department toDepartmentEntity(DepartmentDto departmentDto);
}Code language: Java (java)@Mapper(componentModel = "cdi")
public interface EmployeeMapper {
EmployeeDto toEmployeeDto(Employee employee);
Employee toEmployeeEntity(EmployeeDto dto);
List<EmployeeDto> toEmployeeList(List<Employee> employee);
void updateEmployeeEntityFromDto(EmployeeDto dto, @MappingTarget Employee employee);
}Code language: Java (java)Service Implementation
@ApplicationScoped
public class EmployeeService {

    @Inject
    EmployeeMapper employeeMapper;

    public EmployeeDto getEmployee(Long id) {
        return employeeMapper.toEmployeeDto(Employee.findById(id));
    }

    public List<EmployeeDto> getAllEmployees() {
        // return employeeMapper.toEmployeeList(Employee.listAll());
        return employeeMapper.toEmployeeList(Employee.findAll().list());
    }

    public List<EmployeeDto> getEmployeesByDepartment(Long deptId) {
        return employeeMapper.toEmployeeList(Employee.findEmployeesByDepartmentId(deptId));
    }

    public List<EmployeeDto> searchEmpsByName(String name) {
        return employeeMapper.toEmployeeList(Employee.searchEmpsByName(name));
    }

    @Transactional
    public EmployeeDto createEmployee(EmployeeDto employee) {

        Employee entity = employeeMapper.toEmployeeEntity(employee);
        Employee.persist(entity);

        entity.persistAndFlush();
       // either use persistAndFlush or persist method
       // entity.persist();
        if(entity.isPersistent()) {
            Optional<Employee> optionalEmp = Employee.findByIdOptional(entity.id);
            entity = optionalEmp.orElseThrow(NotFoundException::new);
            return employeeMapper.toEmployeeDto(entity);
        } else {
            throw new PersistenceException();
        }

    }

    @Transactional
    public EmployeeDto updateEmployee(Long id, EmployeeDto employee) {
        Employee entity  = Employee.findById(id);
        if(entity == null) {
            throw new WebApplicationException("Employee with id of " + id + " does not exist.", 404);
        }

        // either use mapping
        employeeMapper.updateEmployeeEntityFromDto(employee,entity);

        // or update the entity with
//        entity.last_name = employee.getLast_name() ;
//        entity.first_name = employee.getFirst_name();
//        entity.birth_date = employee.getBirth_date();
//        entity.hire_date = employee.getHire_date();
//
//        if(entity.department != null && employee.getDepartment().id != null) {
//            entity.department.id = employee.getDepartment().id;
//        }
//
//        if(entity.department == null && employee.getDepartment().id != null) {
//            Department department = new Department();
//            department.id = employee.getDepartment().id;
//            entity.department = department;
//        }

        return employeeMapper.toEmployeeDto(entity);
    }

    @Transactional
    public EmployeeDto updateEmployee(EmployeeDto employee) {
        Employee entity  = Employee.findById(employee.getId());
        if(entity == null) {
            throw new WebApplicationException("Employee with id " + employee.getId() + " does not exist.", 404);
        }
        employeeMapper.updateEmployeeEntityFromDto(employee,entity);
        entity =  Employee.getEntityManager().merge(entity);
        return employeeMapper.toEmployeeDto(entity);
    }

    @Transactional
    public EmployeeDto updateEmpDepartment(Long empId, Department department) {
        Employee entity  = Employee.findById(empId);
        if(entity == null) {
            throw new WebApplicationException("Employee with id " + empId + " does not exist.", 404);
        }
        entity.department = department;

        return employeeMapper.toEmployeeDto(entity);
    }

    @Transactional
    public EmployeeDto updateEmpDepartment(Long empId, Long deptId) {
        Employee entity  = Employee.findById(empId);
        if(entity == null) {
            throw new WebApplicationException("Employee with id " + empId + " does not exist.", 404);
        }

        Optional<Department> department = Department.findByIdOptional(deptId);
        if(department.isPresent()) {
            entity.department = department.get();
        }


        return employeeMapper.toEmployeeDto(entity);
    }


    @Transactional
    public Response deleteEmployee(Long id) {

        boolean isEntityDeleted = Employee.deleteById(id);
        if(!isEntityDeleted) {
            throw new WebApplicationException("Employee with id of " + id + " does not exist.", 404);
        }

        return Response.status(204).build();

    }
}
Code language: Java (java)
Configuring the Datasource
quarkus.datasource.db-kind=postgresql
quarkus.datasource.username=postgres
quarkus.datasource.password=admin

quarkus.datasource.jdbc.url=jdbc:postgresql://localhost:5432/eis
quarkus.datasource.jdbc.max-size=16

quarkus.hibernate-orm.log.sql=true

# drop and create the database at startup (use `update` to only update the schema)
quarkus.hibernate-orm.database.generation = drop-and-createCode language: Java (java)
Note
It is not mandatory to configure the datasource ,when testing or running in Quarkus application in dev mode. Quarkus can even provide you with a zero config database out of the box, a feature referred as Dev Services. If you want to use Dev Services then all you need to do is include the relevant extension for the type of database you want (either reactive or JDBC, or both), and don’t configure a database URL, username and password, Quarkus will provide the database and you can just start coding without worrying about config.
Depending on your database type you may need docker installed in order to use this feature. Dev Services is supported for the following open source databases:
Postgresql (container)
MySQL (container)
MariaDB (container)
H2 (in-process)
Apache Derby (in-process)
DB2 (container) (requires license acceptance)
MSSQL (container) (requires license acceptance)
Start the application
We can start the application in dev mode with following command.
mvn compile quarkus:devCode language: Java (java)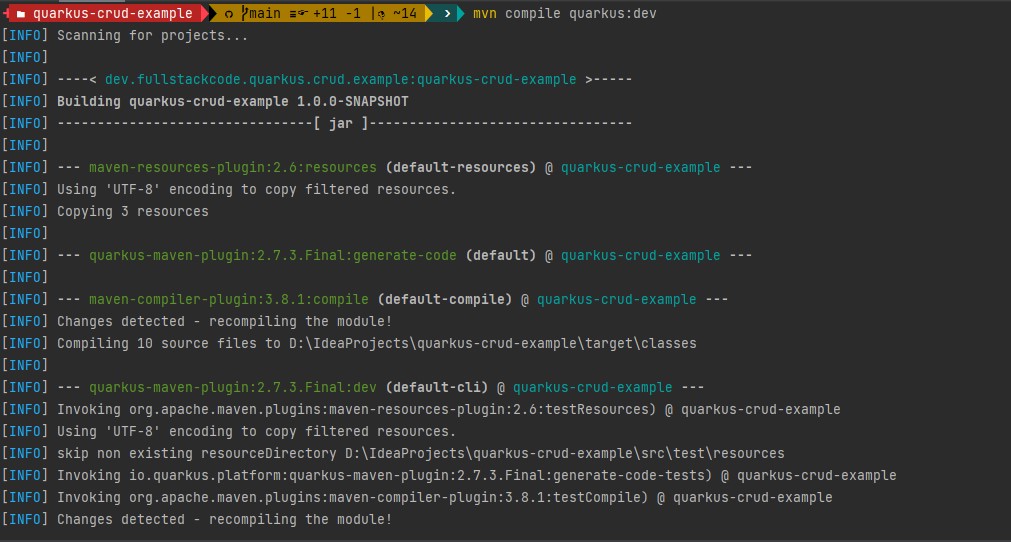
Testing Rest API
Now let’s test the developed REST API.
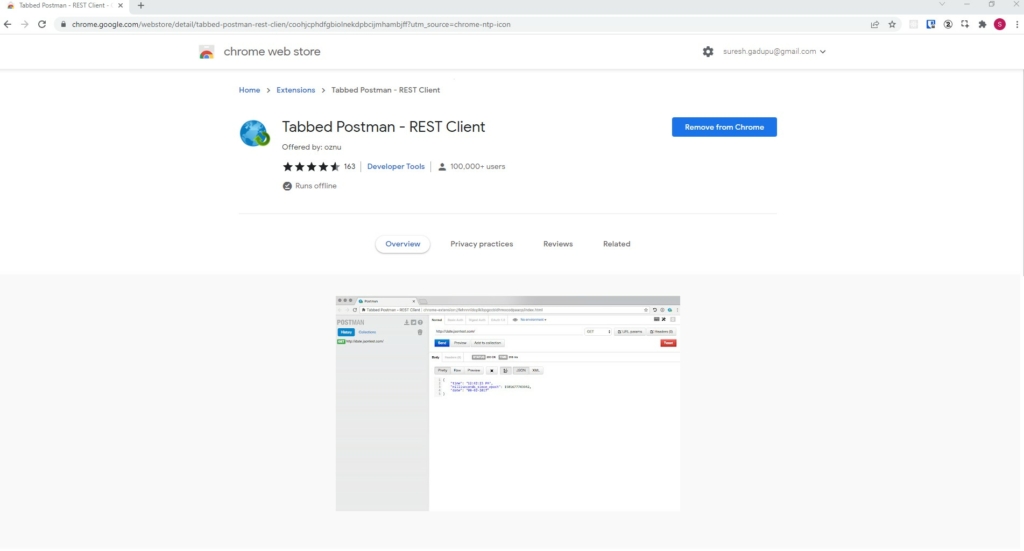
We need a REST client to test the functionality. I am going to use Tabbed Postman Rest client. This Rest client is chrome browser extension.
We need a REST client to test the functionality. I am going to use Tabbed Postman Rest client. This Rest client is chrome browser extension.
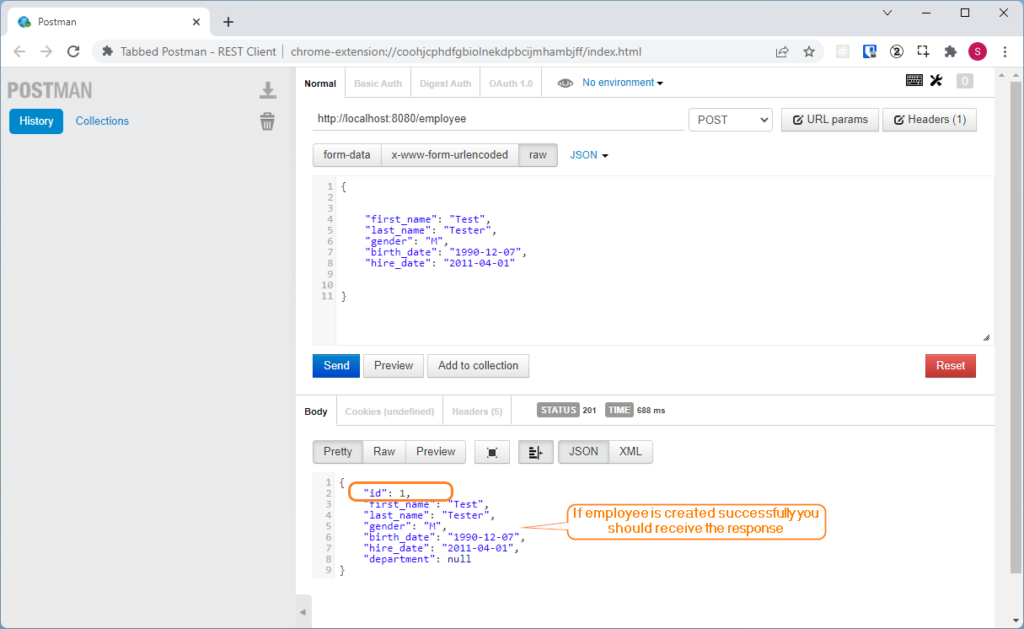
- Testing Create Employee
Open the Tabbed postman Rest client in browser and select the required details as shown below and click on send button
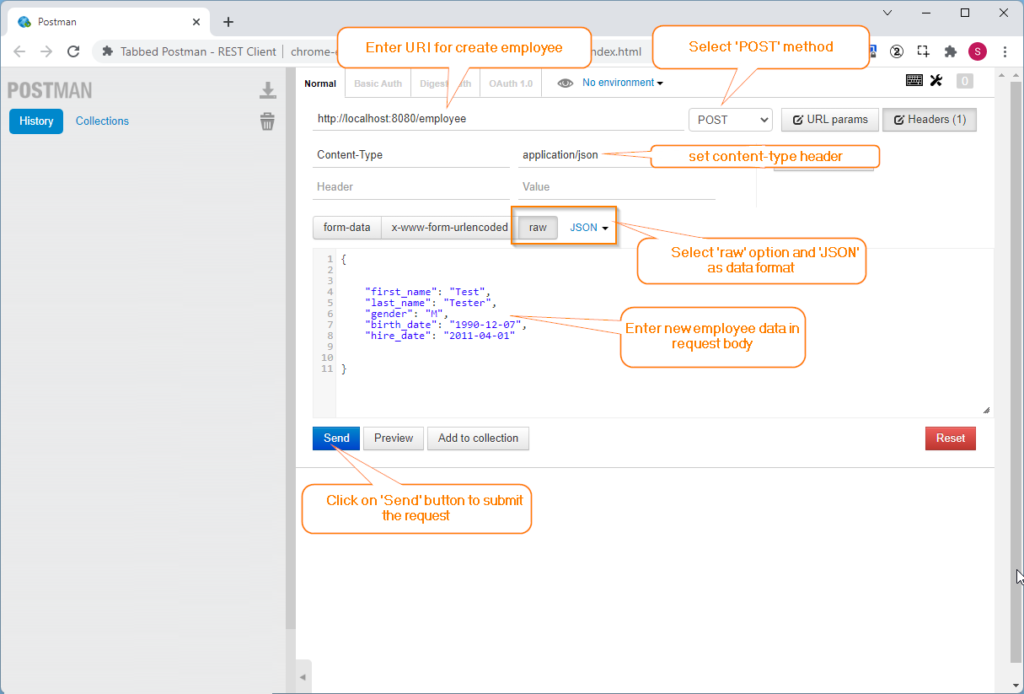
If the request is successful, new Employee will be created and id will be assigned him.
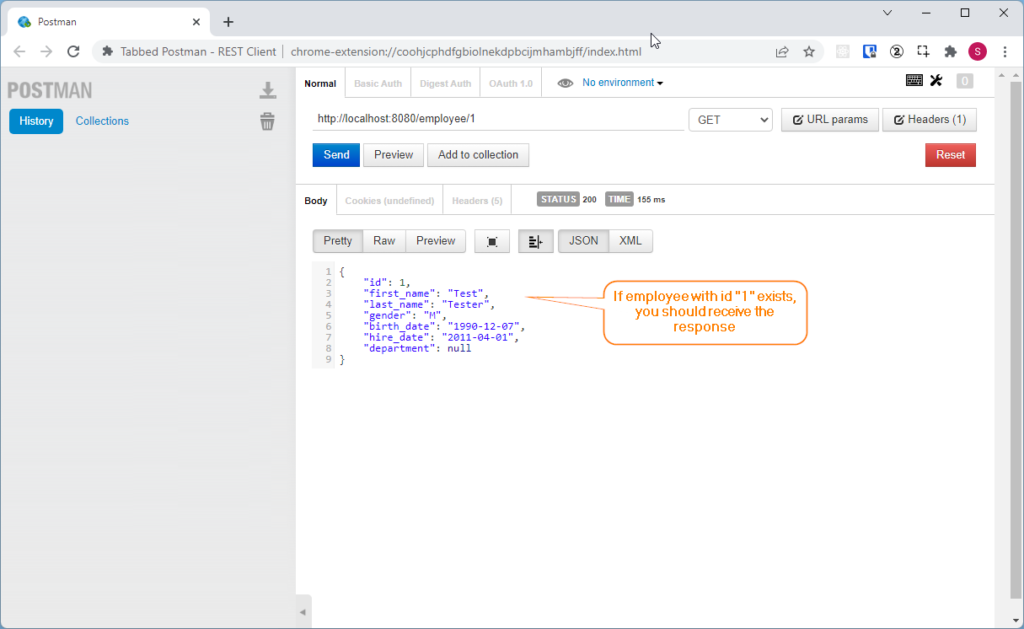
2. Testing Retrieve Employee
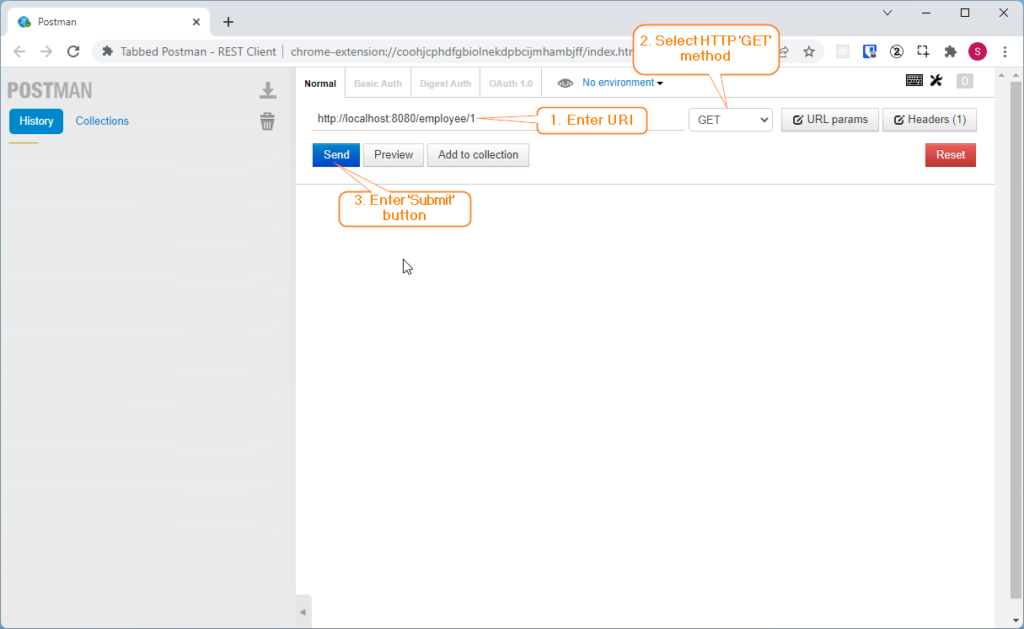
If employee exists with given id in the url , we should receive response
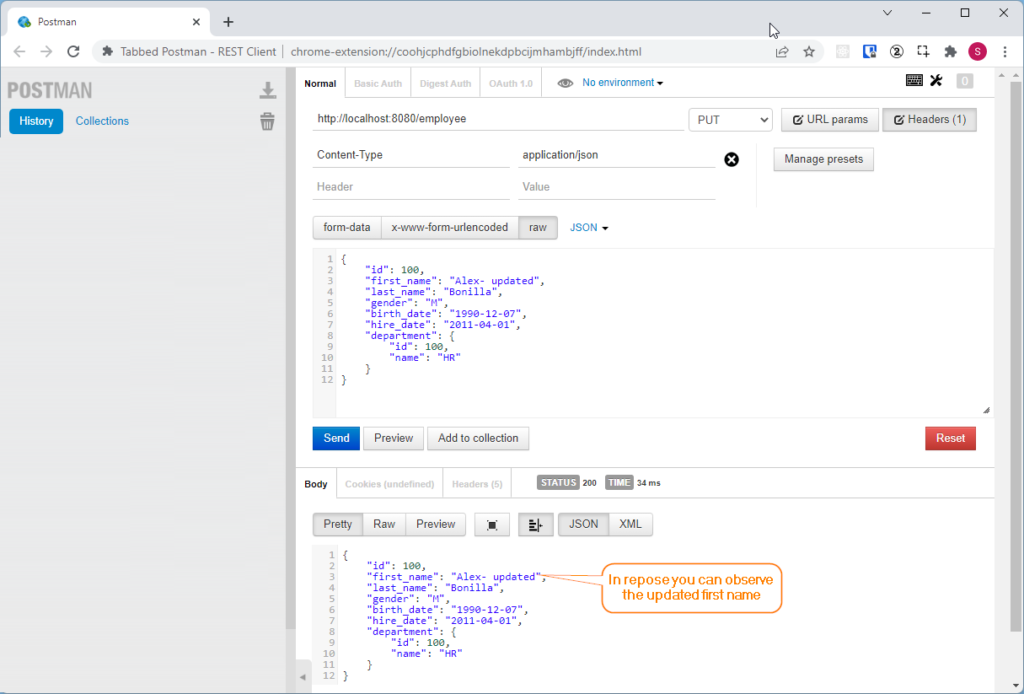
3. Testing Update functionality
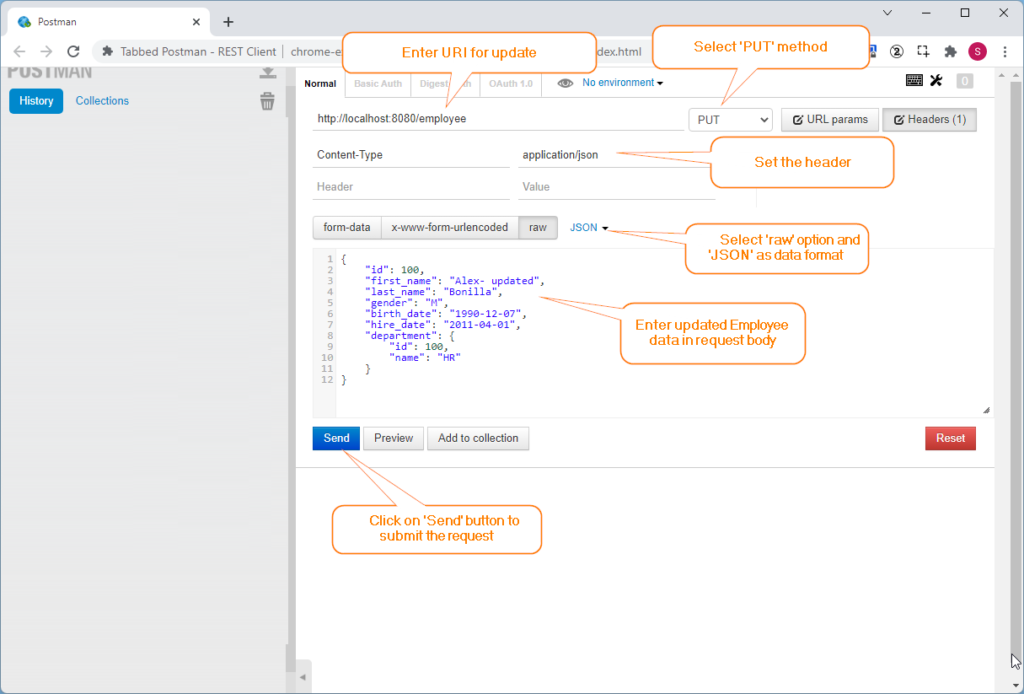
If employee record updated successfully, you should receive response like below
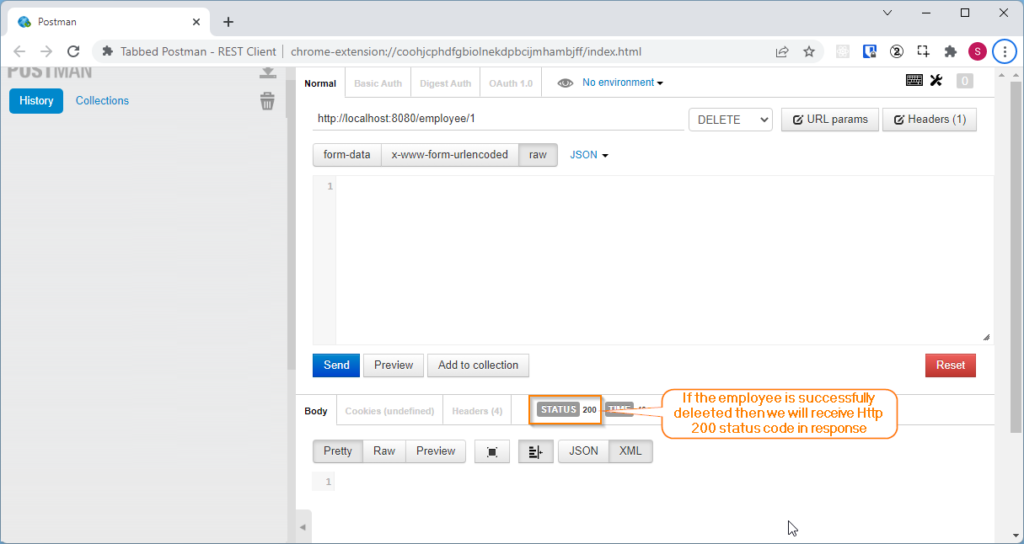
4. Testing Delete functionality
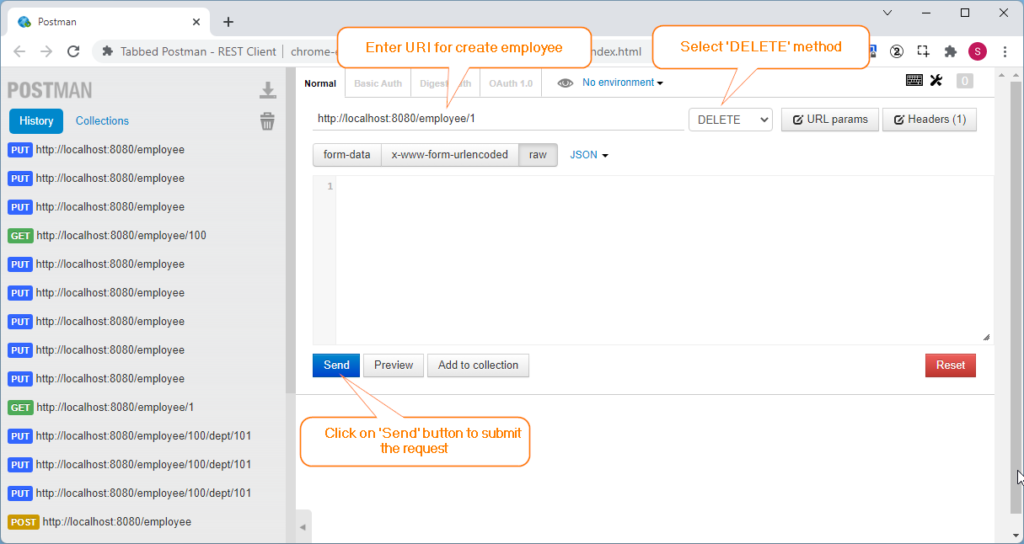
If employee delete successfully, then we will not receive any response, we will only receive http status code 200.
You can download source code for this blog post from GitHub.
You might be also interested in
References