Deploying Spring Boot Applications on CapRover
In this blog post, I will show how can you can deploy the Spring Boot application on CapRover platform.
In my previous blog post, I have shown you how to setup your own PAAS platform using CapRover on Oracle Cloud.
Now we will see how to deploy Spring Boot application on Caprover.
CapRover allows the deploying application following ways.
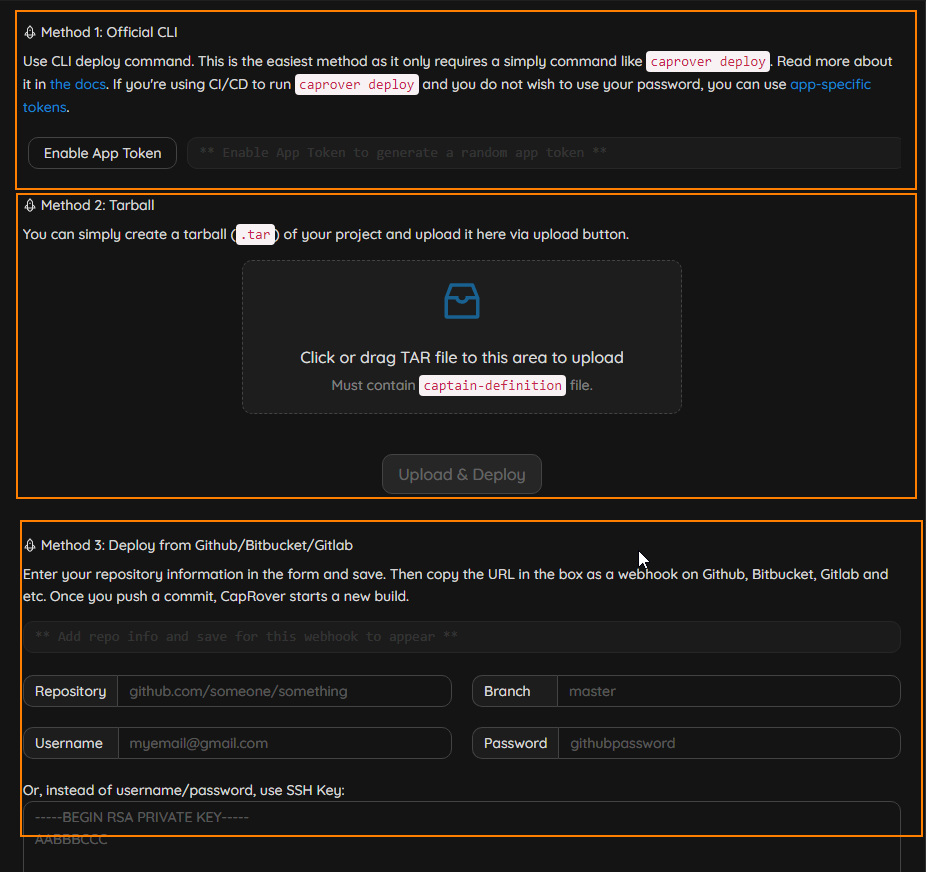
CapRover CLI
Using CLI deploy command.This is the easiest method as it only requires a simply command like caprover deploy. We can use CI/CD tools to run caprover deploy command .
Tarball
We can create a tarball (.tar) of project and upload it here via upload button of deployment section
Deploy from Github/Bitbucket/Gitlab
We can setup the webhook from the Github/Gitlab/Bitbucket so that when ever we push the code changes to repository , CapRover automatically builds and deploys the application.
Using Dockerfile
We can deploy using Dockerfile.
Using captain-definition file
Using CapRover specific captain-definition file we can deploy the application. Inside captain-definition file we can refer to Dockerfile or We can write docker commands inside definition file.
Using Docker Image
We can also deploy using docker image
In this blog post I am going to use the “Deploy from Github/Bitbucket/Gitlab” method.In this method we create a repo in GitHub and setup the webhook so that CapRover builds and deploys the application when ever we push new code.
Let’s deploy simple Spring Boot CRUD application on CapRover.
I am going to deploy springboot-caprover-deployment repo from GitHub for demonstration.
Opening Ports
I have deployed CapRover server on oracle cloud compute instance. So we need to open the ports in firewall and VNICs.
As the Spring Boot generally works on port 8080.We need to open port 8080.We can also expose the application on different port via port mapping.
You can refer to one of previous blog post to see how to open port in Oracle Cloud.
Database Setup
Let’s first setup “PostgreSQL” database server to store the data. We can setup PostgreSQL Database with Caprover one click app.
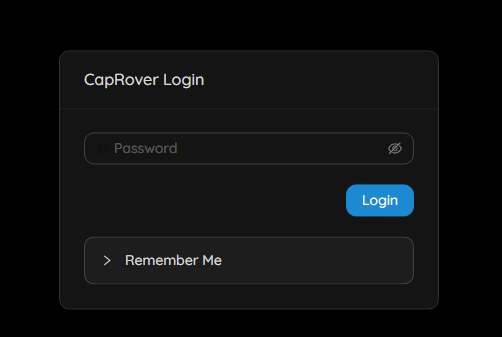
- Log into CapRover instance
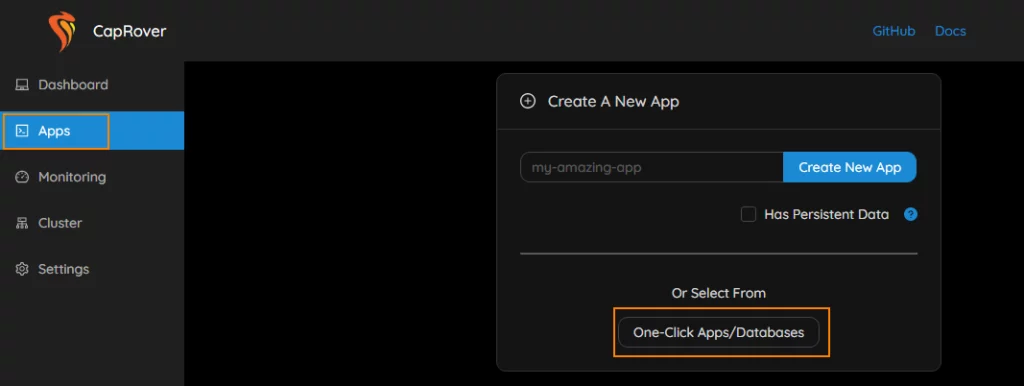
2.Click on “App” link on left side menu, click on the “One-Click/Databases”
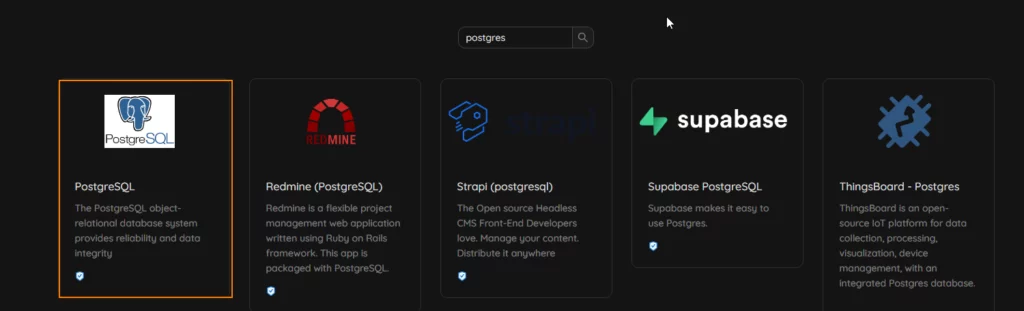
3. Search for Postgres database. Click on the Postgres Database.
4. Configure Database by entering following details
- App Name : postgres
- Username : postgres
- Password : xxx
- default database : eis
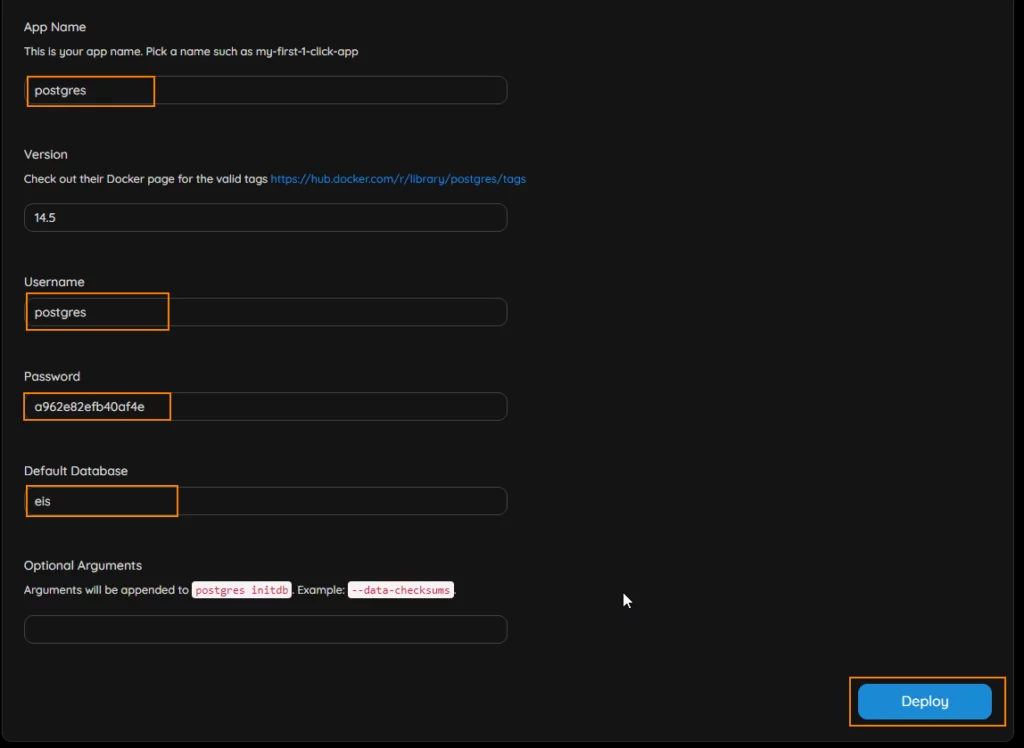
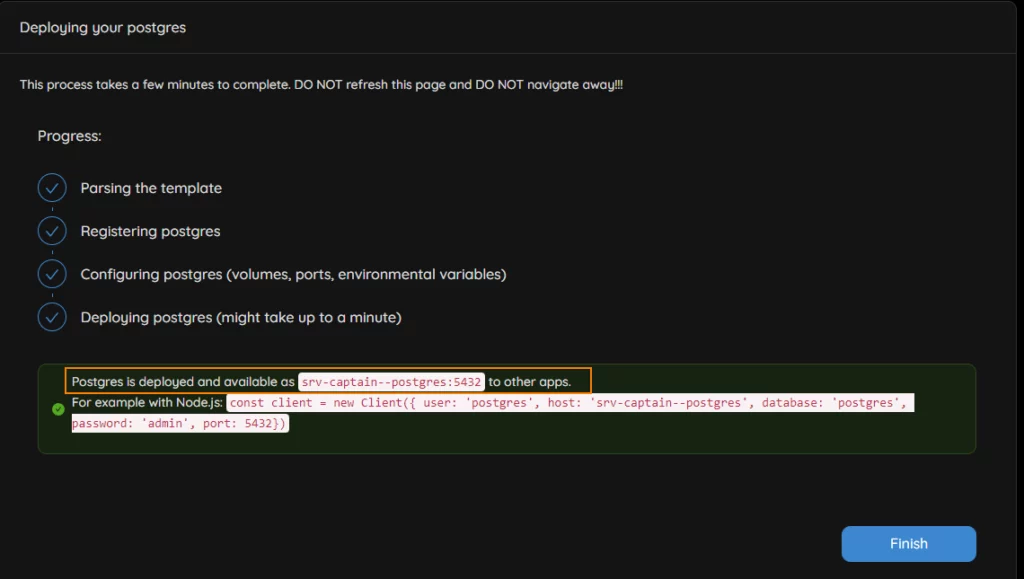
5. Click on “Deploy” button to deploy the database.The deployment screen shows the database host name, which can be used to access the database from the applications.
Click on “Finish” button to to complete the deployment.
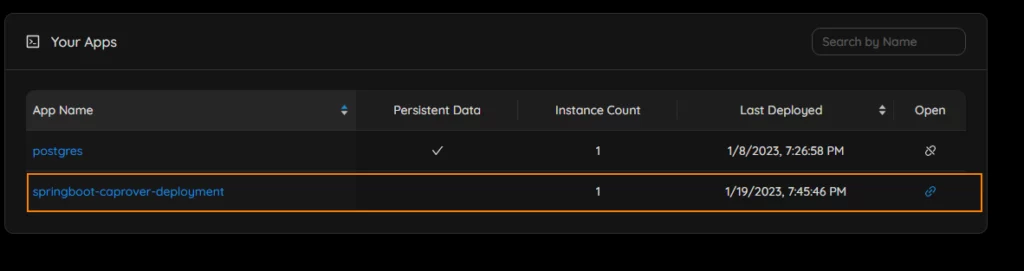
6.You can see the database in the one click dashboard.

Creating Database
Once we setup the database server, we need to create the database.
As database is is running docker container , we need to connect to Postgres inside a container.
SSH into CapRover server.
List all docker container with following command and copy the postgres container id.
docker container lsCode language: Java (java)Connect to Postgres Database inside the container with following command.
docker exec -it <containerid or containername> psql -U <username>Code language: Java (java)psql (14.5 (Debian 14.5-2.pgdg110+2))
Type "help" for help.
postgres=#Code language: Java (java)on the psql command prompt enter \l to display all databases.
postgres=# \l
   Name    |  Owner   | Encoding |  Collate   |   Ctype    |   Access privileges
-----------+----------+----------+------------+------------+-----------------------
 postgres  | postgres | UTF8     | en_US.utf8 | en_US.utf8 |
 template0 | postgres | UTF8     | en_US.utf8 | en_US.utf8 | =c/postgres          +
           |          |          |            |            | postgres=CTc/postgres
 template1 | postgres | UTF8     | en_US.utf8 | en_US.utf8 | =c/postgres          +
           |          |          |            |            | postgres=CTc/postgres
 test      | postgres | UTF8     | en_US.utf8 | en_US.utf8 |Code language: Java (java)
Let’s create “eis” database for our application.
postgres=# create database eis;
CREATE DATABASECode language: Java (java)
Verify that database is created.
postgres=# \l
                                 List of databases
   Name    |  Owner   | Encoding |  Collate   |   Ctype    |   Access privileges
-----------+----------+----------+------------+------------+-----------------------
 eis       | postgres | UTF8     | en_US.utf8 | en_US.utf8 |
 postgres  | postgres | UTF8     | en_US.utf8 | en_US.utf8 |
 template0 | postgres | UTF8     | en_US.utf8 | en_US.utf8 | =c/postgres          +
           |          |          |            |            | postgres=CTc/postgres
 template1 | postgres | UTF8     | en_US.utf8 | en_US.utf8 | =c/postgres          +
           |          |          |            |            | postgres=CTc/postgres
 test      | postgres | UTF8     | en_US.utf8 | en_US.utf8 |Code language: Java (java)
Deploying Spring Boot Application
Now let’s deploy a Spring Boot application. As I said earlier we going to use springboot-caprover-deployment repo from GitHub
1.Log into CapRover instance
2.Click on “App” link on left side menu, On right side dashboard enter your app name and click on “Create New App” button.

3.The new app shows on the dashbaord.
4.Click on the app link to see the Deployment and Configuration options.
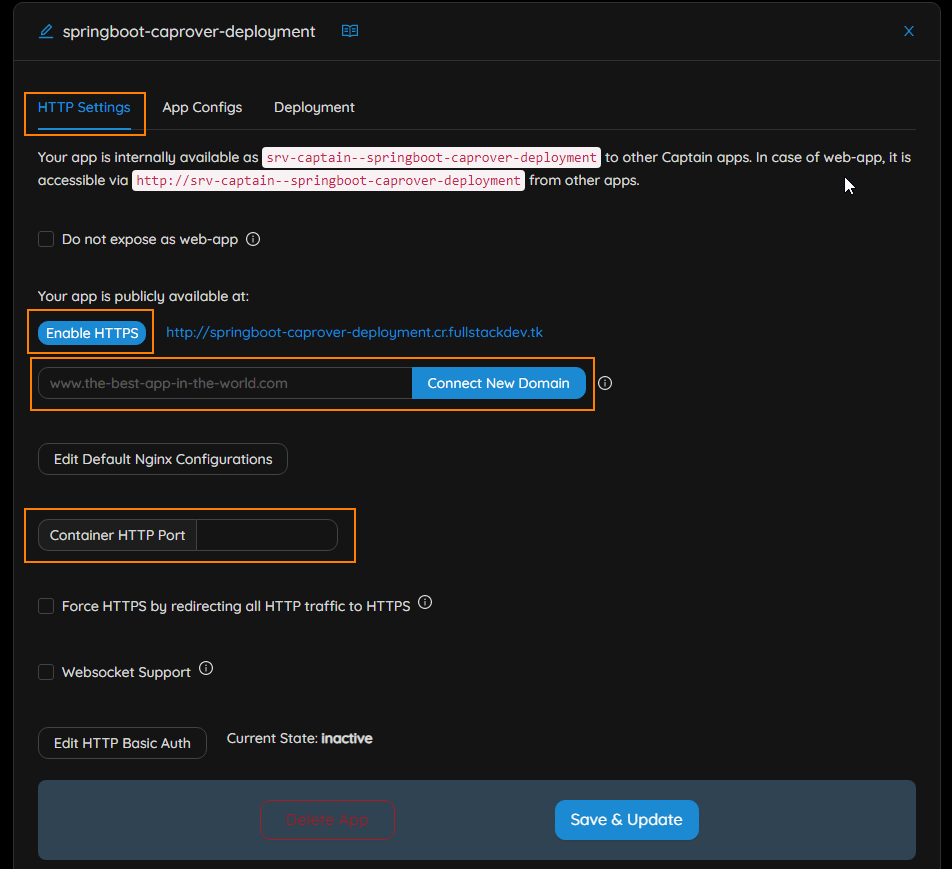
Http Settings
HTTPSettings screen allows you to configure following
- Enble HTTPS
- Connect Application to the new domain.
- Change the port of HTTP Container.
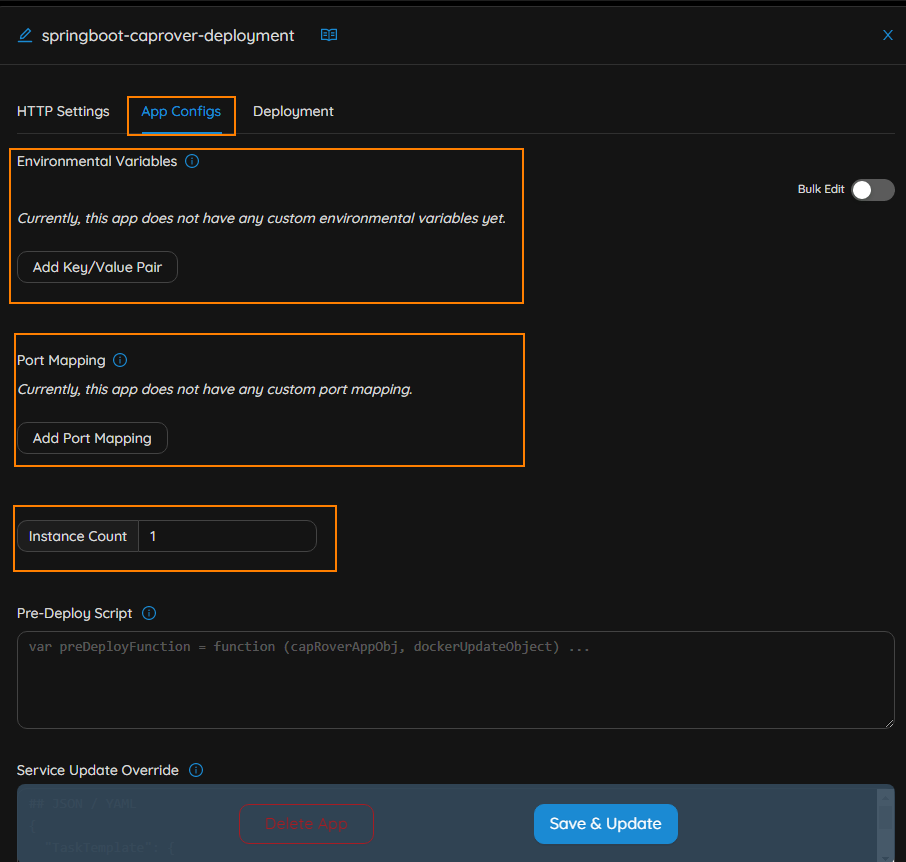
App Config
App Config screen allows you to configure following
- Set Environment variables for application – These environment variables are used to provide addition properties or override existing properties.
- Port Mapping – Allows us to map docker container port to host port so that we can access the applications.
- Instance Count – You can specify how many instances of your application should run.
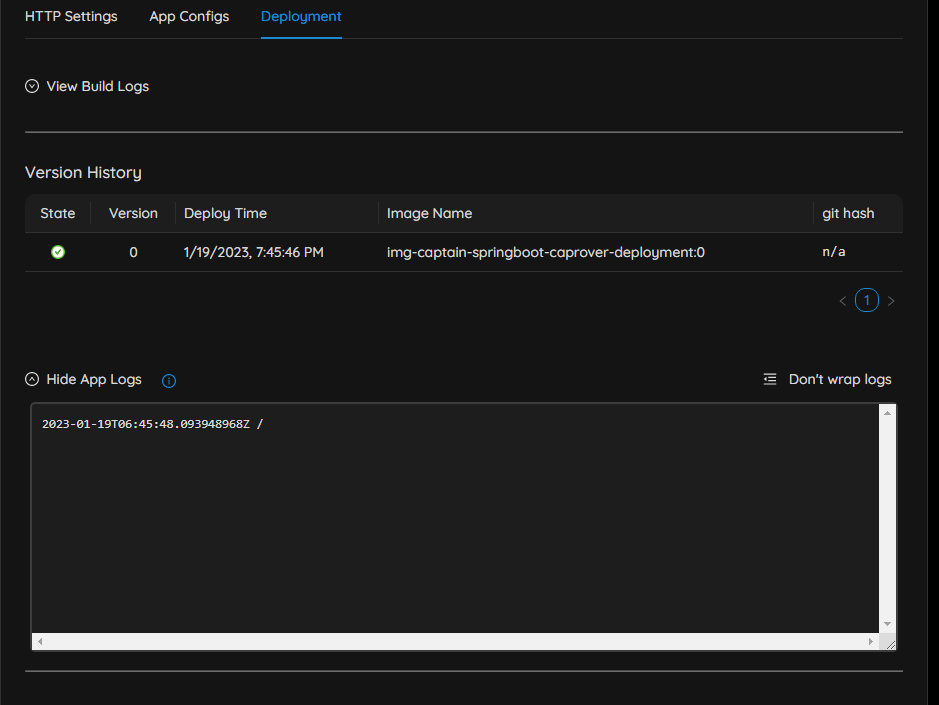
Deployment
Deployment screen shows
- Deployment History
- Deployment methods
- Build logs
In this blog post, we are going to use “Deploy from Github/Bitbucket/Gitlab” method to deploy spring boot application.
“Deploy from Github/Bitbucket/Gitlab” allows us to automatically build the application when ever we push the code new code to GitHub repo.
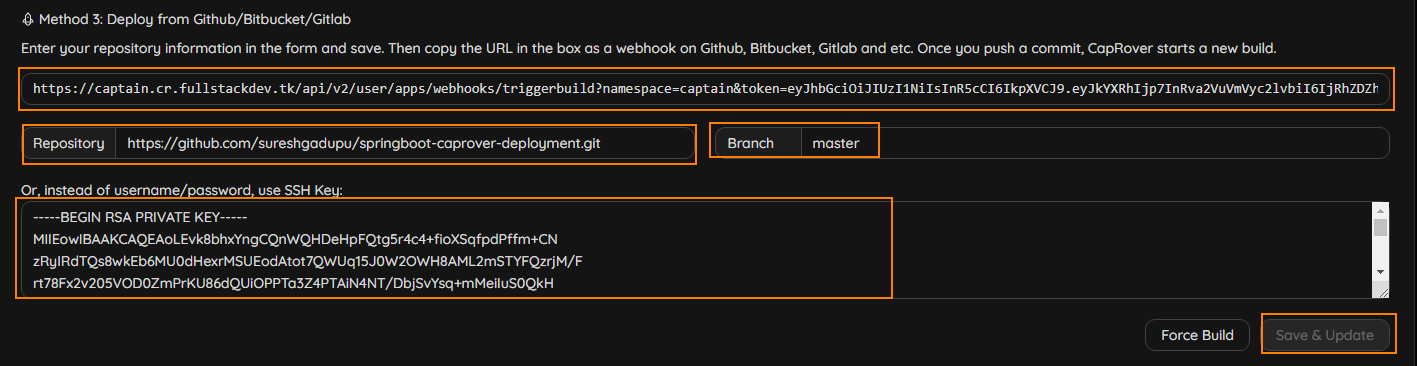
For this method of deployment first we need to create webhook url for GithHub repo, so that GithHub sends events to CapRover server when ever we push the new code.
Enter following details and click on “Save & Update” button to generate GitHub webhook URL.
- GitHub repository
- Branch name
- GitHub User Name and Password or SSH key setup for GitHub
We can also deploy the application by clicking on “Force Build” button available in the deployment screen.
Next we will configure the webhook in GitHub repository so that when ever we push the new code to repo, CapRover automatically builds the image and deploys the application.
Configuring Webhook in GitHub
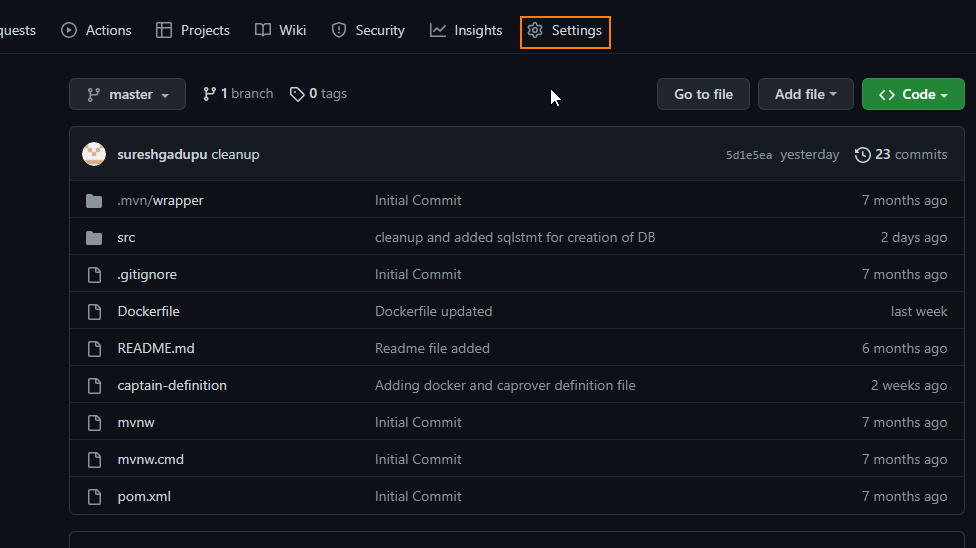
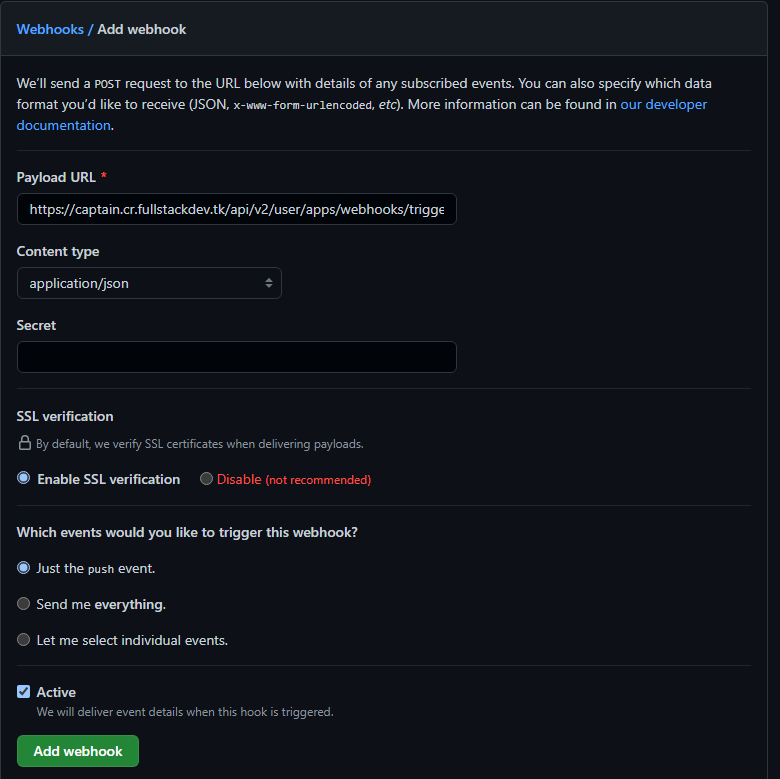
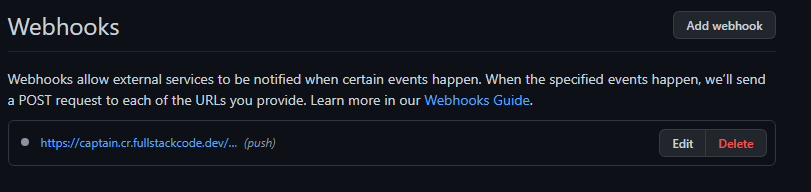
Go to repository page in GitHub and click on “settings” tab
Click on the “Webhook” link on the left side menu, click on “Add webhook” button and copy generated webhook URL generated in above steps in the given textbox and click on “Add Webhook” button.
Preparing repo
Once you completed the development of your application. You need to add caprover-definition file.
Caprover looks for caprover-definition file which contains build and deployment instructions.
The definition file contains docker image build instructions or can refer to external Dockerfile which contains the instructions.
captain-definition
{
  "schemaVersion": 2,
  "dockerfilePath": "./Dockerfile"
}Code language: Java (java)
Dockerfile
We use below multi stage docker file which compiles the source code and builds the image.
FROM adoptopenjdk/openjdk11:jdk-11.0.16.1_1-slim as build
ENV DOCKER_BUILDKIT=1
COPY mvnw ./
COPY .mvn .mvn
COPY pom.xml ./
COPY src src
RUN chmod a+rx mvnw
RUN ./mvnw clean package -DskipTests

FROM adoptopenjdk/openjdk11:jdk-11.0.16.1_1-slim
COPY --from=build "./target/*.jar" /app.jar
RUN addgroup --system springboot && adduser --system sbuser && adduser sbuser springboot
USER sbuser
ENTRYPOINT ["java", "-jar", "/app.jar"]Code language: Java (java)
Setting Environment Variables and PortMapping
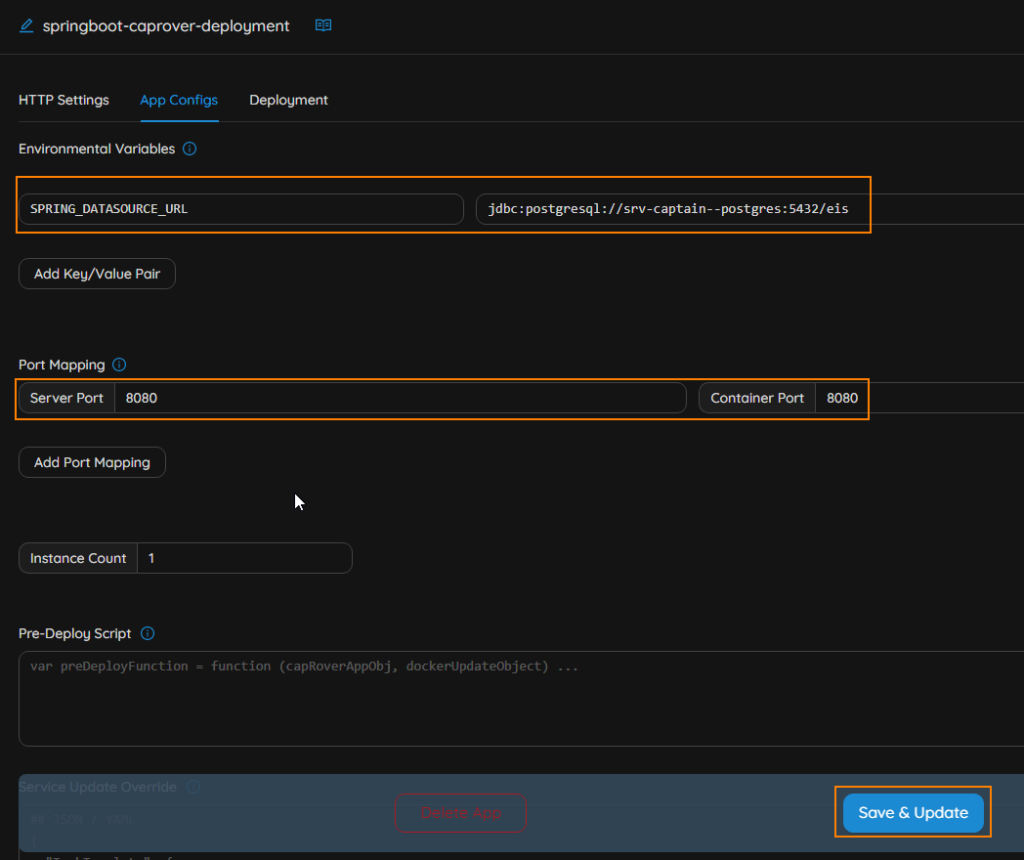
Before pushing the code to repo, we need to setup the environment variables , so that application points to installed database.
SPRING_DATASOURCE_URL : jdbc:postgresql://srv-captain--postgres:5432/eisCode language: Java (java)Port mapping for accessing application from outside.
As the spring boot application runs on port 8080 , we are mapping it to server port 8080.
Click on “Save & Update” button to save the configuration.
Push the Code to Repo
Now push your code to repo. As we already setup the webhook, caprover will receive the event and start building and deploying image.
You can see the build and deployment logs in Deployment section.
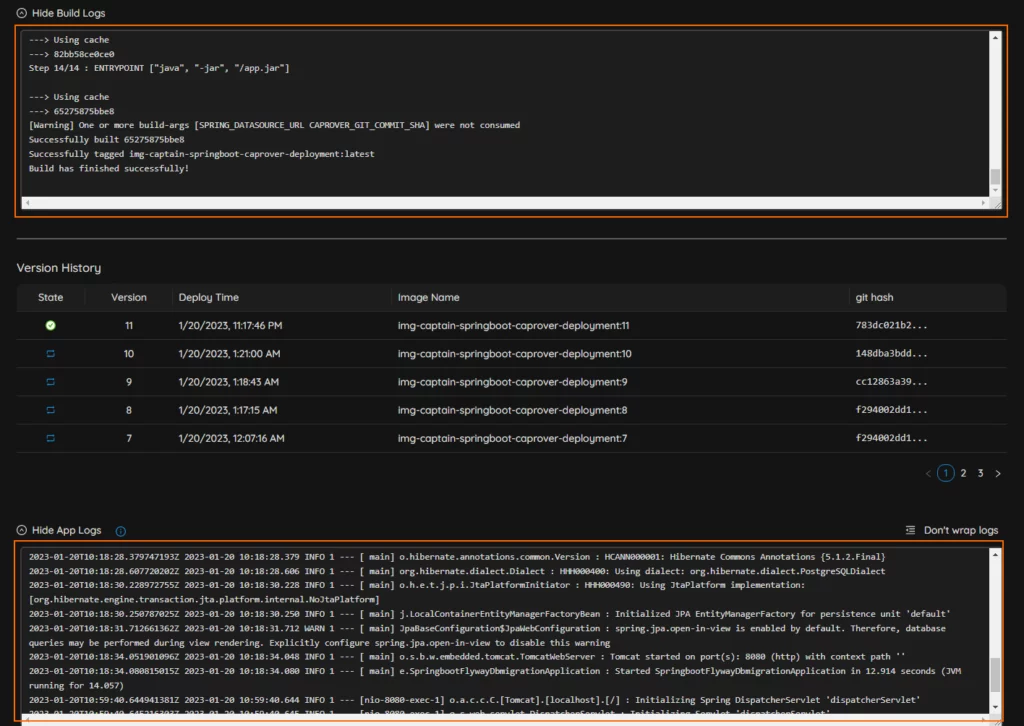
By looking at the startup logs, when we can find out whether application started successfully or not.
We can also force redeployment of application by clicking on “Force Build” button.
Accessing the Application
From the “HTTP Settings” tab we can see the public URL of the application.
By clicking “Enable HTTPS” button, we can simply enable SSL for the application.
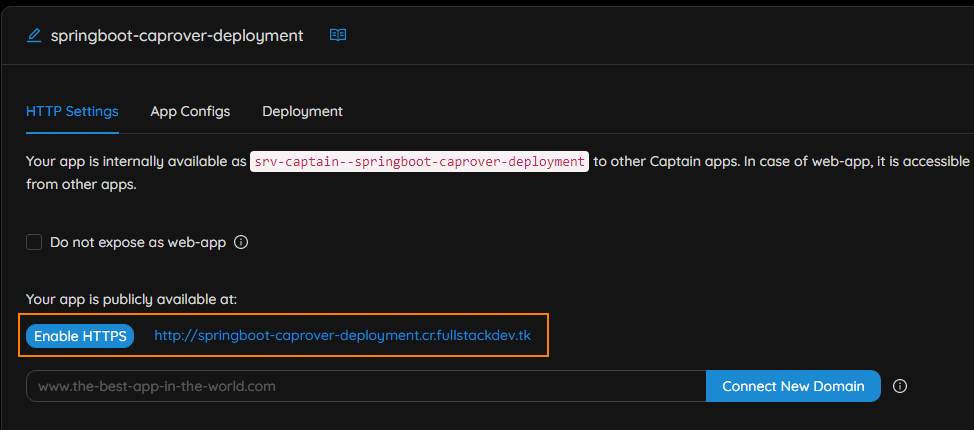
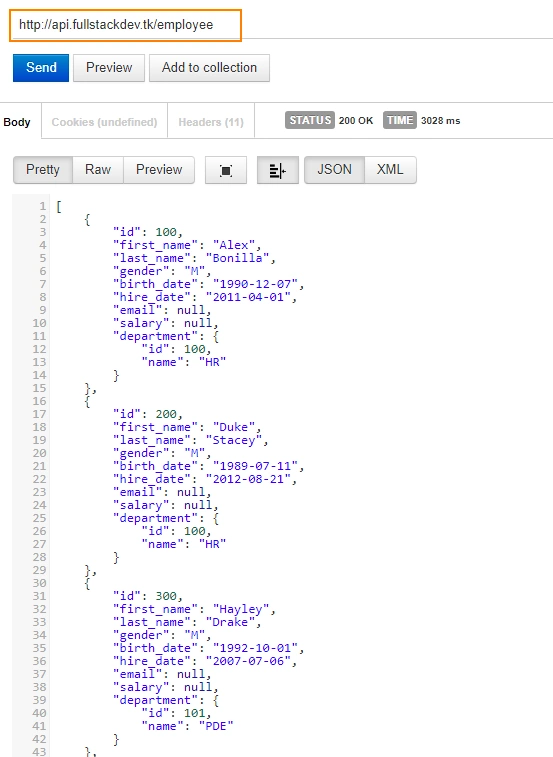
When you access below url, we can all see the all the employee information .
http://springboot-caprover-deployment.cr.fullstackdev.tk:8080/employeeCode language: Java (java)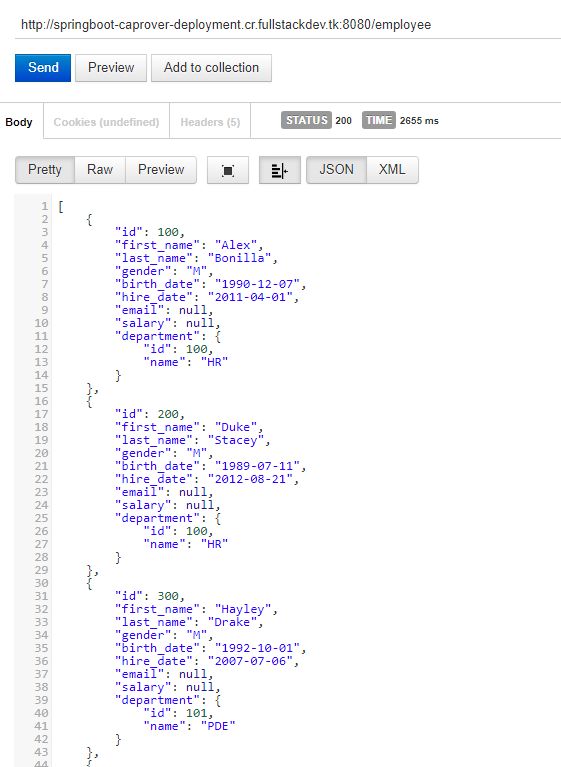
Connect to NewDomain
You can also connect application to new URL along with CapRover generated URL.
Let’s connect out application to api.fullstackdev.tk domain.
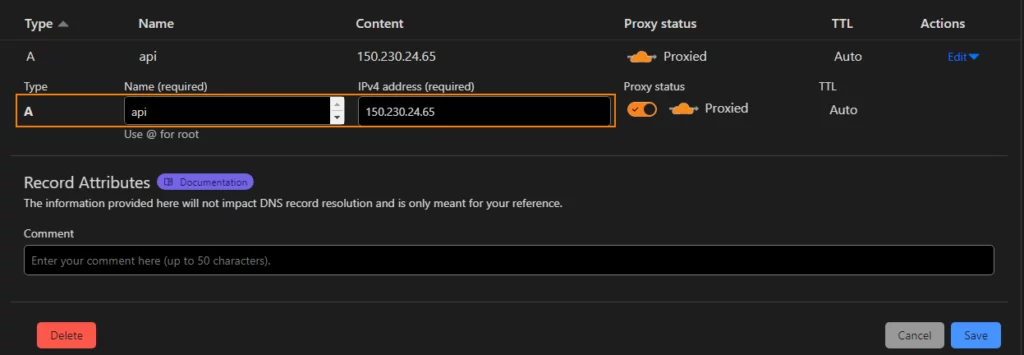
To connect to new URL, create a record in your DNS provider with following details.
- Type: A
- Name: api
- IP Address: CapRover Server IP address
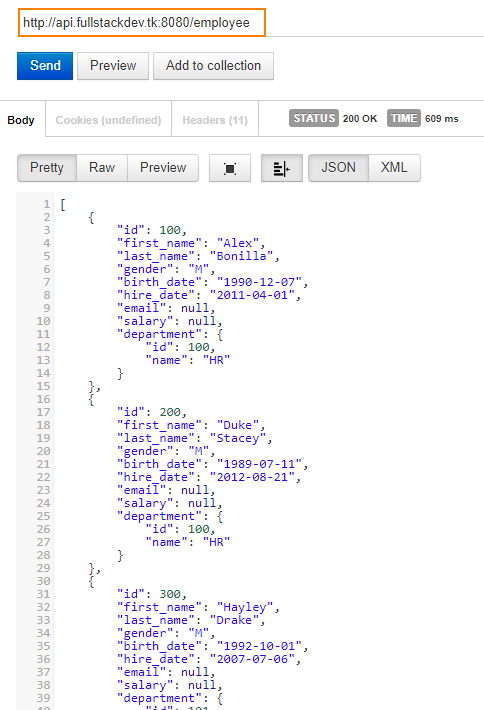
Now got to “HTTP settings” tab of application and enter URL and click on “Connect New Domain” button.

Now we can access the application with newly configured domain url
We are accessing the application on port 8080.In general production grade applications does not expose custom port, they run on default http port 80. We can also make the our Spring Boot application run on port 80 by overriding the default port 8080
You can override the port in 2 ways
1.In AppConfig section of application, add following environment variable.
SERVER_PORT : 80Code language: Java (java)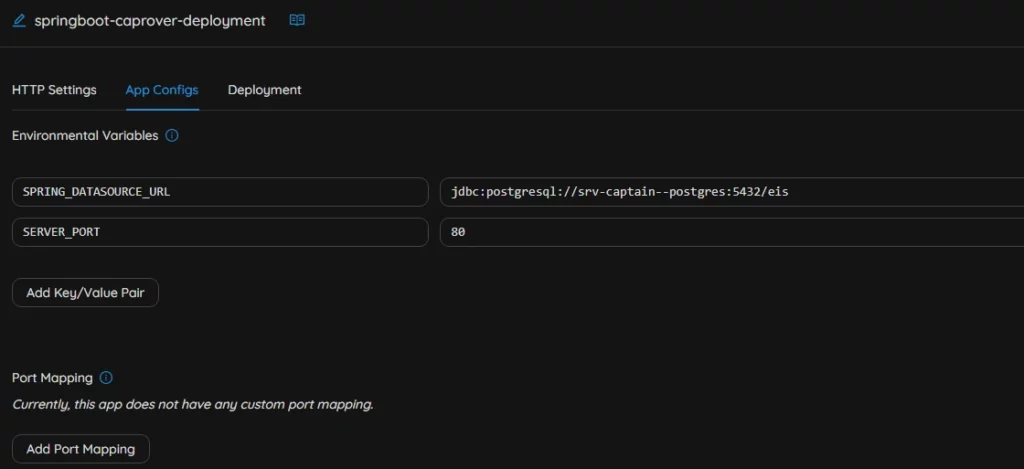
2. In application.properties file add following property
server.port=80
Now we can invoke application with out port in URL as it is running on default http port.
You might be also interested in