Using CloudAMQP RabbitMQ server with Spring Boot Application
In this blog post, I will explain how to use RabbitMQ cluster created in CloudAMQP cloud service to send and receive messages from Spring Boot applications.
In my previous blog post , I have explained how to create RabbitMQ cluster for free in CloudAMQP service. Now we are going to use RabbitMQ cluster created in CloudAMQP to send and receive messages.
Let’s create Producer and Consumer applications using Spring Boot and send messages between applications using RabbitMQ server created in CloudAMQP service.
I am using Producer and Consumer code from one of my previous blog post.
Producer Application
We create a configuration class to create direct exchange ,queues and bindings
package dev.fullstackcode.sb.rabbitmq.producer.config;
import org.springframework.amqp.core.Binding;
import org.springframework.amqp.core.BindingBuilder;
import org.springframework.amqp.core.DirectExchange;
import org.springframework.amqp.core.Queue;
import org.springframework.amqp.rabbit.connection.ConnectionFactory;
import org.springframework.amqp.rabbit.core.RabbitTemplate;
import org.springframework.amqp.support.converter.Jackson2JsonMessageConverter;
import org.springframework.amqp.support.converter.MessageConverter;
import org.springframework.boot.ApplicationRunner;
import org.springframework.context.annotation.Bean;
import org.springframework.context.annotation.Configuration;
@Configuration
public class RabbitMQConfiguration {
@Bean
Queue queueA() {
return new Queue("queue.A", false);
}
@Bean
Queue queueB() {
return new Queue("queue.B", false);
}
@Bean
DirectExchange exchange() {
return new DirectExchange("exchange.direct");
}
@Bean
Binding bindingA(Queue queueA, DirectExchange exchange) {
return BindingBuilder.bind(queueA).to(exchange).with("event_A");
}
@Bean
Binding bindingB(Queue queueB, DirectExchange exchange) {
return BindingBuilder.bind(queueB).to(exchange).with("event_B");
}
@Bean
ApplicationRunner runner(ConnectionFactory cf) {
return args -> cf.createConnection().close();
}
@Bean
MessageConverter messageConverter() {
return new Jackson2JsonMessageConverter();
}
@Bean
RabbitTemplate rabbitTemplate(ConnectionFactory connectionFactory) {
RabbitTemplate rabbitTemplate = new RabbitTemplate(connectionFactory);
rabbitTemplate.setMessageConverter(messageConverter());
return rabbitTemplate;
}
}
Code language: Java (java)Publishing Messages
Once RabbitTemplate is configured , it is very easy publish messages. We can use overloaded send/convertAndSend method from RabbitTemplate to publish messages.
Let’s develop a controller class which publishes messages.
package dev.fullstackcode.sb.rabbitmq.producer.controller;

import dev.fullstackcode.sb.rabbitmq.producer.model.Event;
import org.springframework.amqp.core.DirectExchange;
import org.springframework.amqp.rabbit.core.RabbitTemplate;
import org.springframework.beans.factory.annotation.Autowired;
import org.springframework.http.HttpStatus;
import org.springframework.web.bind.annotation.PostMapping;
import org.springframework.web.bind.annotation.RequestBody;
import org.springframework.web.bind.annotation.RequestMapping;
import org.springframework.web.bind.annotation.RestController;
import org.springframework.web.server.ResponseStatusException;

@RestController
@RequestMapping(value ="rabbitmq/event")
public class RabbitMQProducerController {

    @Autowired
    private RabbitTemplate rabbitTemplate;

    @Autowired
    private DirectExchange directExchange;


    @PostMapping
    public String  send(@RequestBody Event event){
        if( event.getName().equalsIgnoreCase("Event A")) {
            rabbitTemplate.convertAndSend(directExchange.getName(), "event_A", event);
        } else if (event.getName().equalsIgnoreCase("Event B")) {
            rabbitTemplate.convertAndSend(directExchange.getName(), "event_B", event);
        } else {
            throw new ResponseStatusException(HttpStatus.BAD_REQUEST,"unknown event");
        }
        return "message sent successfully";
    }

}
Code language: Java (java)
Configuring RabbitMQ connection
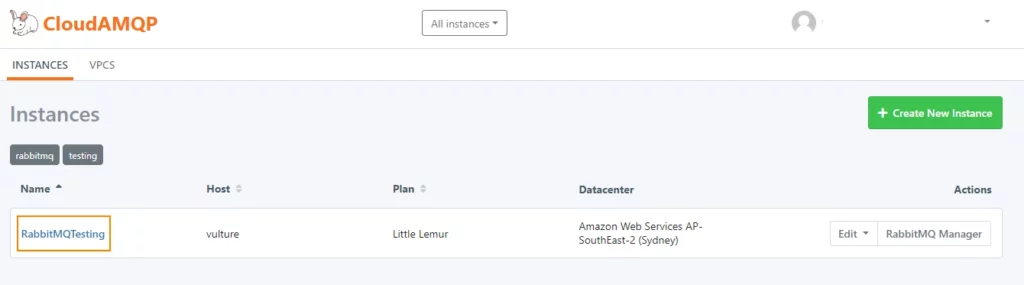
First login into CloudAMQP service and clicking on the cluster name , you can find out the cluster connection details which you can use to connect from your application.
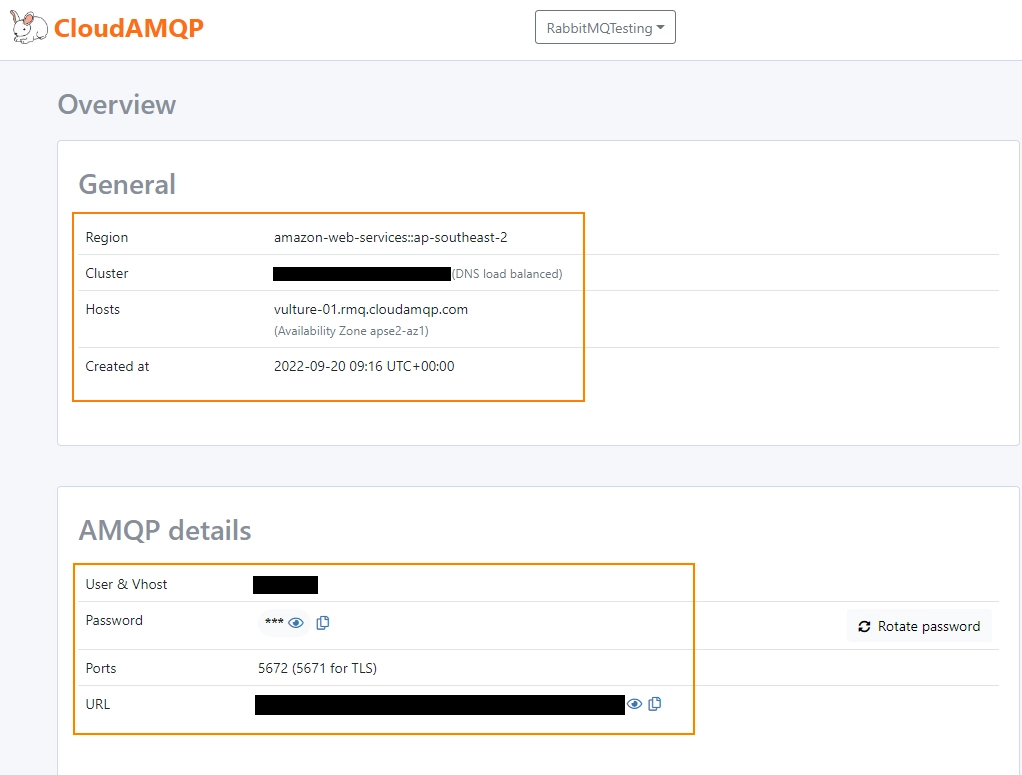
spring.rabbitmq.host=<host>
spring.rabbitmq.virtual-host=<virtual-host>
spring.rabbitmq.port=5672
spring.rabbitmq.username=<username>
spring.rabbitmq.password=<password>Code language: Java (java)
You can also configure connection details using single property
spring.rabbitmq.addresses=amqp://<username>:<password>@<host>/<virtual-host>
Code language: Java (java)
Starting Producer Application
Let’s start the springboot-rabbitmq-producer application and publish some messages.
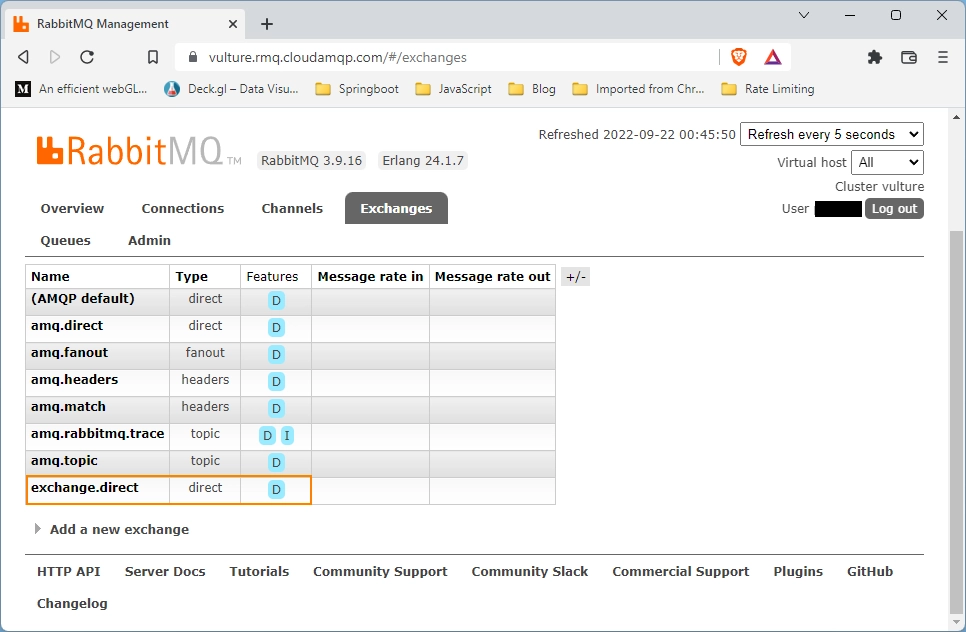
As we are connecting to RabbitMQ server on startup, it should create Direct Exchange and Queues and bindings in RabbitMQ instance.
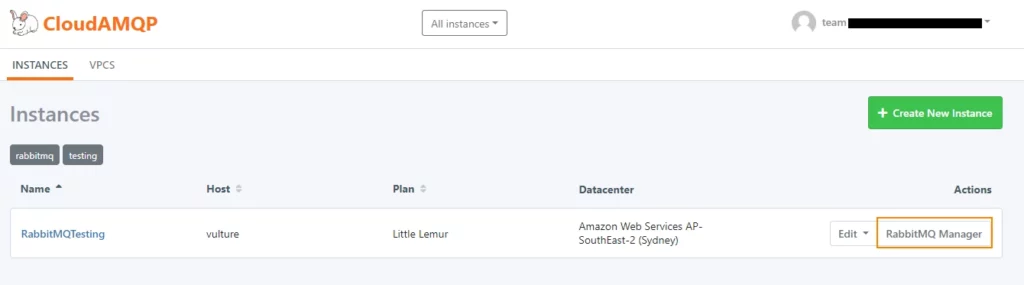
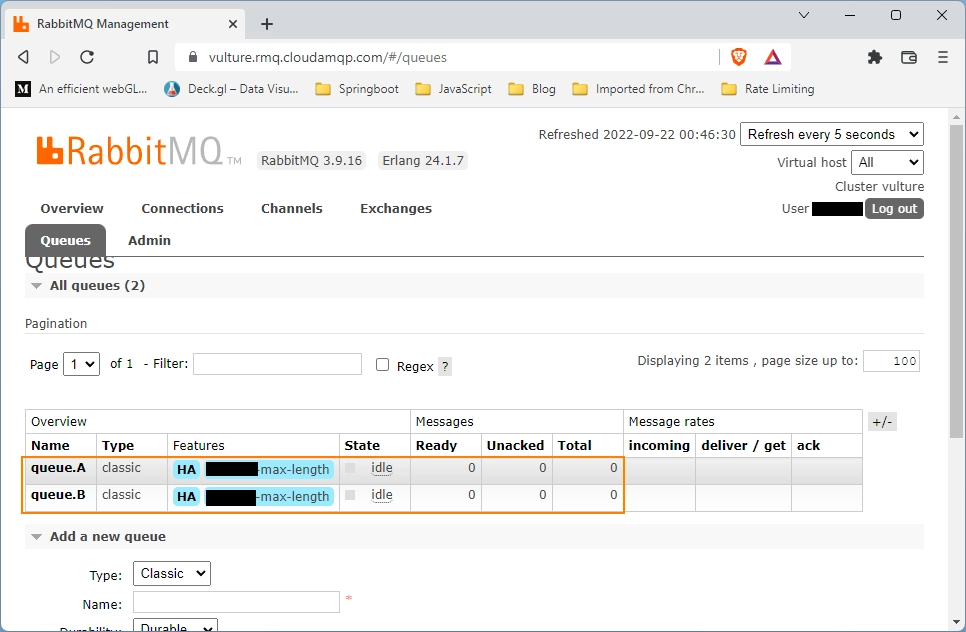
We can check this by going to management console of RabbitMQ cluster and clicking on the RabbitMQ Manager button.
From the management console, we can confirm that exchange and queues are created successfully.
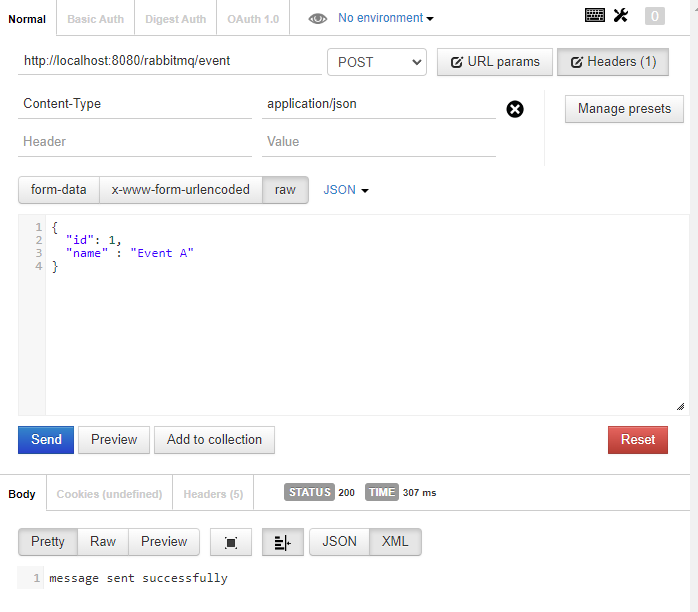
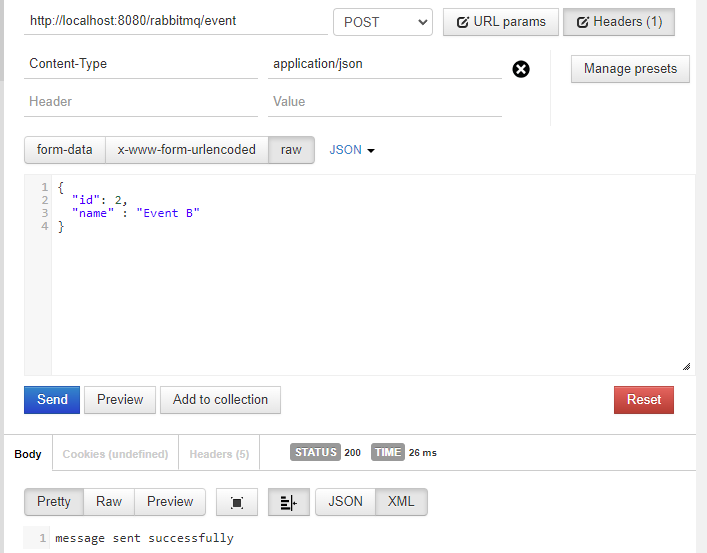
Publishing Messages
Let’s publish messages using rest client.
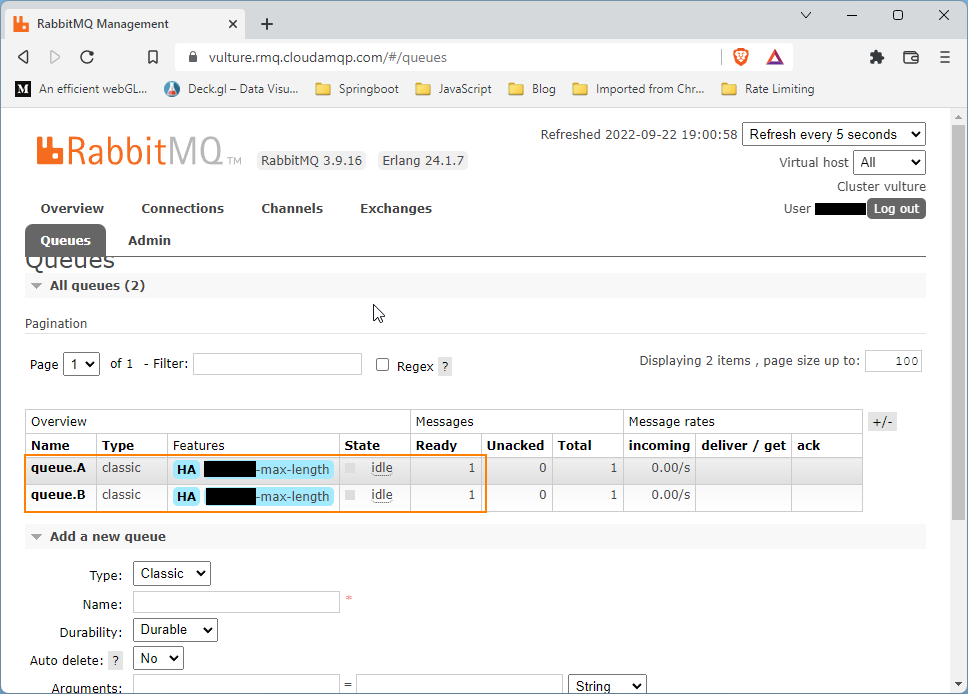
From the management console we can verify that messages reached successfully to the queues
Consumer Application
Now let’s develop a consumer application which consumes messages from RabbitMQ server.
First define MessageConverter to Convert Json String back to Object
package com.fullstackcode.sb.rabbitmq.consumer.config;


import org.springframework.amqp.support.converter.Jackson2JsonMessageConverter;
import org.springframework.amqp.support.converter.MessageConverter;
import org.springframework.context.annotation.Bean;
import org.springframework.context.annotation.Configuration;

@Configuration
public class RabbitMQConfiguration {

    @Bean
    MessageConverter messageConverter() {
        return new Jackson2JsonMessageConverter();
    }


}
Code language: Java (java)
Consumer Class
@Component
@Slf4j
public class RabbitMQConsummer {

    @Autowired
    private RabbitTemplate rabbitTemplate;

    @RabbitListener(queues = "queue.A")
    private void receiveQueueA(Event event) {
       log.info("Event received from queue A -> {}",event.toString());

    }


    @RabbitListener(queues = "queue.B")
    private void receiveQueueB(Event event) {
        log.info("Event received from queue B-> {}",event);
    }
}
Code language: Java (java)
Configuring RabbitMQ connection
In application.properties file we need to specify the connection details
spring.rabbitmq.host=<host>
spring.rabbitmq.virtual-host=<virtual-host>
spring.rabbitmq.port=5672
spring.rabbitmq.username=<username>
spring.rabbitmq.password=<password>Code language: Java (java)
You can also configure connection details using single property
spring.rabbitmq.addresses=amqp://<username>:<password>@<host>/<virtual-host>Code language: Java (java)If we start the consumer application, we can see the following output
INFO : Event received from queue A -> Event(id=1, name=Event A)
INFO : Event received from queue B-> Event(id=2, name=Event B)Code language: Java (java)
You can download source code for the blog post from GitHub
Producer application here
Consumer application here