CloudKarafka – Free Managed Kafka Cluster For Developers in the Cloud
In this blog post I will explain how to create free managed Kafka cluster using CloudKarafka cloud service which can be used for testing Kafka based application.
In one of my previous tutorial I covered how to create free managed Kafka cluster in the cloud using confluent cloud platform. The confluent cloud platform free Kafka cluster can be used only up to 60 days.
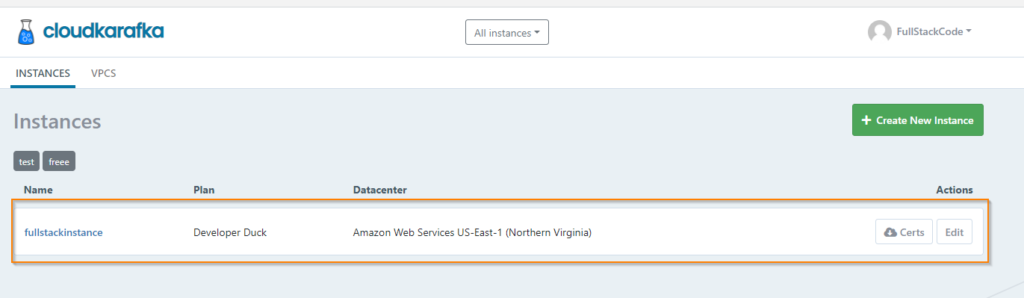
CloudKarafka provides Developer Duck plan which can be used to create lifetime free managed Kafka cluster. While there are limited resources available in the free plan, it will be enough for developing and testing Kafka related applications. CloudKarafka also provides paid plans if your company plans to use managed Kafka messaging service.
In below image you can see the resources available for free Kafka cluster.
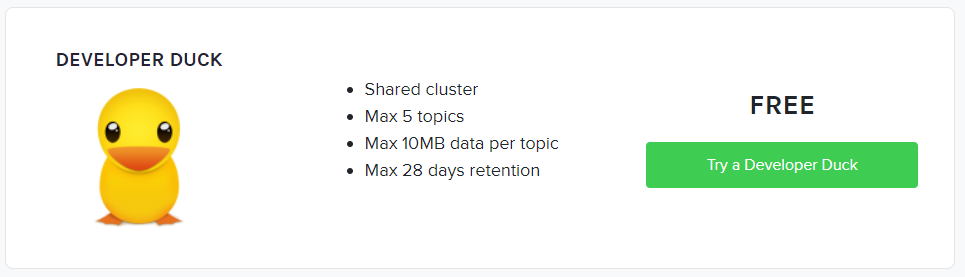
Free Kafka in Cloud
Registering Account
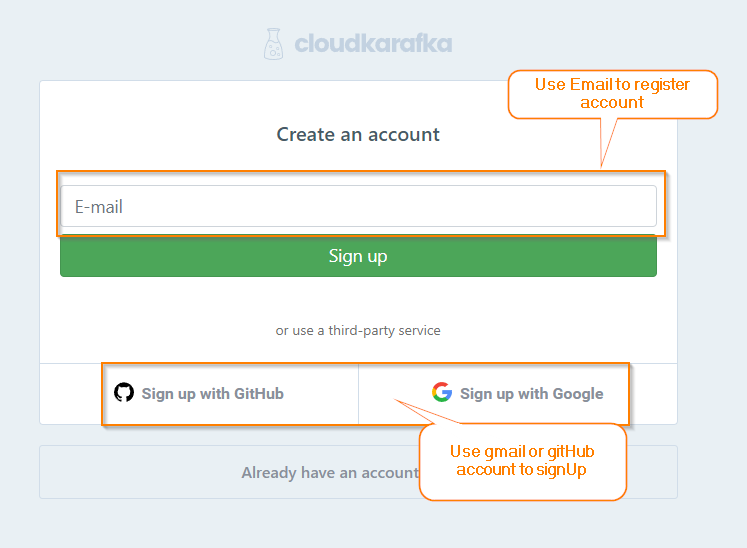
For creating free Kafka cluster first we need to create account with CloudKarfka website. You need to have Email or Gmail or GitHub account.
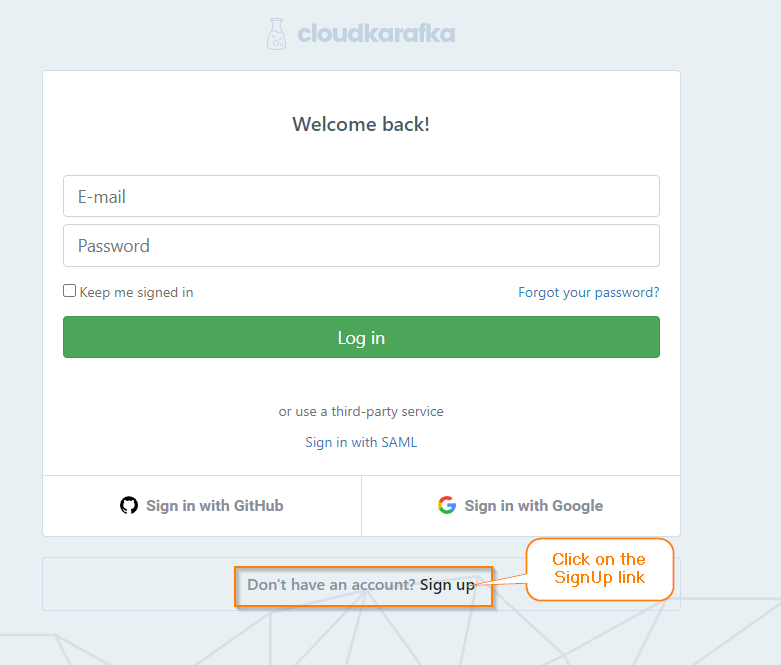
Step 1) First go to https://www.cloudkarafka.com/ website and click on the Login button on the right corner.
Step2) On the next screen click on the SignUp link
Step3) Next you will be presented with SignUp screen, Use your Email or Gmail Account or GitHub account to SignUp.
Step4) Once you create a account, you SignIn into the your account.
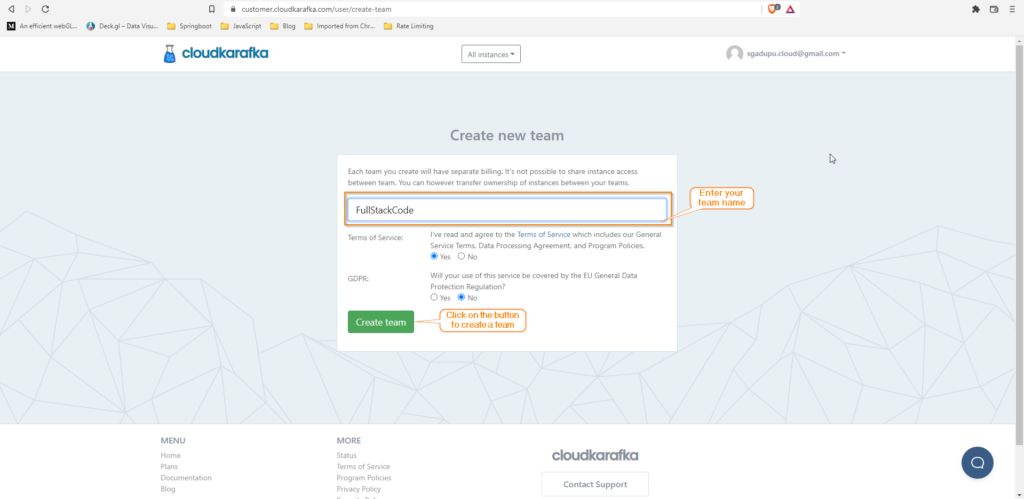
Step5) Once you SignIn into your account, You will get following screen to create your team.
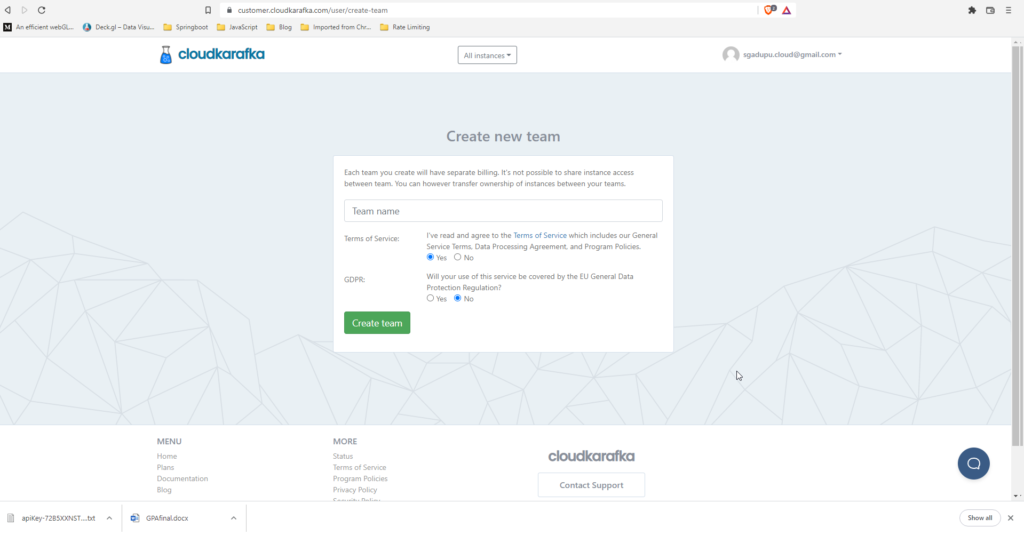
Step6) Enter your team name , accept the terms and click on the Create Team button
Creating Kafka Cluster
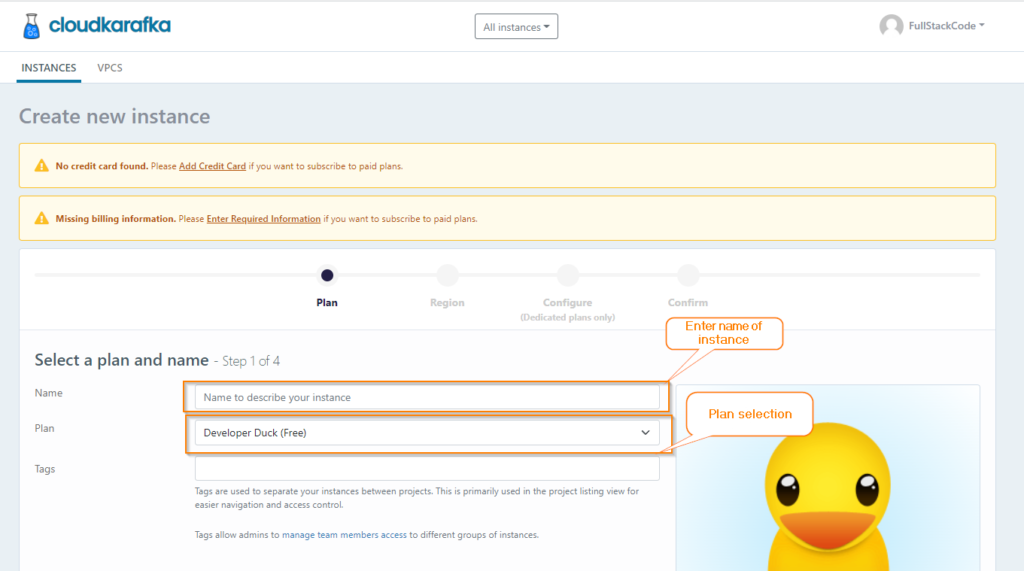
Step7) After creating your team, you can the create Kafka cluster instance by clicking on the Create new Instance button.

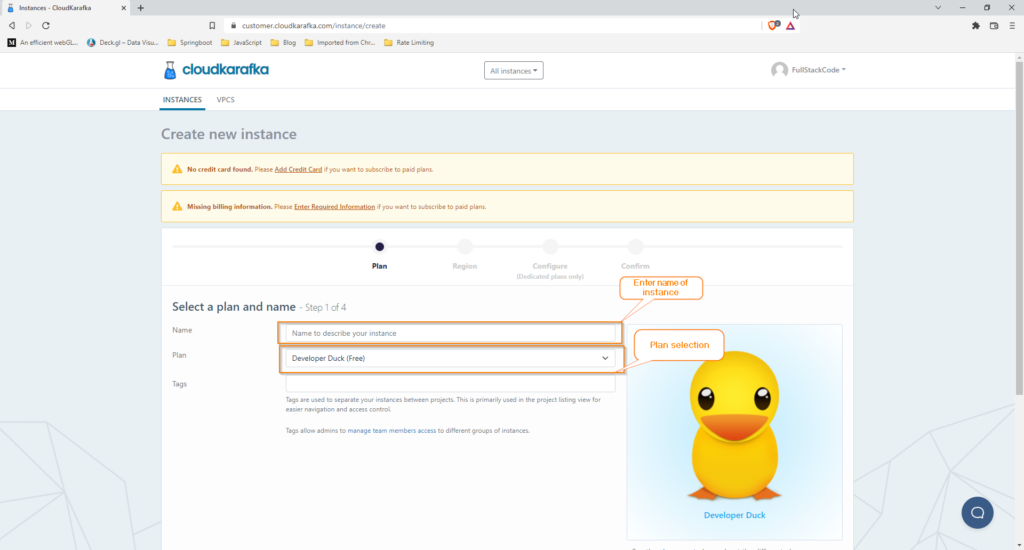
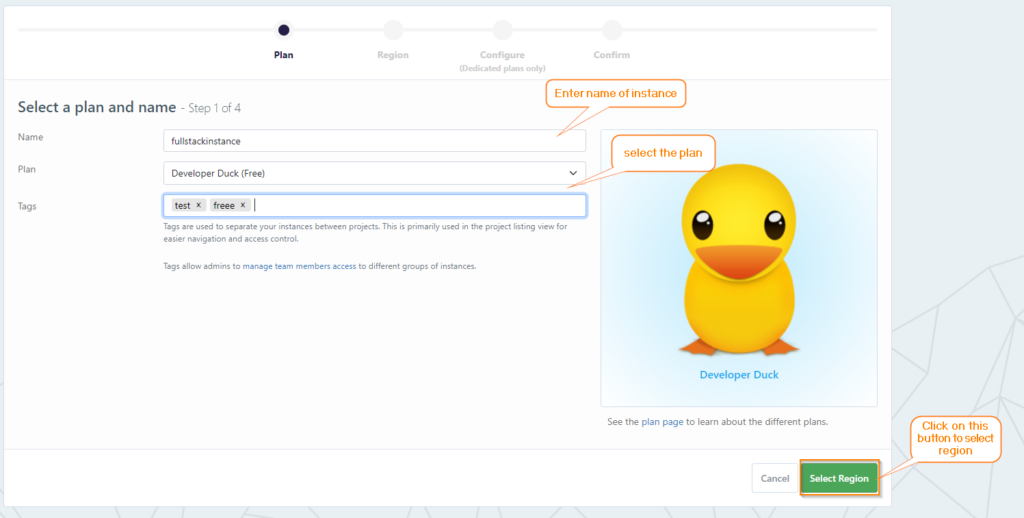
Step8) Next enter the Kafka cluster Name and select the plan ( in our case it will be Developer Duck )
Step 9) Next click on the Select Region button to select the region where you want to create the cluster.
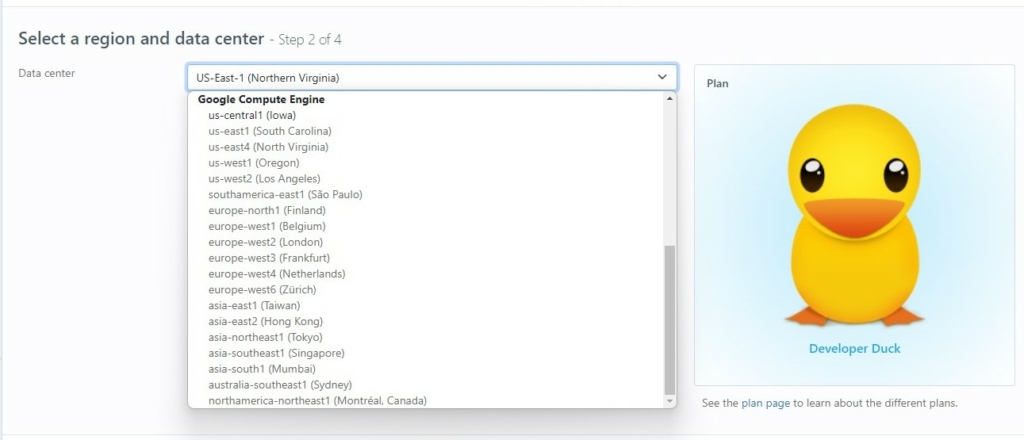
Step 10) On the next screen you can select the region from AWS or Google Cloud.Select the region which is closer to your location to minimize the latency. Once you select the region click on the Review button on the bottom right corner.

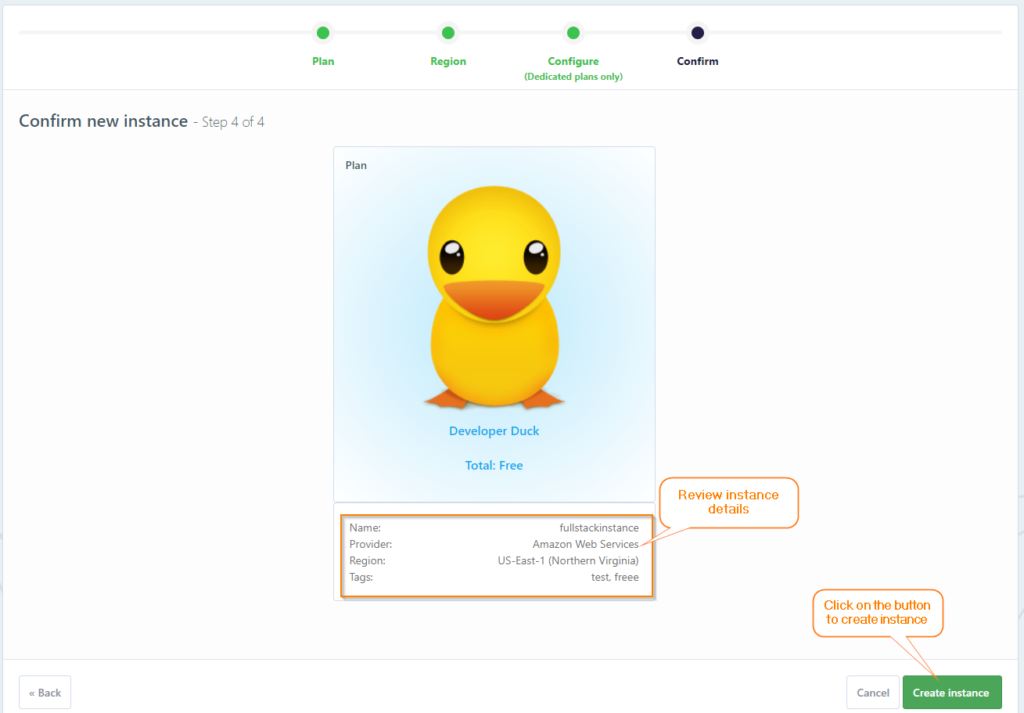
Step 11) On next screen , review the instance details and click on the Create Instance button. Kafka cluster will be created for you.
Create Topics
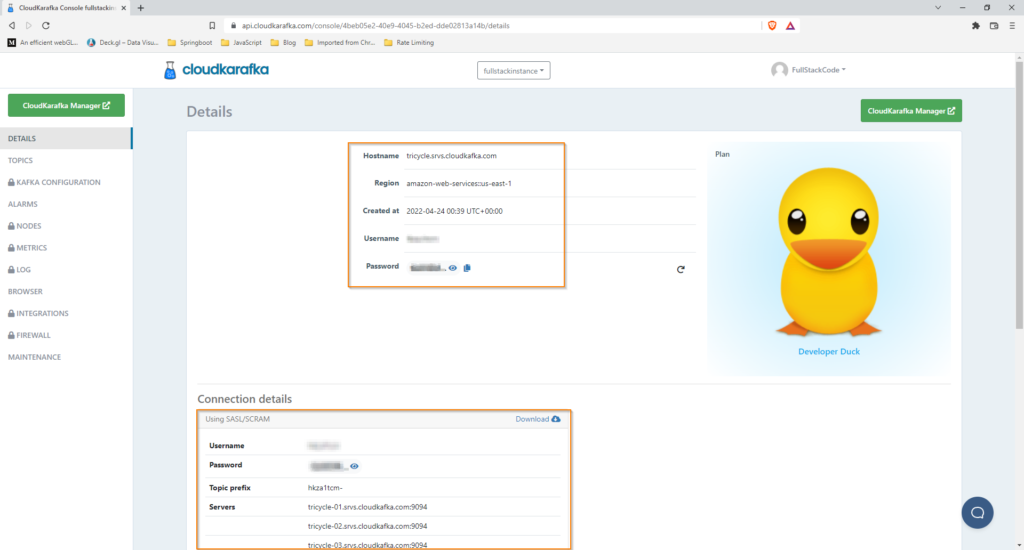
Step 12) Once you create the cluster instance, click on the instance to access the Kafka manager screen.In this screen you can see the confuguration details which will be used in the application connecting this cluster
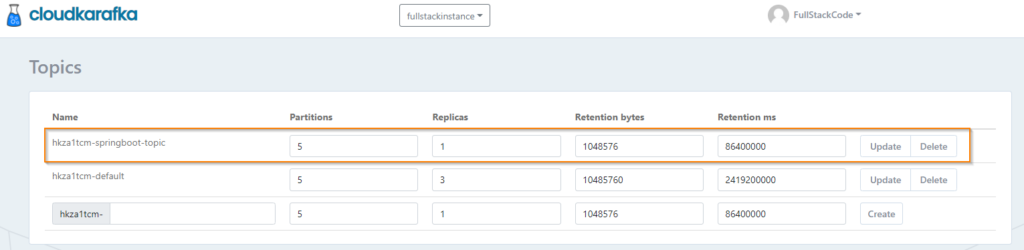
Step 13) Now click TOPICS menu on the left corner to manage topics

Step 14) Next you can create/delete topics. Cluster comes with default topic. You can create your own topics here.


Next we can write producer application which sends messages to topics and consumer application which reads messages from topics. I will cover producer and consumer applications using free CloudKarfka Kafka service in next blog post.